Gibson LG0 Rebracing March, 2003 by Ronnie Nichols
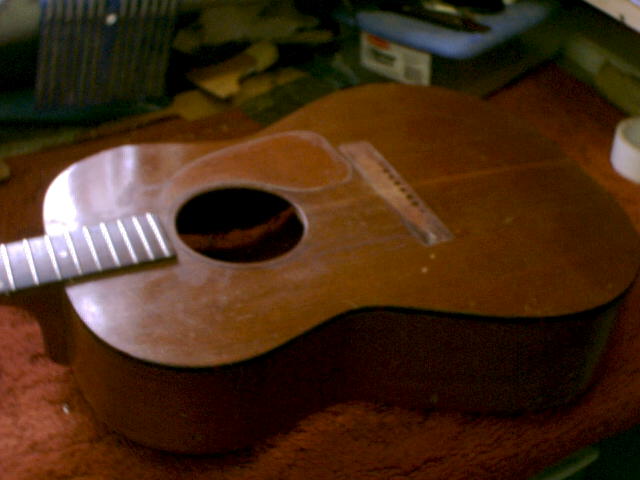
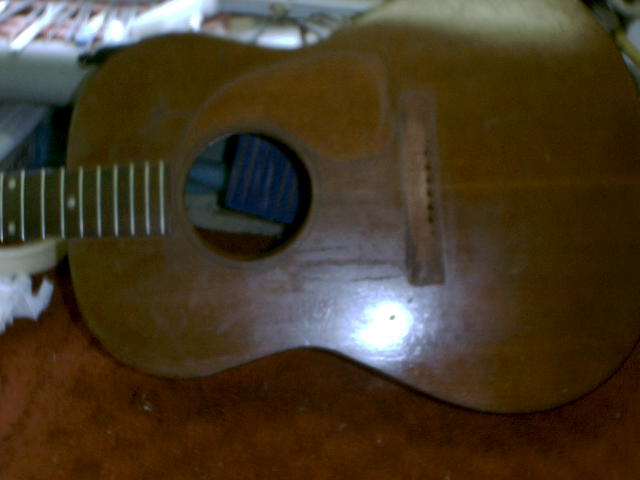
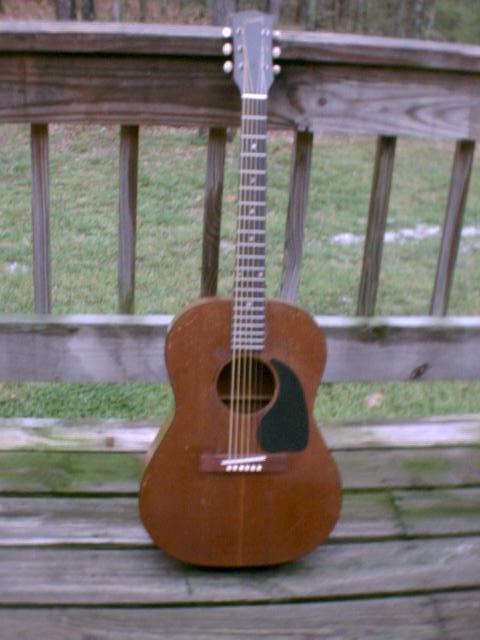
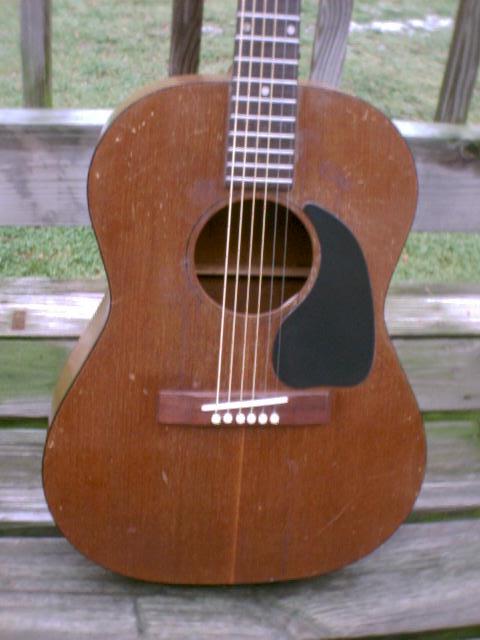
Here’s the patient. The owner says Gibson identified this as a 1949 model, but I’ve since learned that the LG-0 wasn’t made until 1958. I’d assume this one was made around the 1960’s. It’s a nice little guitar with solid mahogany body and neck. It just doesn’t have the sound that we like to hear. This first picture shows it with the bridge and pickguard already removed. The guitar played great but just didn’t have much punch.
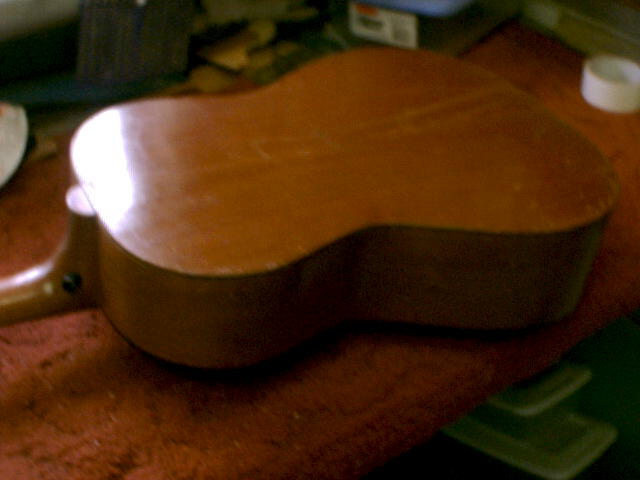
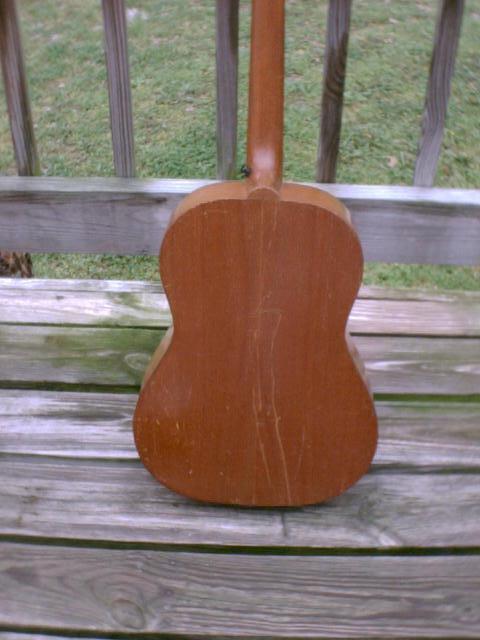
You can tell this guitar has been around a while. There is evidence of some previous repairs to the back.
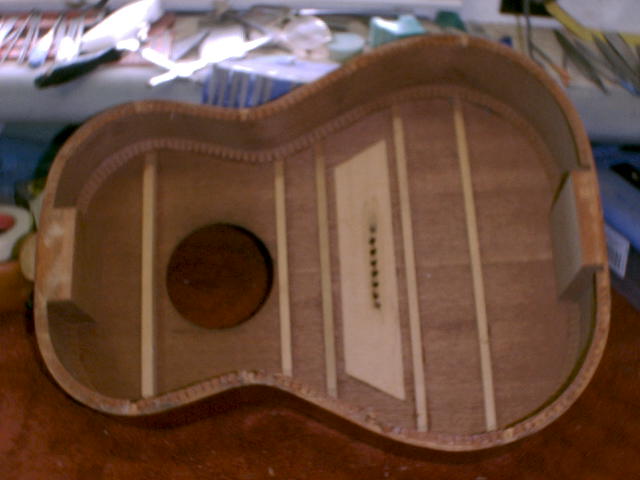
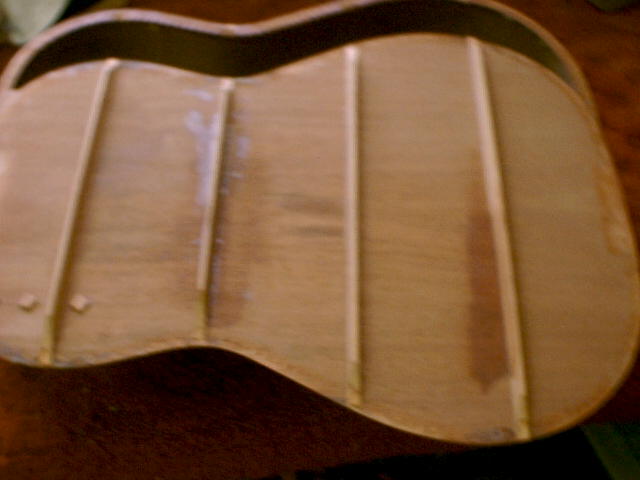
Here is a shot of the original braces and bridge plate. This was the common bracing in those days for this style guitar. This style bracing was used in Gibson, Kay, Harmony, and a lot of guitars. These guitars all had pretty similar bracing. We feel that these guitars are braced too heavily for a good, rich sound that bluegrass musicians prefer. The top is also about .130 inch thick. We like to see the top at about .100 inch.
So, we removed the old ladder braces and spruce bridge plate. We also thinned the top from the inside to approximately .100 to .110 inch. We left the old brace that was in front of the soundhole.
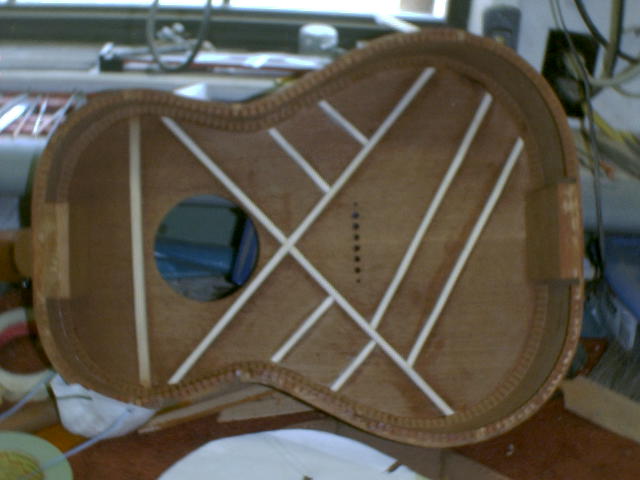
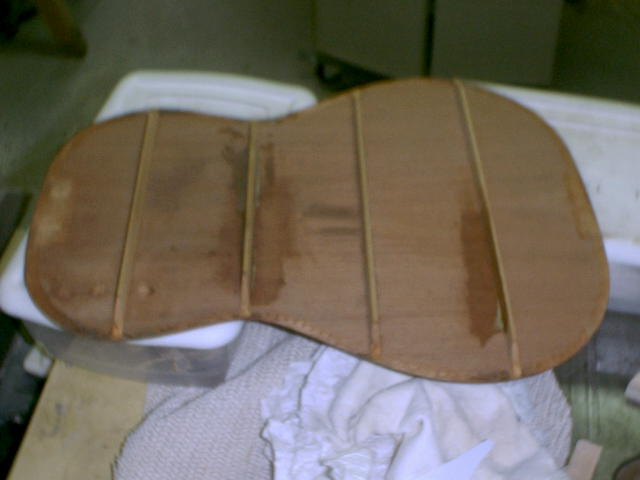
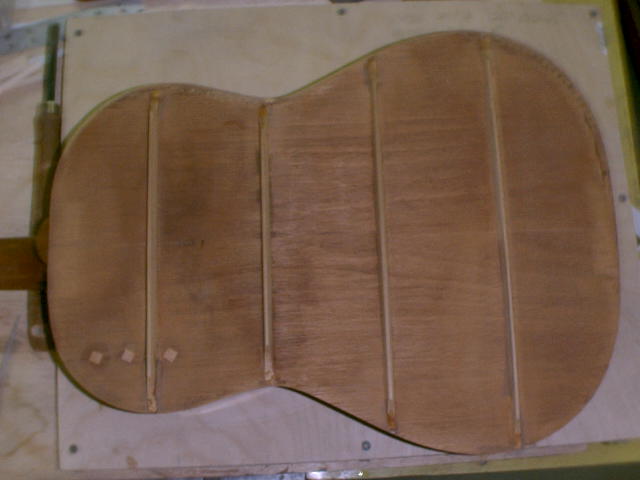
We used some red spruce for some Martin style braces. This guitar now thinks it is a Martin since it is braced like a HD-35 Martin. We like the sound of the narrower braces like a D-35 has. All braces are approximately ¼ inch wide. They are scalloped as detailed on Martin’s blueprint. The braces are shifted forward so that the bridge contacts the x brace at the right spot. This makes the braces show at the rear of the soundhole, but we feel it helps the tone.
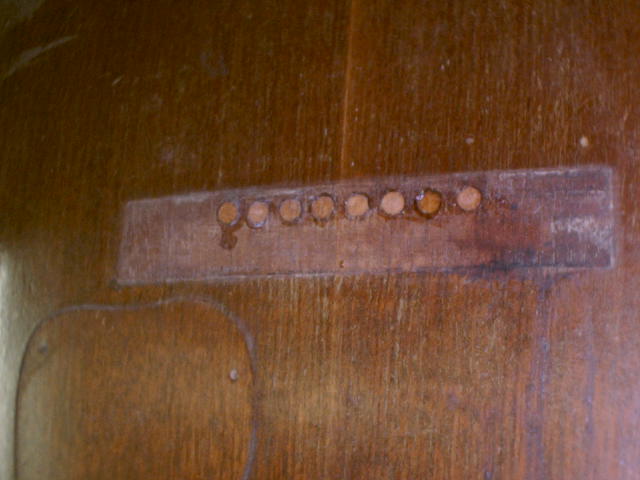
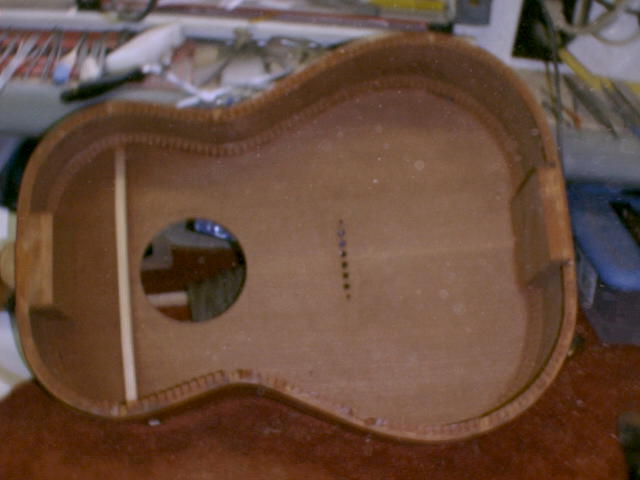
The bridge pin holes in the top were over size so we made some mahogany plugs to fill them. This will insure that our new set up will have a strong bridge. There is a lot of stress on this area of the guitar. We made a maple bridge plate which is also .100 inch thick. It is shaped similar to a small size Martin bridge plate. We also added some thin braces around the sound hole.

Here is the bridge plate being installed. The guitar was bellied up pretty badly around and behind the bridge prior to our repairs. The new bridge plate and bridge should help flatten the top to the desired contour.

Here are the completed braces and bridge plate. This should dramatically change the sound of this guitar.
Here is the back after some cleanup and smoothing. We left the original cleats in it because this is a proper repair for that crack.
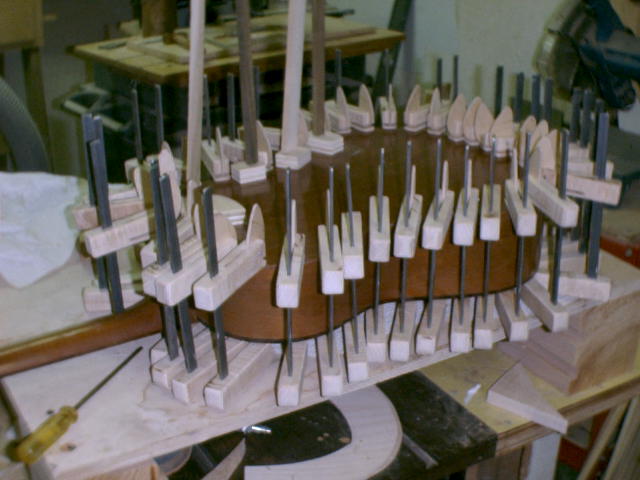
The back is now clamped back onto the body.
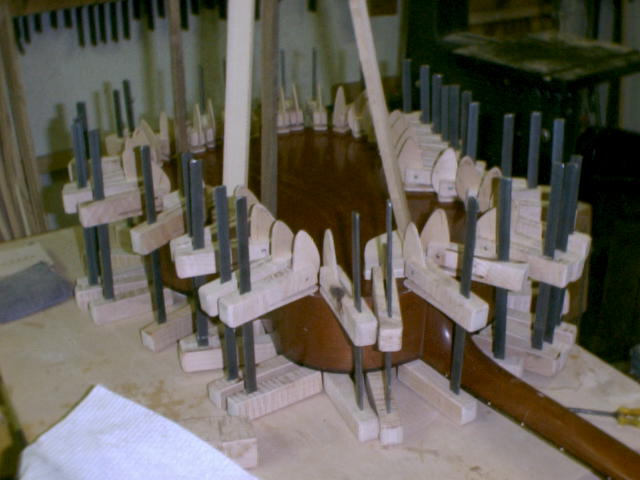
Another shot of the clamps.
Here is the guitar after we finished. We made a rosewood bridge that closely resembles the original. We did make it a little wider than the original because these bridges tend to split apart because the bridge pins are so close to the back.
The new bridge is about 1/8 inch wider than the original. We also made a pickguard that is of thinner material than the original one. Our bridge is glued on without any screws. The screws don’t add anything to the sound in my opinion.
Since this guitar did not have binding on the back of the body, we were able to reattach the back and make it look pretty near like it did previously. We attempted to keep it looking pretty much like it was original, although anyone who knows guitars would only have to brush across the strings to tell it wasn’t like all the rest of them. We hope this guitar will give somebody a lot of years of enjoyment.
![]()
Nice work! I have an old LG-0 I’d like to do the same thing to. What was the best method for removing the back? Did you use heat or a saw?
Thanks
Jim: I prefer to use heat. There are several ways to do it and none is right or wrong. It is a matter of preference. I like to use several thin putty knives and heat them up and switch every few seconds when they start to cool down. I made a little bracket that I attached to a clothes iron. I can just slide the putty knives in the iron and quickly change them out. If there is a trick to it, it is to take your time and go slow.Good luck with your project!! Ronnie
I’ve got a ’67 LG0 that had a bridge doctor added to it before I got it that I will be rebracing to an xbrace arrangement. How would you qualify the sound after the rebracing?
I think the sound was greatly improved over the ladder bracing. Of course changing the bridge plate makes a difference too. It is a challenge to do but I’ve learned to re-brace these guitars through the sound hole without removing the top or back. That saves a lot of time and destruction. It can be done, though. Ronnie Nichols
Hi, I don’t know how you could manage to re-brace a guitar through the soundhole. Makes me think of those ships in bottles sailors used to make…
It takes some patience, some practice, and a little bit of luck and skill. Re-bracing through the sound hole can save a lot of extra work, though. I used to remove the back or top and this brings on a lot of work in itself. Thanks for visiting my website!! Ronnie Nichols
I really appreciate you posting this!
I have a 1963 Epiphone Caballero (same body as LG0) that I plan on doing the X-Brace conversion to. I already have the back off and the original top braces off. Do you have an email I could ask you a few more questions? This is my first one and I just want to make sure I’m on the right track! Thank you so much for your time 🙂
-Brian
I sent you an email with my email address. Thanks, Ronnie
Hey there I’m told by Gibson that the LG0 model wasn’t produced until 1958. I have one that is supposed to be a 1049. Confused
They told you right. I was going by what the guitar owner told me. Gruhn’s book verifys that these guitars weren’t made until 1958. I’ll change the information on my website.
1949 not 1049 it has a 5 digit serial number