I saw this guitar listed for sale on Ebay and it caught my eye. These guitars were made by the Kay Company and I have remodeled some of these old Kay and Harmony Guitars in the past. The end result was usually that the sound was greatly improved. I made an offer on the guitar and they declined it. I already have more guitars than I need so I just let it pass.
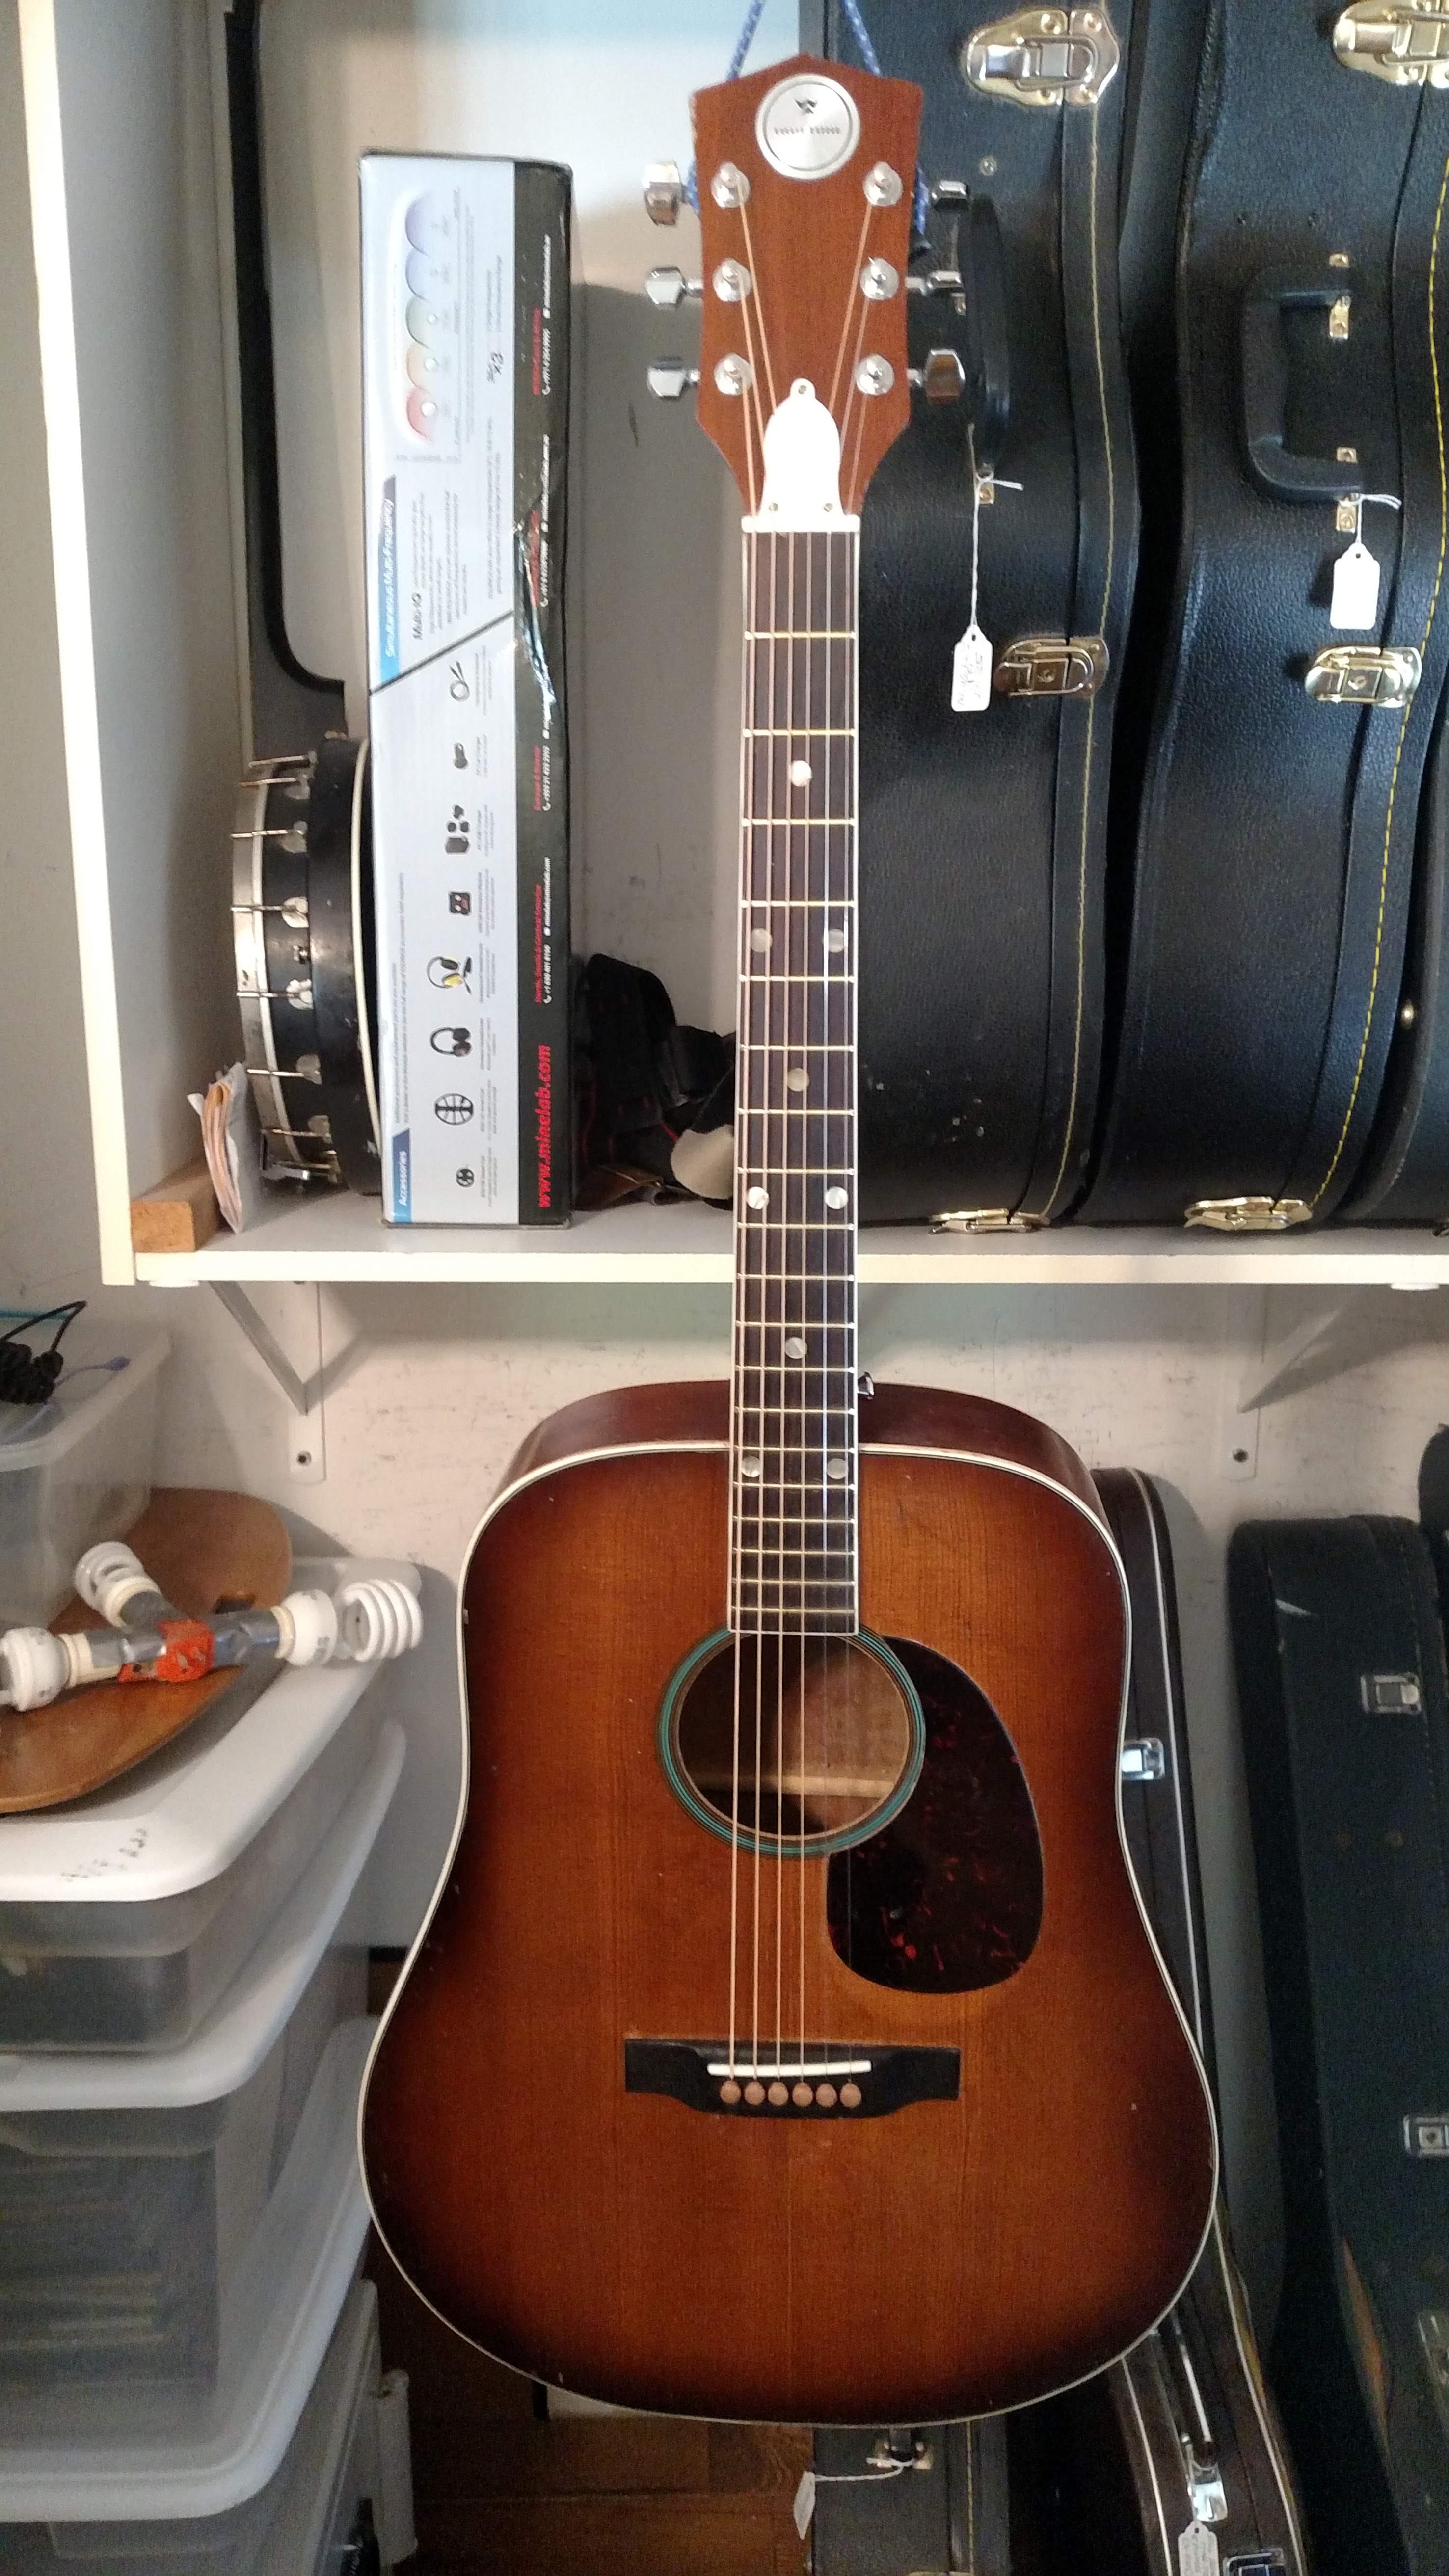
A few weeks later this same guitar popped up on Ebay for less than my original offer. I wasn’t looking for it. I just happened to run across it. I liked several things about this guitar and debated whether to make another offer on it. I liked the color of it and the size. I’ve had some of these shaped guitars in the past. I think they called this body shape a “western” style. The waist is not as narrow as a regular Dreadnought. I also liked the fact that it was x braced and not ladder braced like so many of those old Kays and Harmonys were.
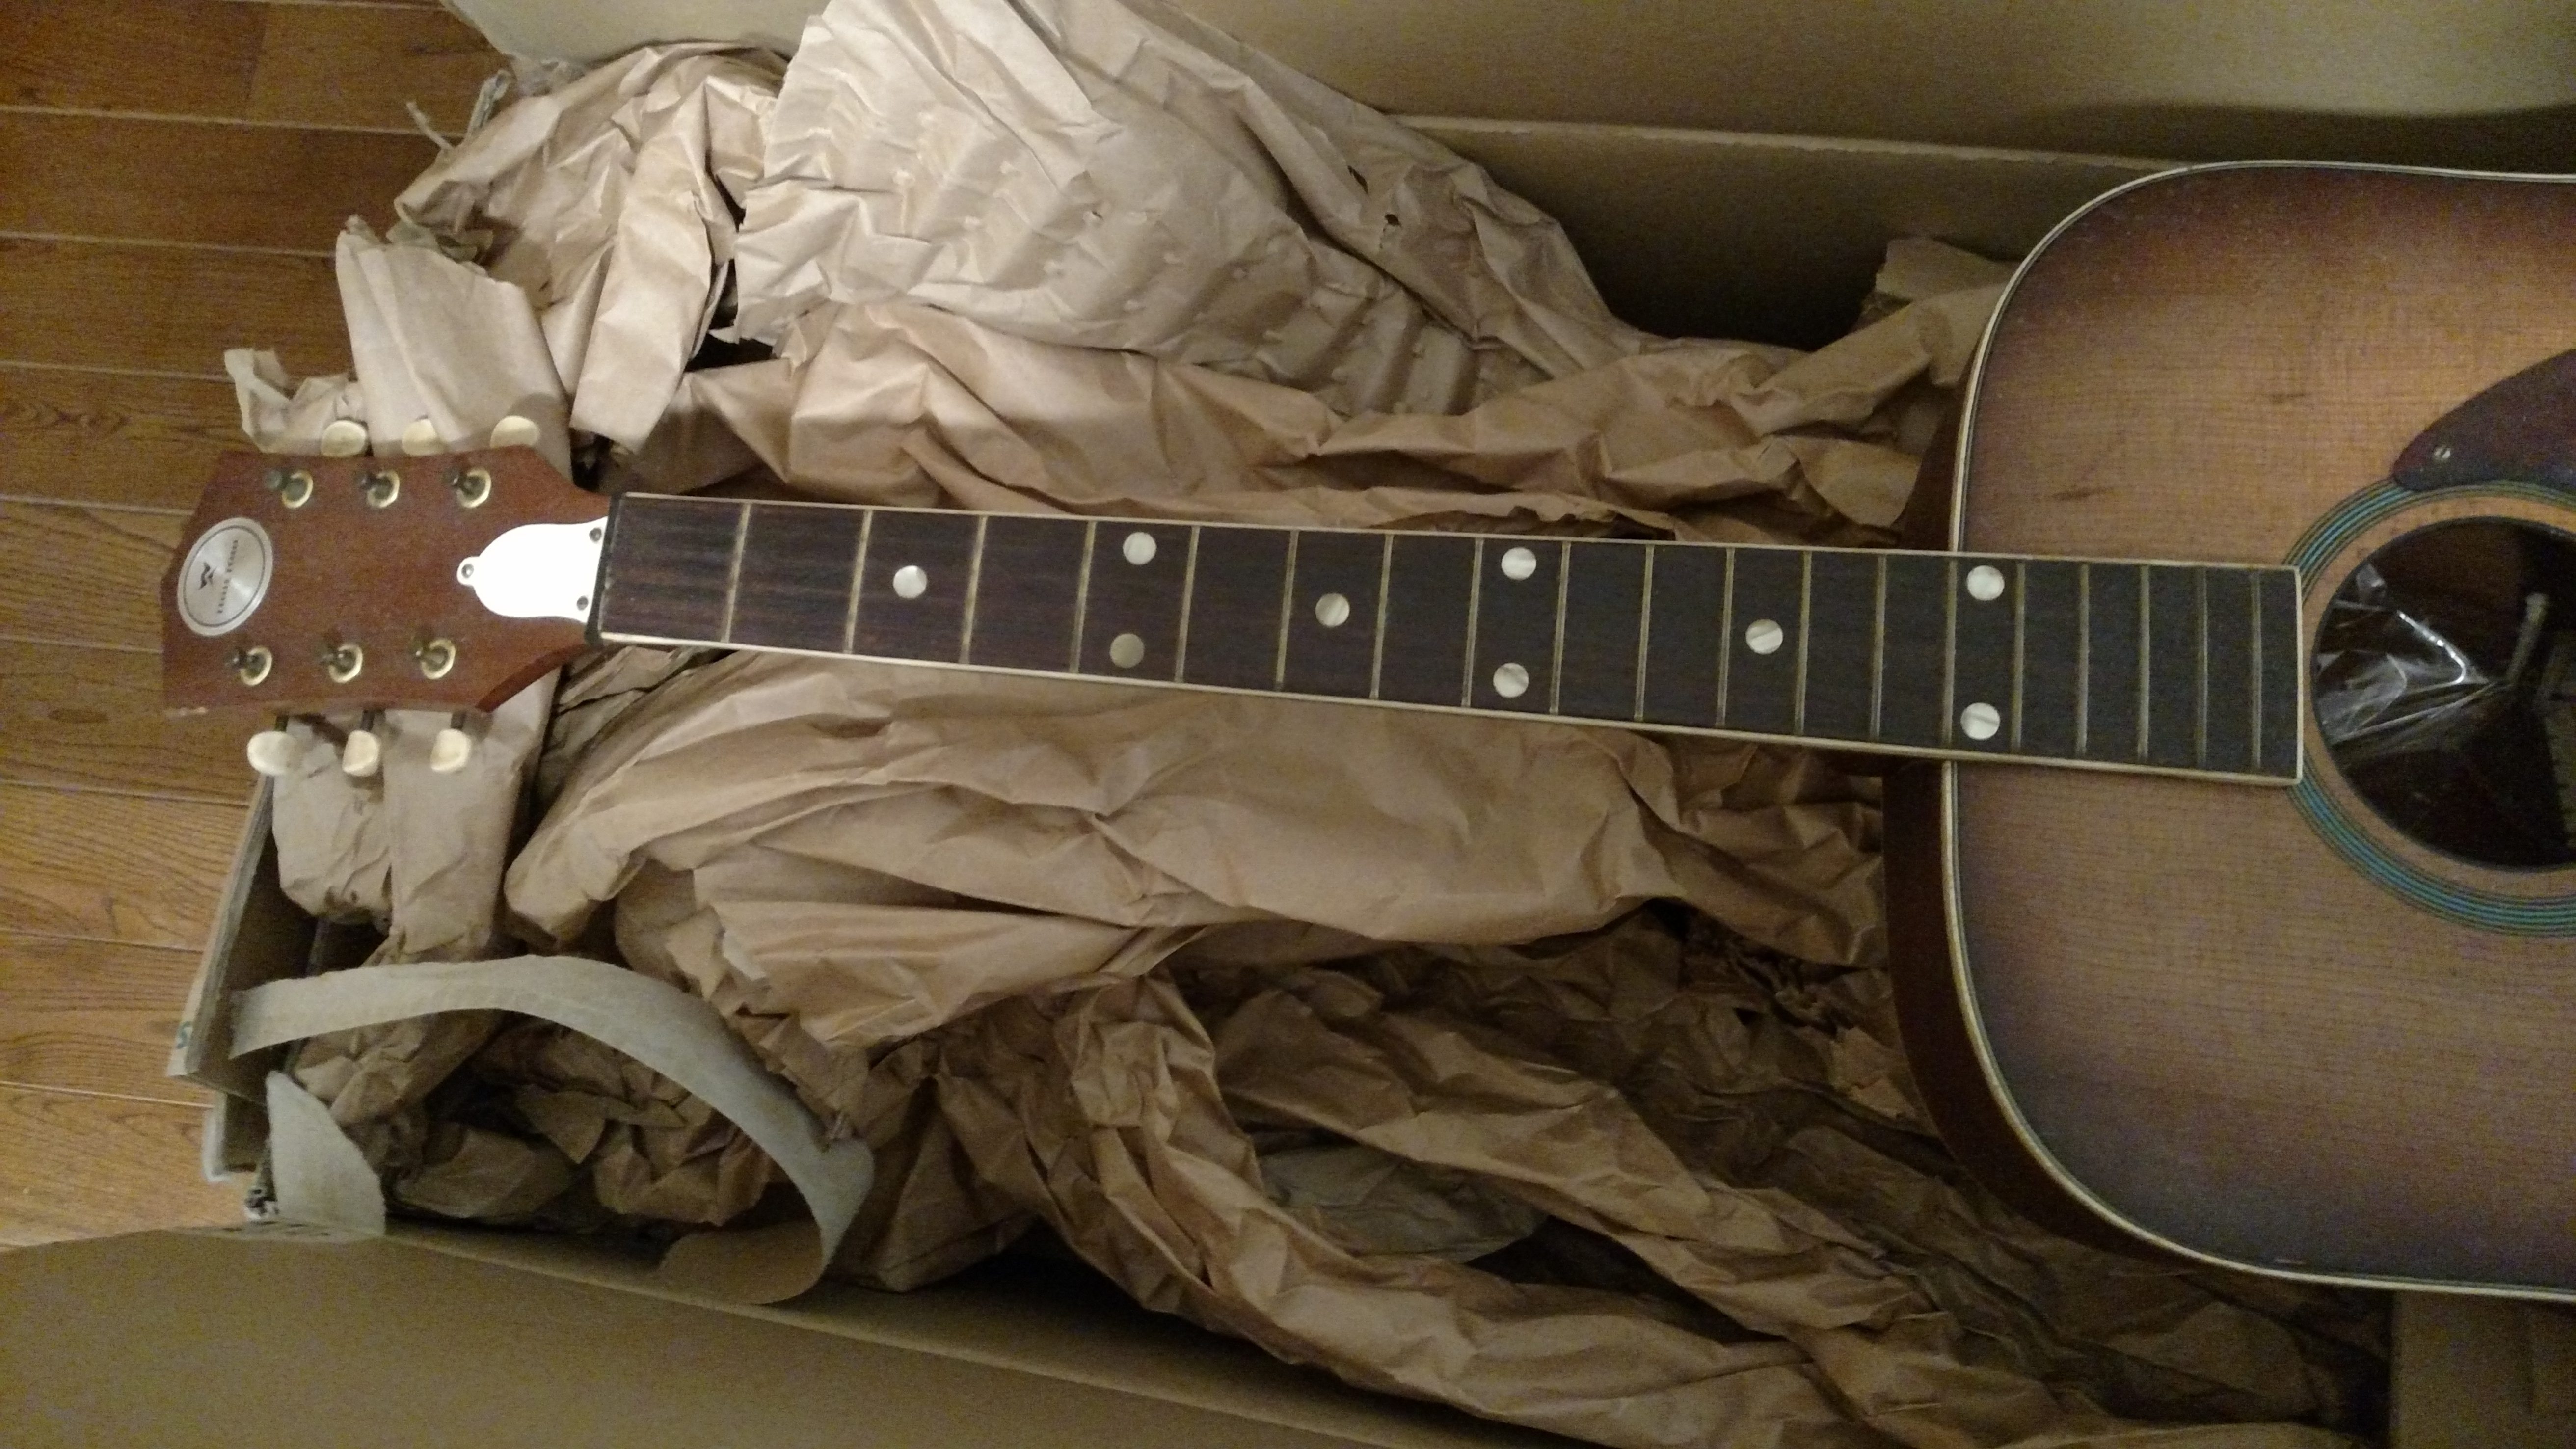
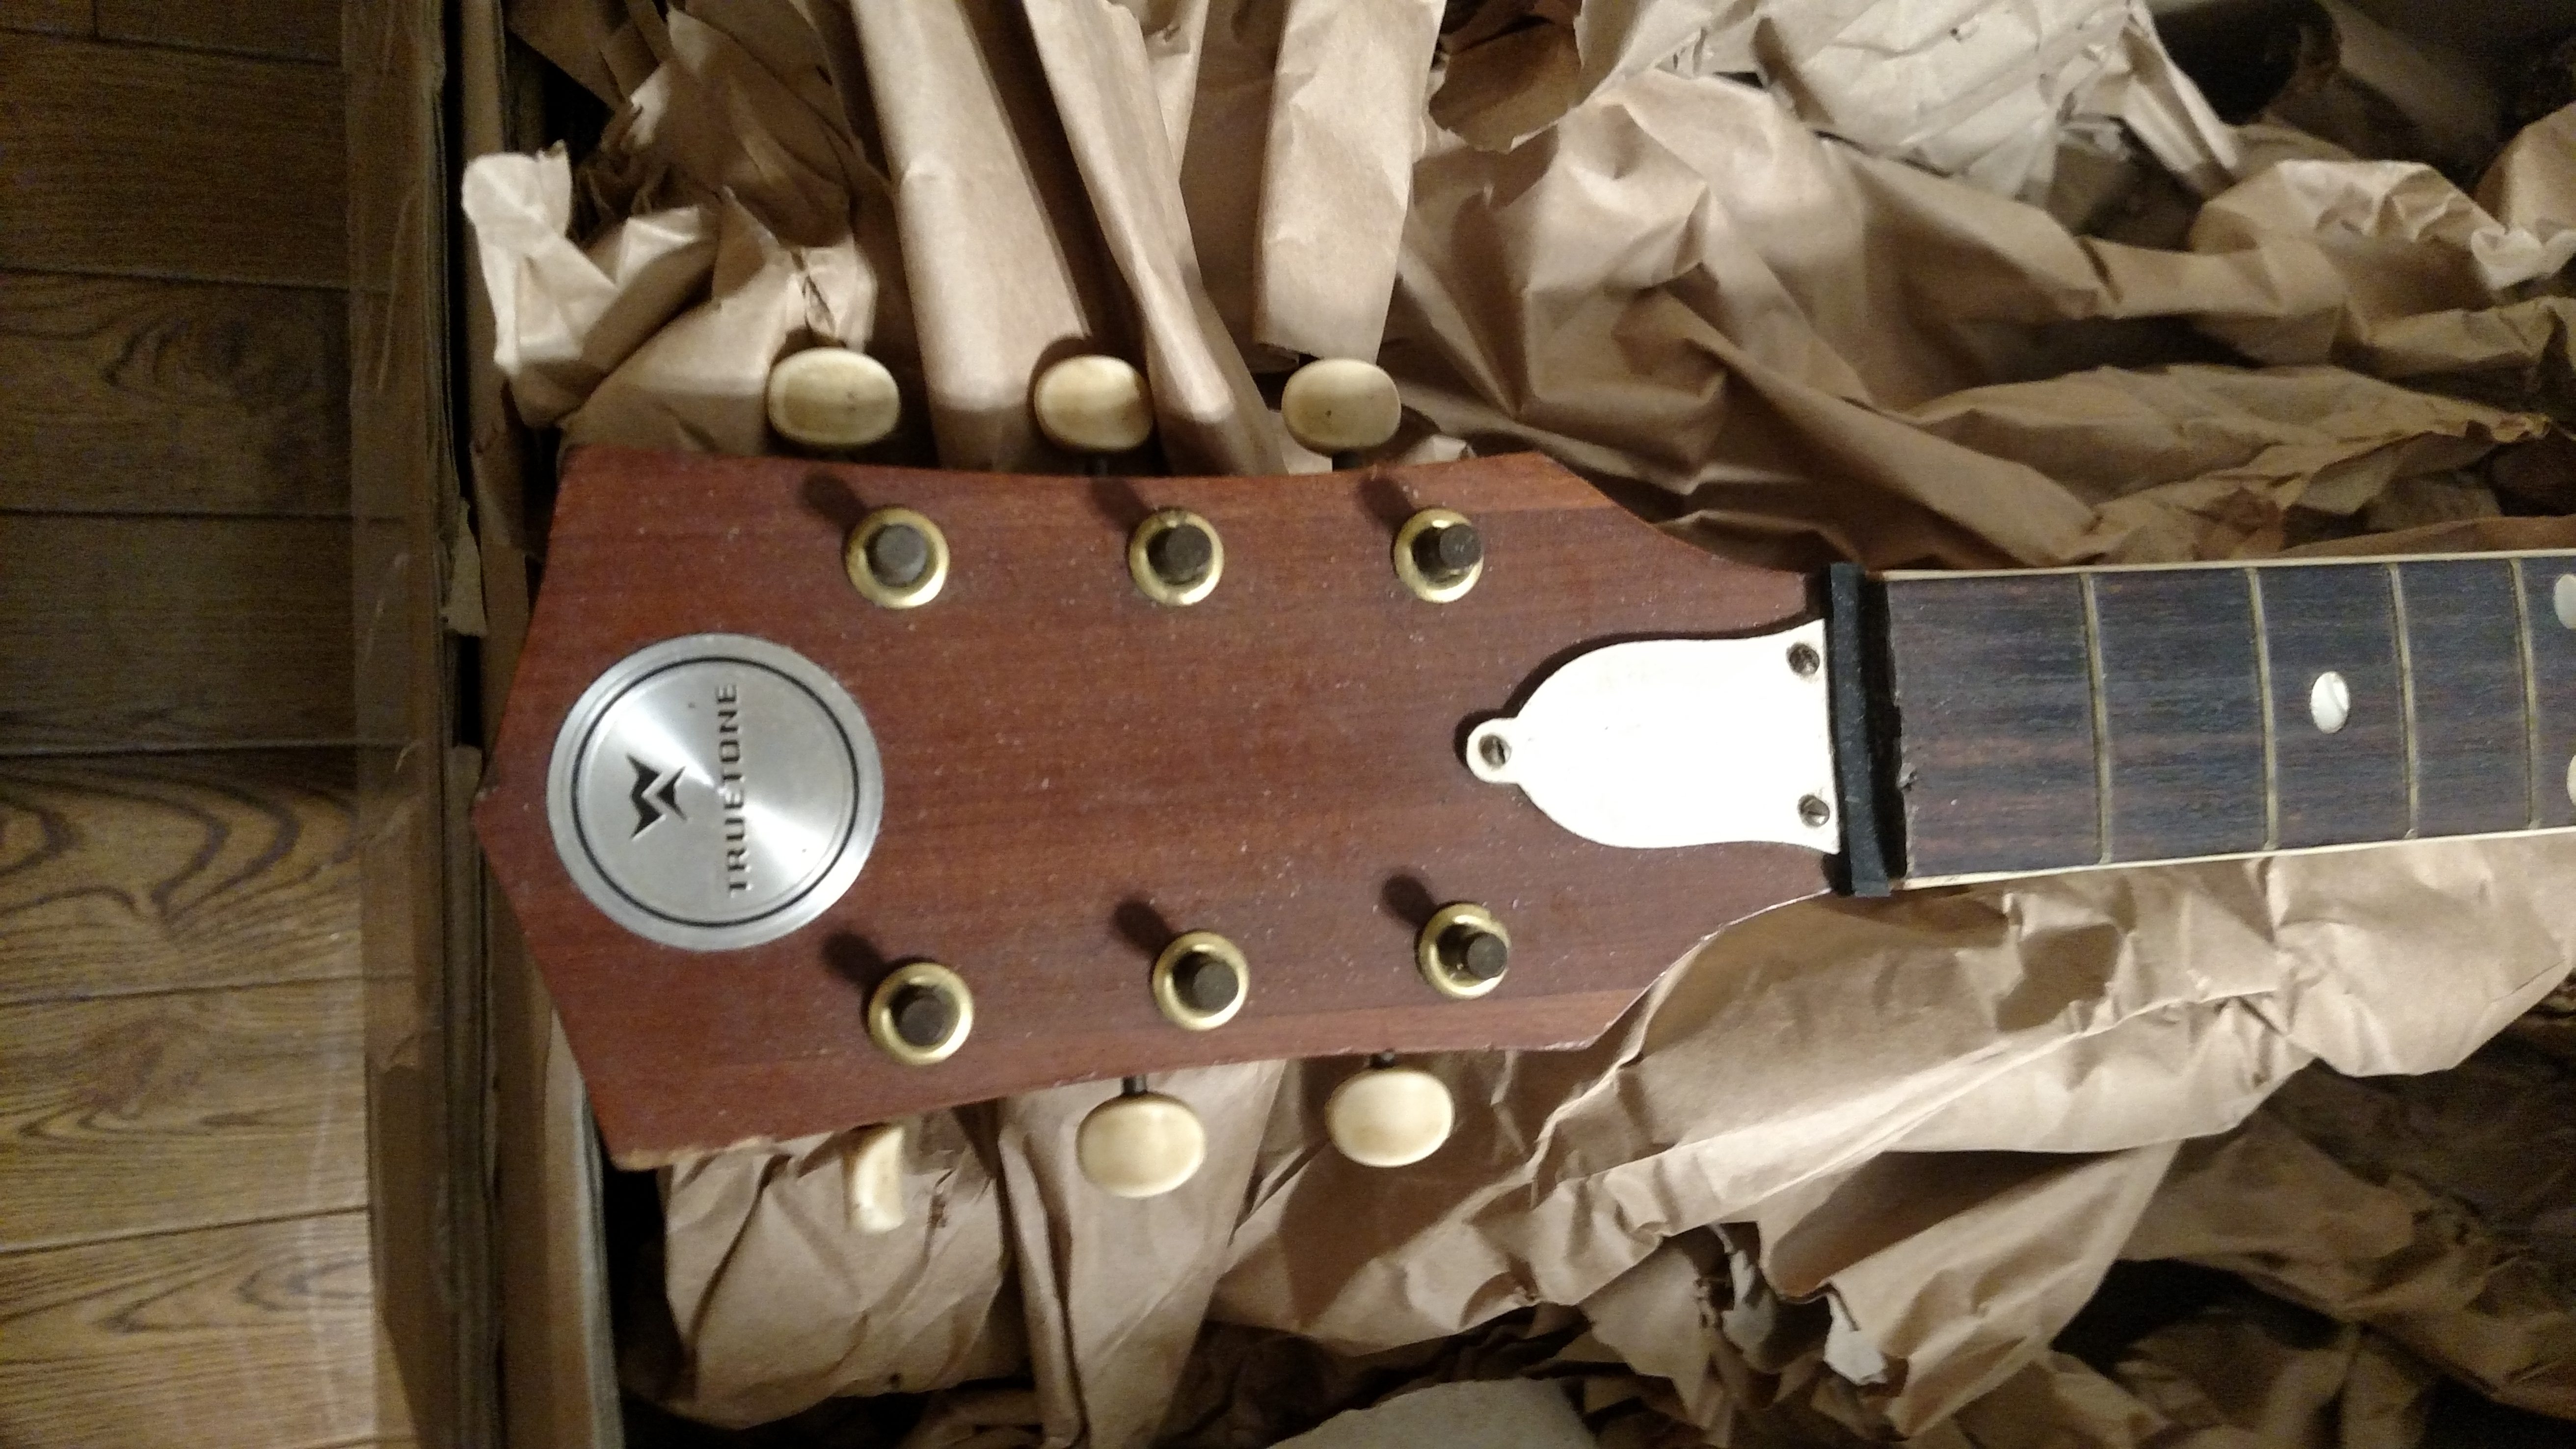
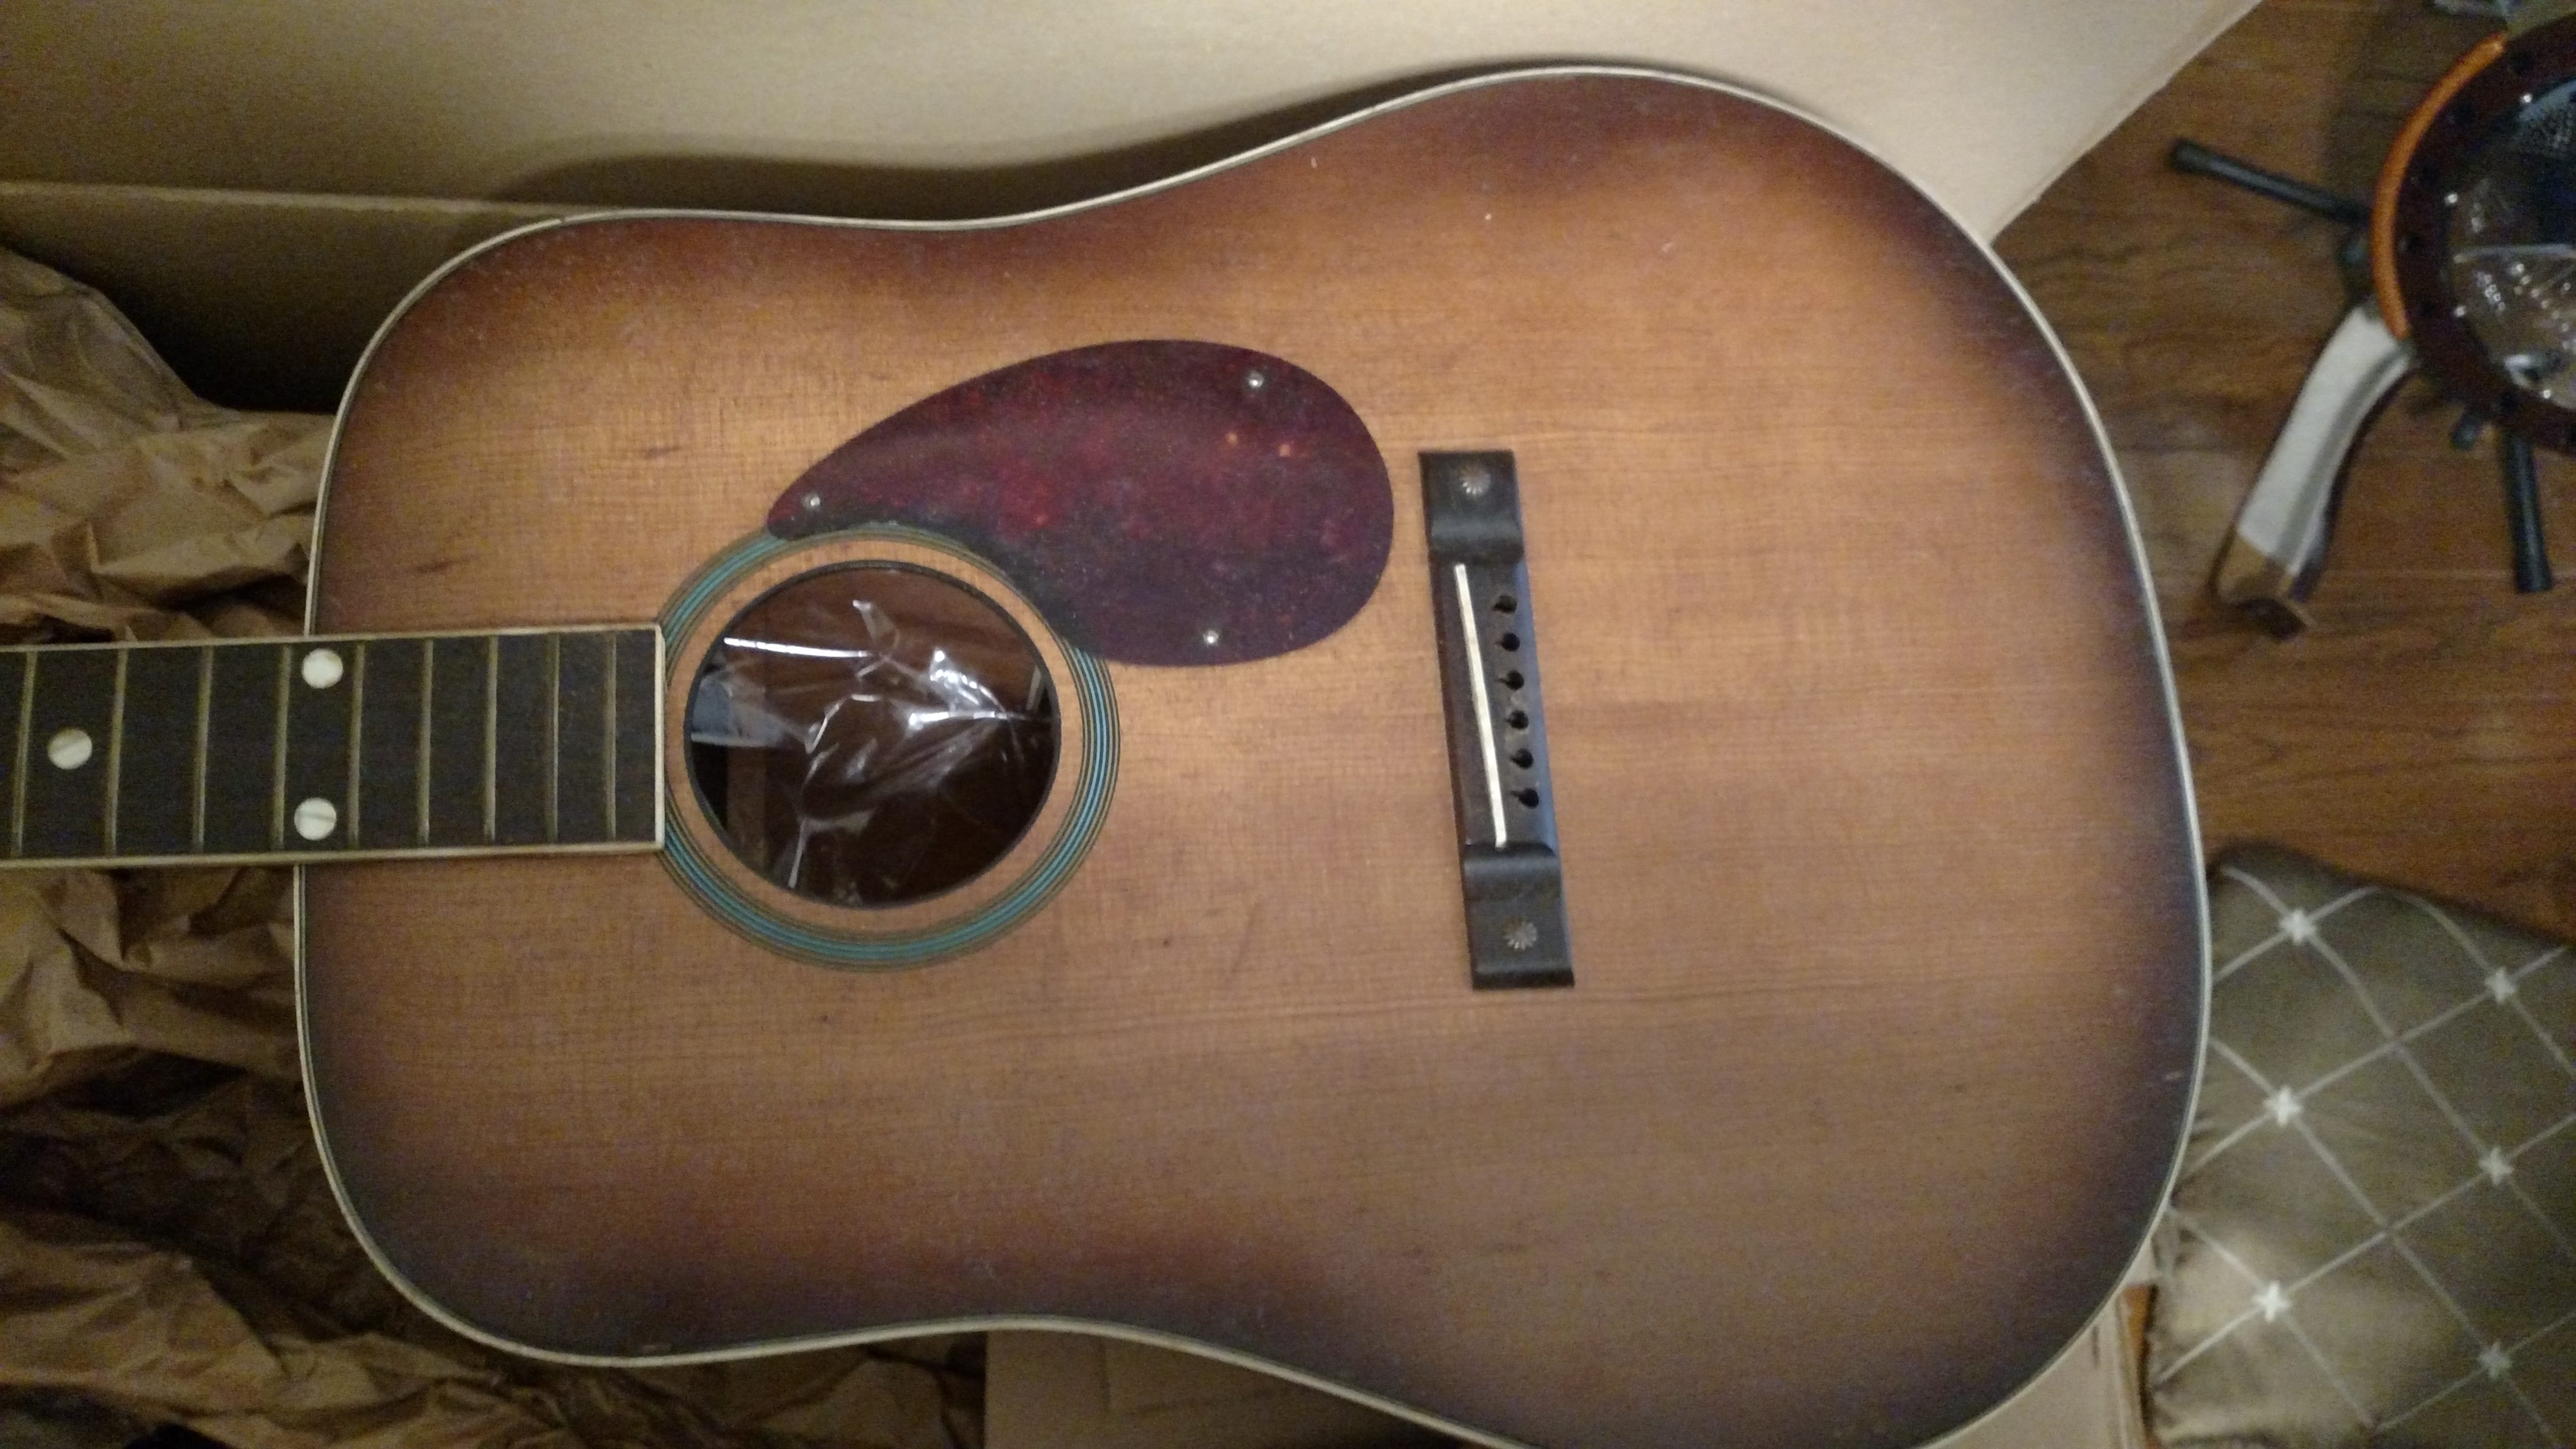
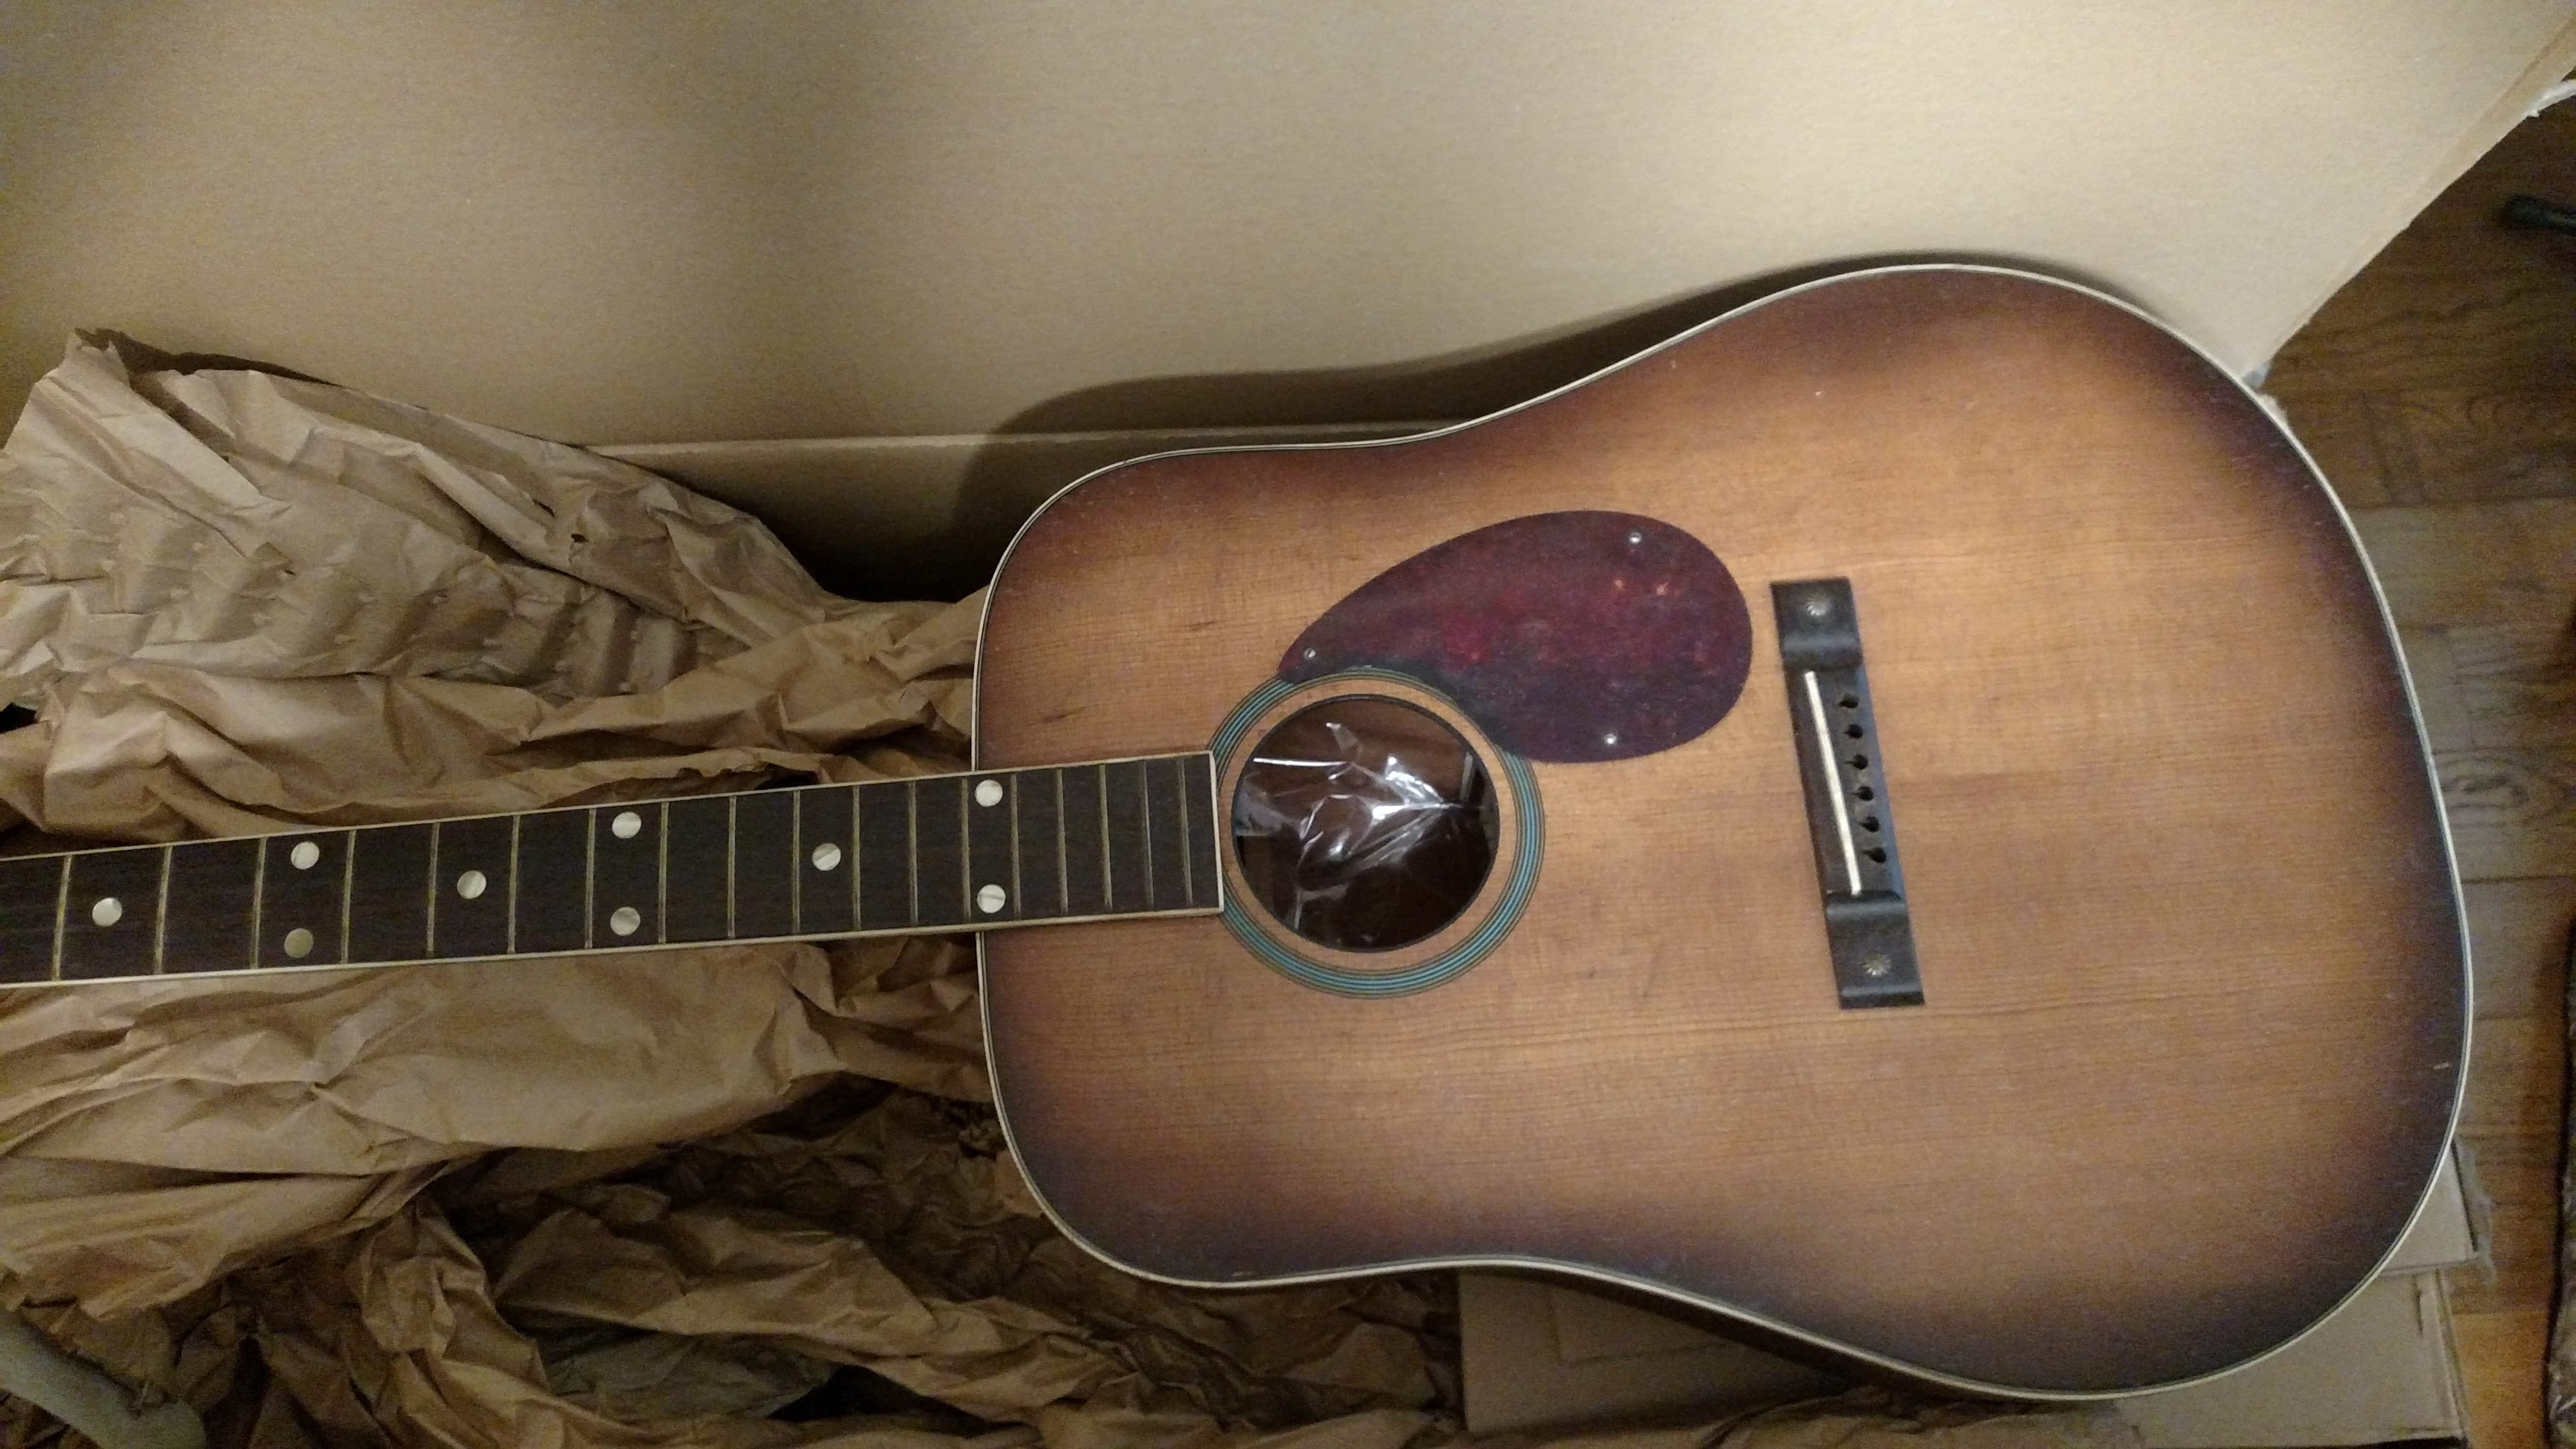
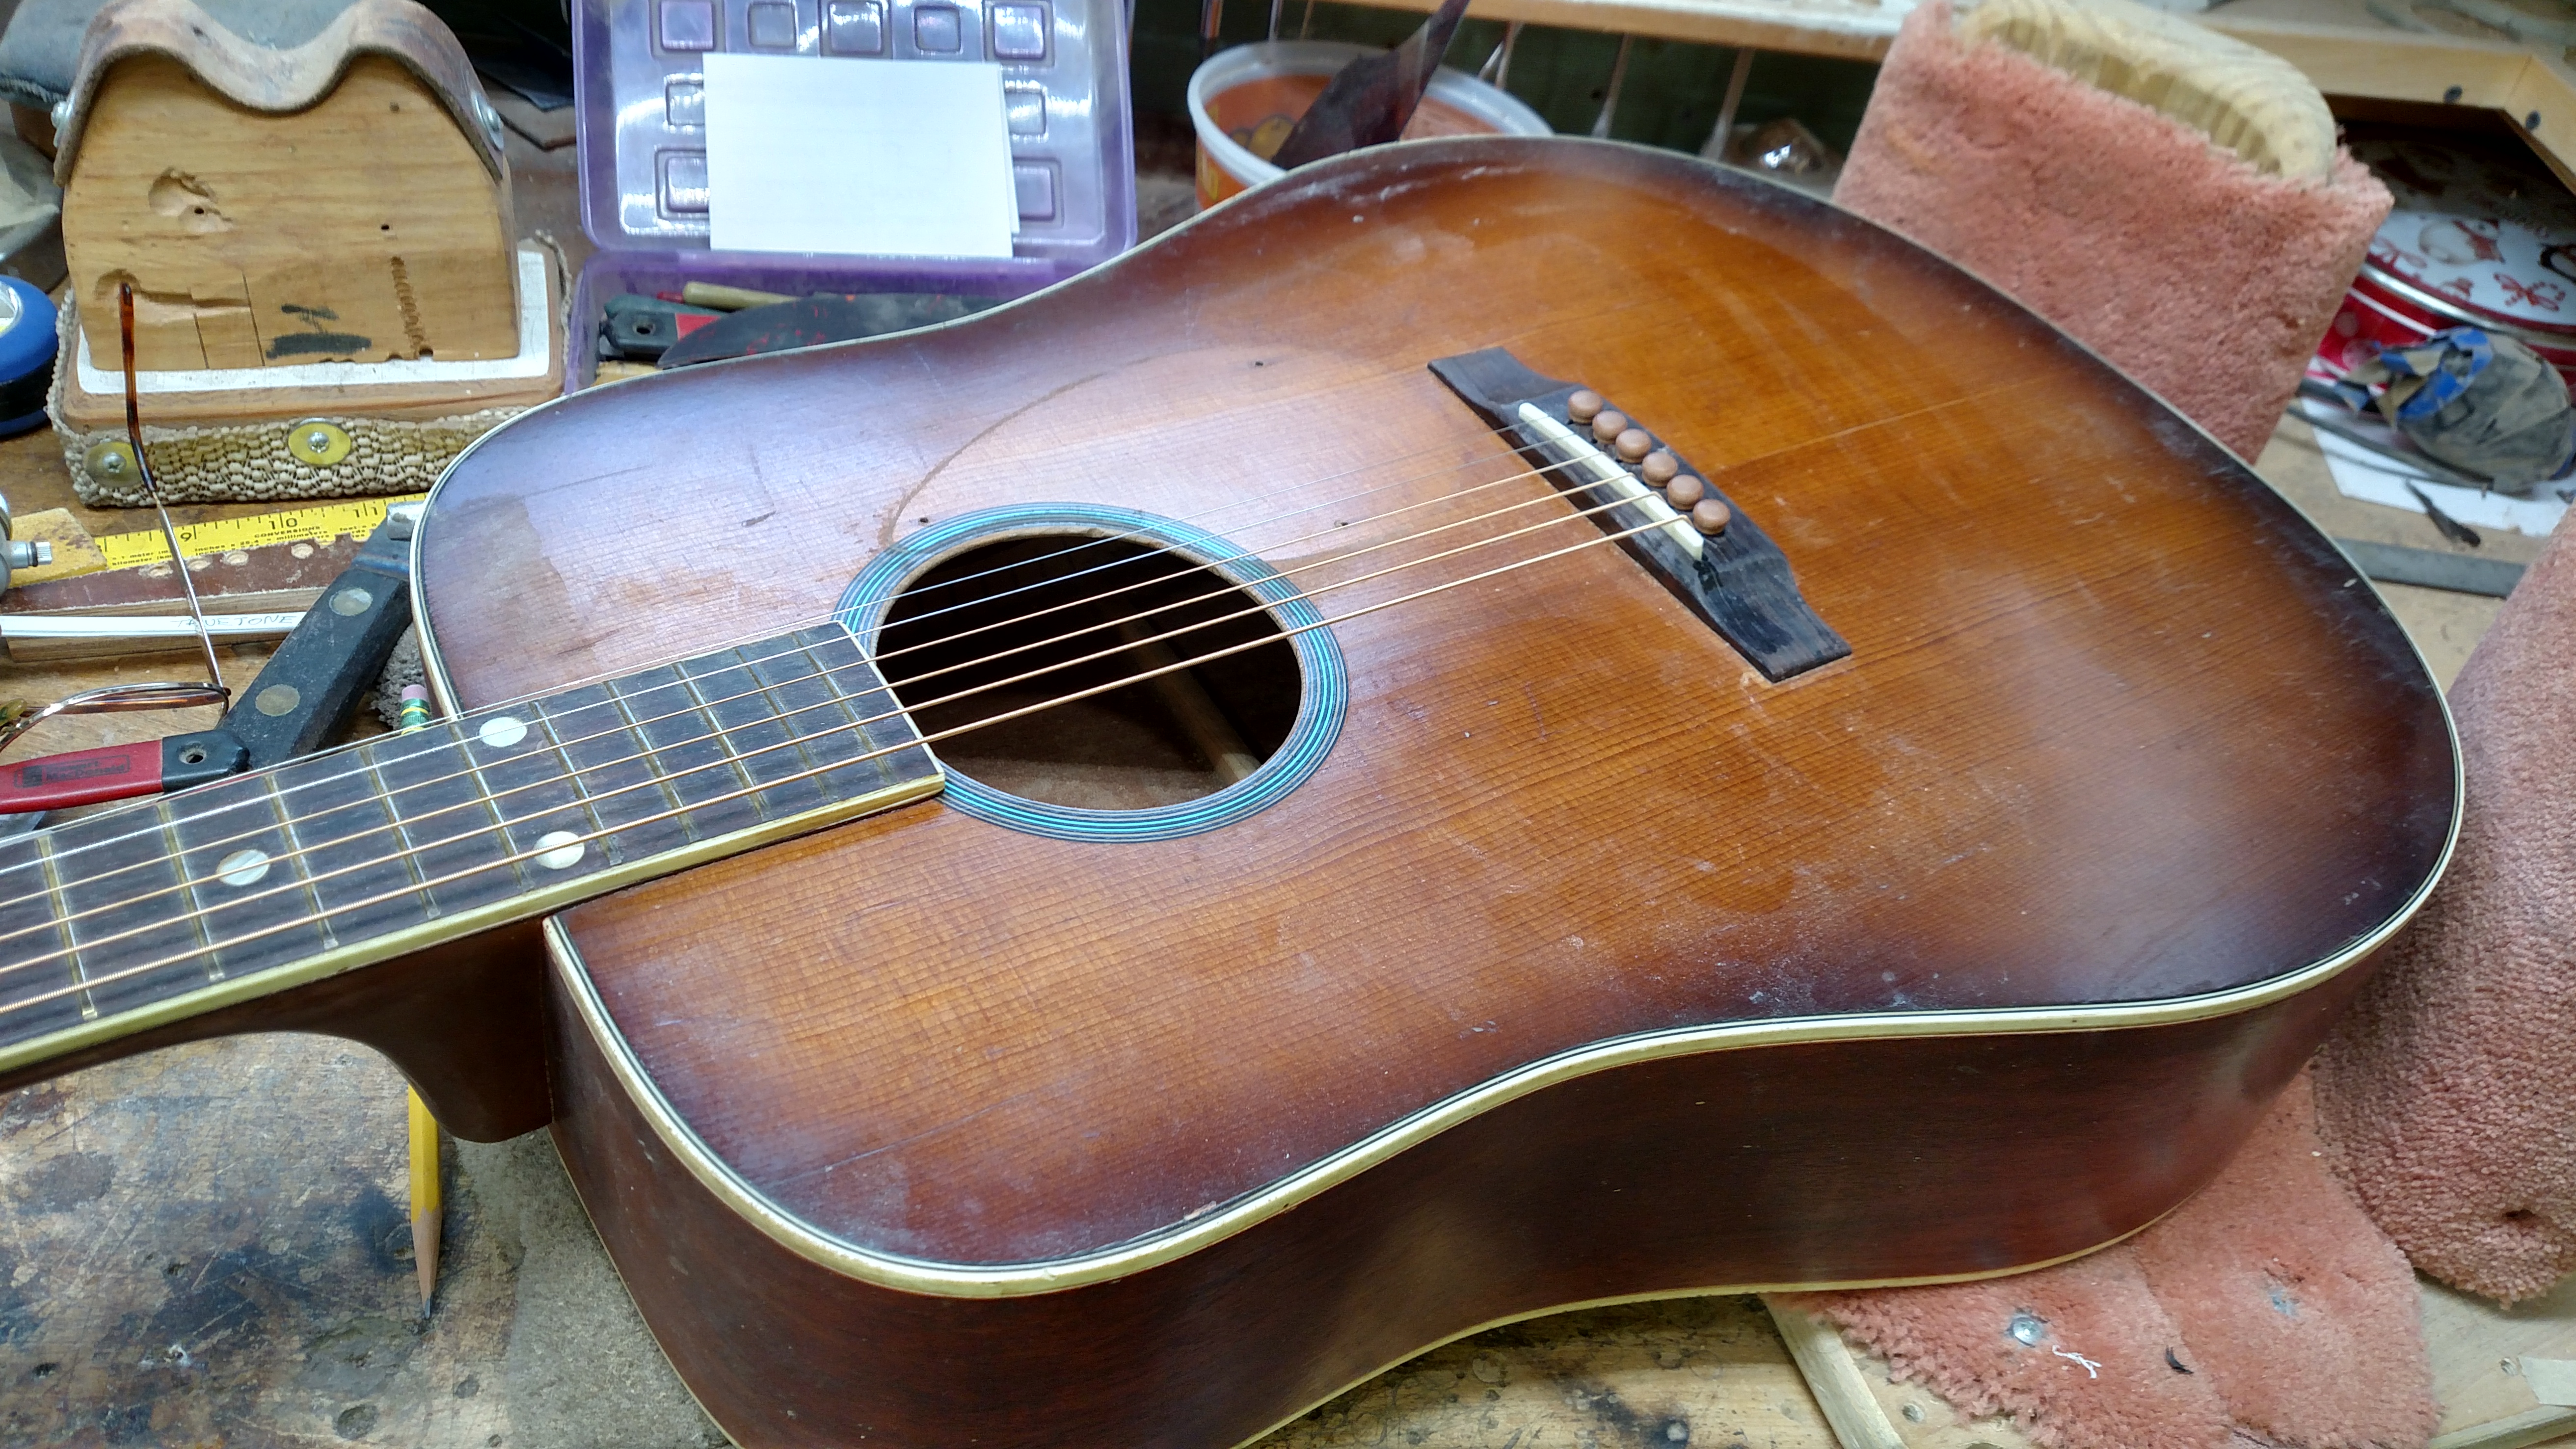
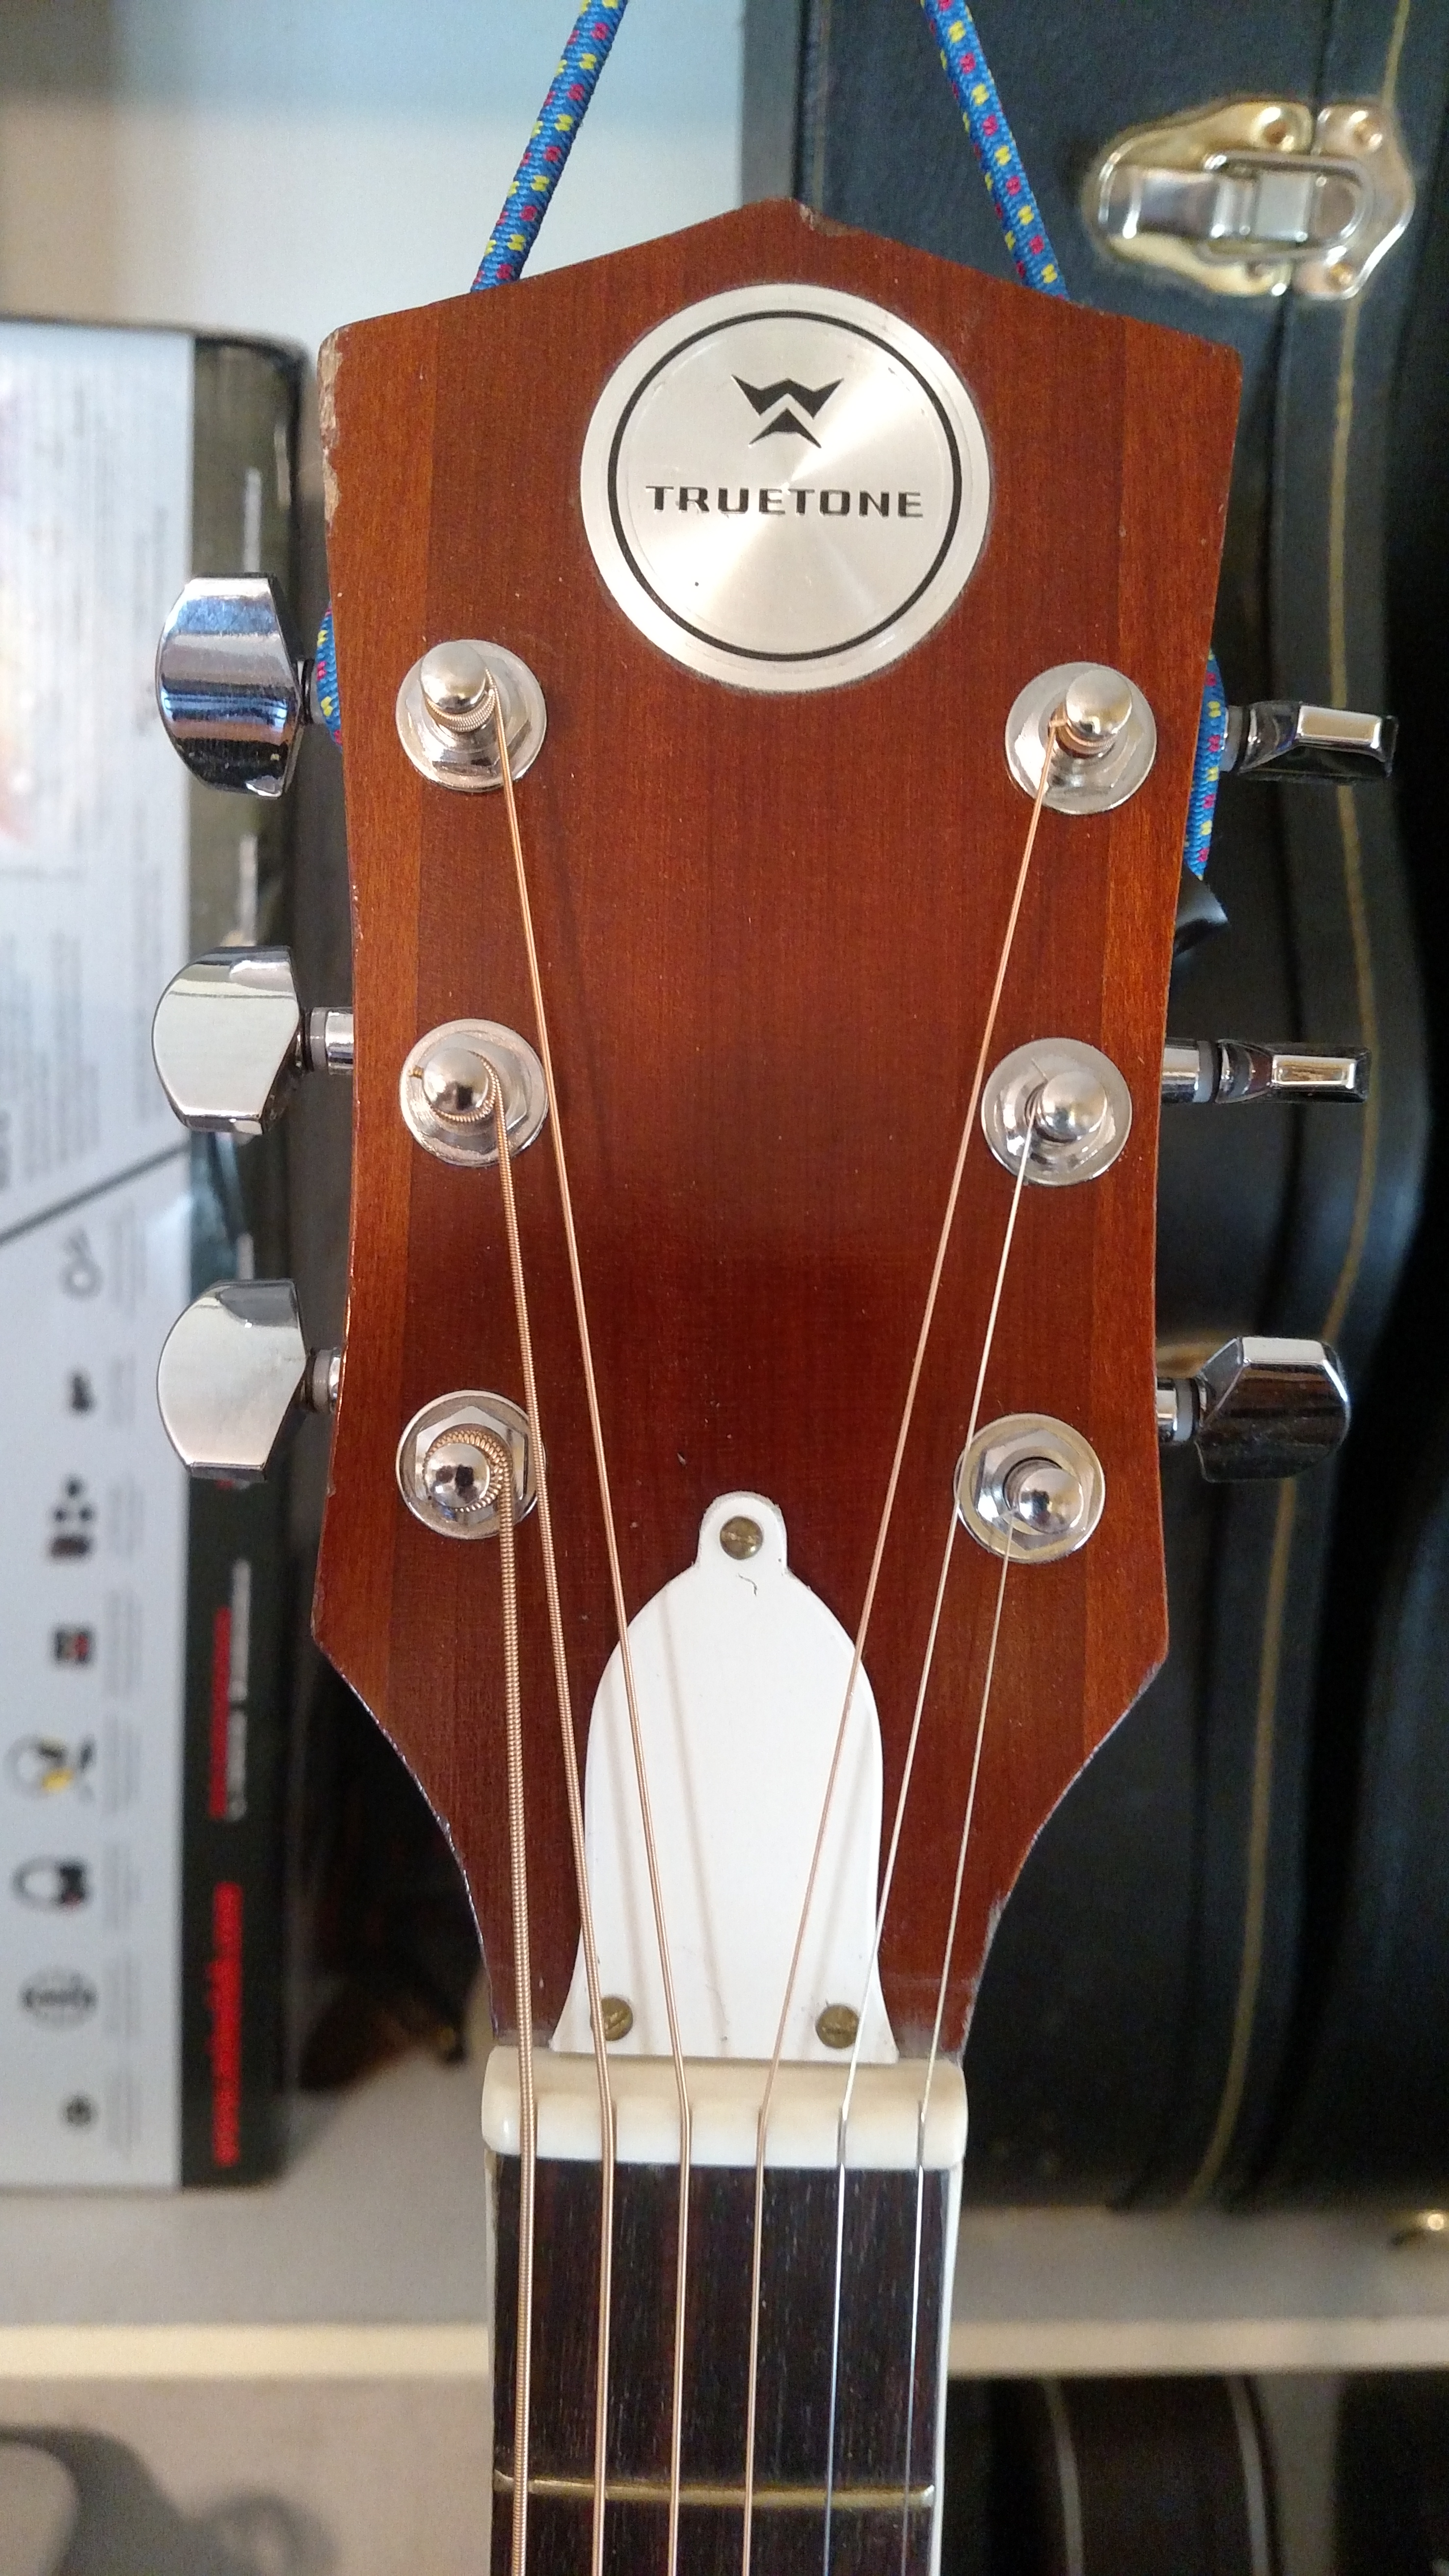
And so, I bought the guitar. These pictures show what it looked like the day I received it in the mail. I have since determined that is was probably made in the 1960’s or somewhere in that time period. The fingerboard is bound rosewood with large dot inlays which are some kind of plastic or acetate material. It has the original brass colored frets which showed little wear, although someone had run a rough file over them at some point. 
These guitars had a solid top and probably a plywood back and sides. They used a Kay style bridge which was held on by glue and 2 screws and nuts. It was a really thick bridge which was rosewood. The pickguard was attached with 3 small wood screws. The sound holes in these guitars are smaller than a Martin size and are bound with plastic material surrounding them. This small sound hole not only changes the amount of sound that comes out, but it also makes it extremely hard to work on the braces through this small opening. These guitars had some very heavy braces in them in the top and back. These braces were around 7/16 inch square and were spruce.
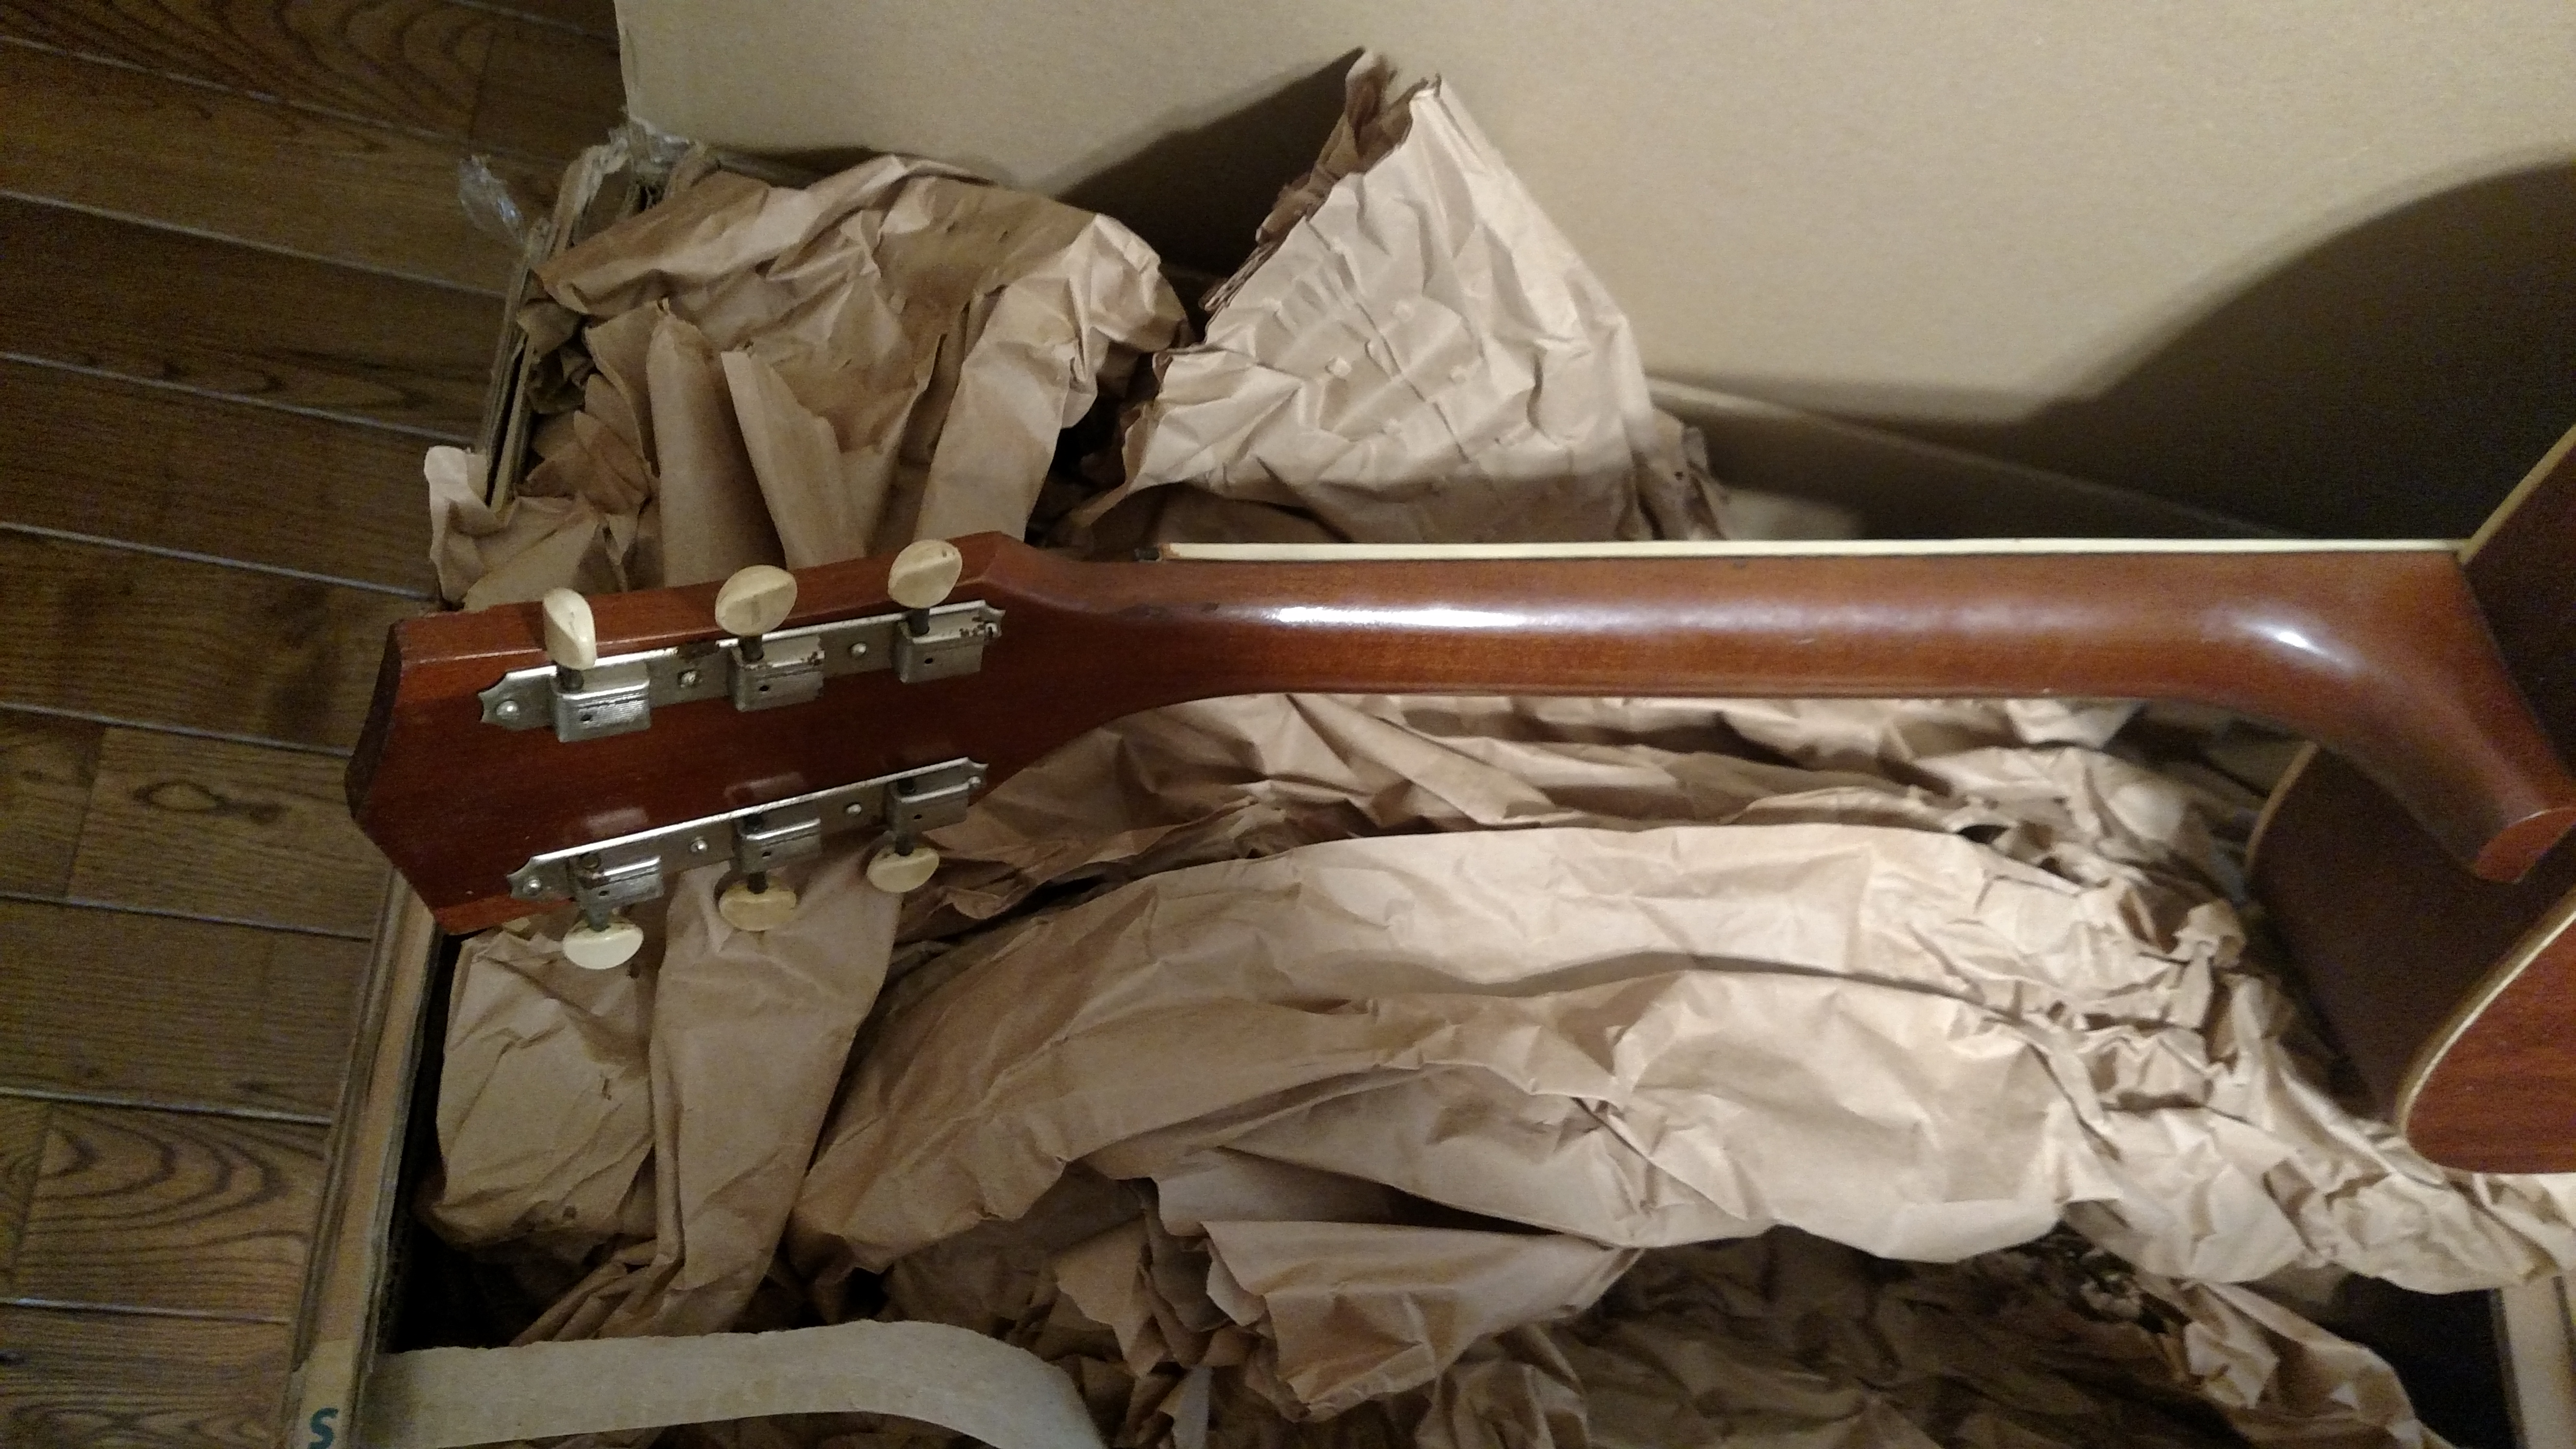
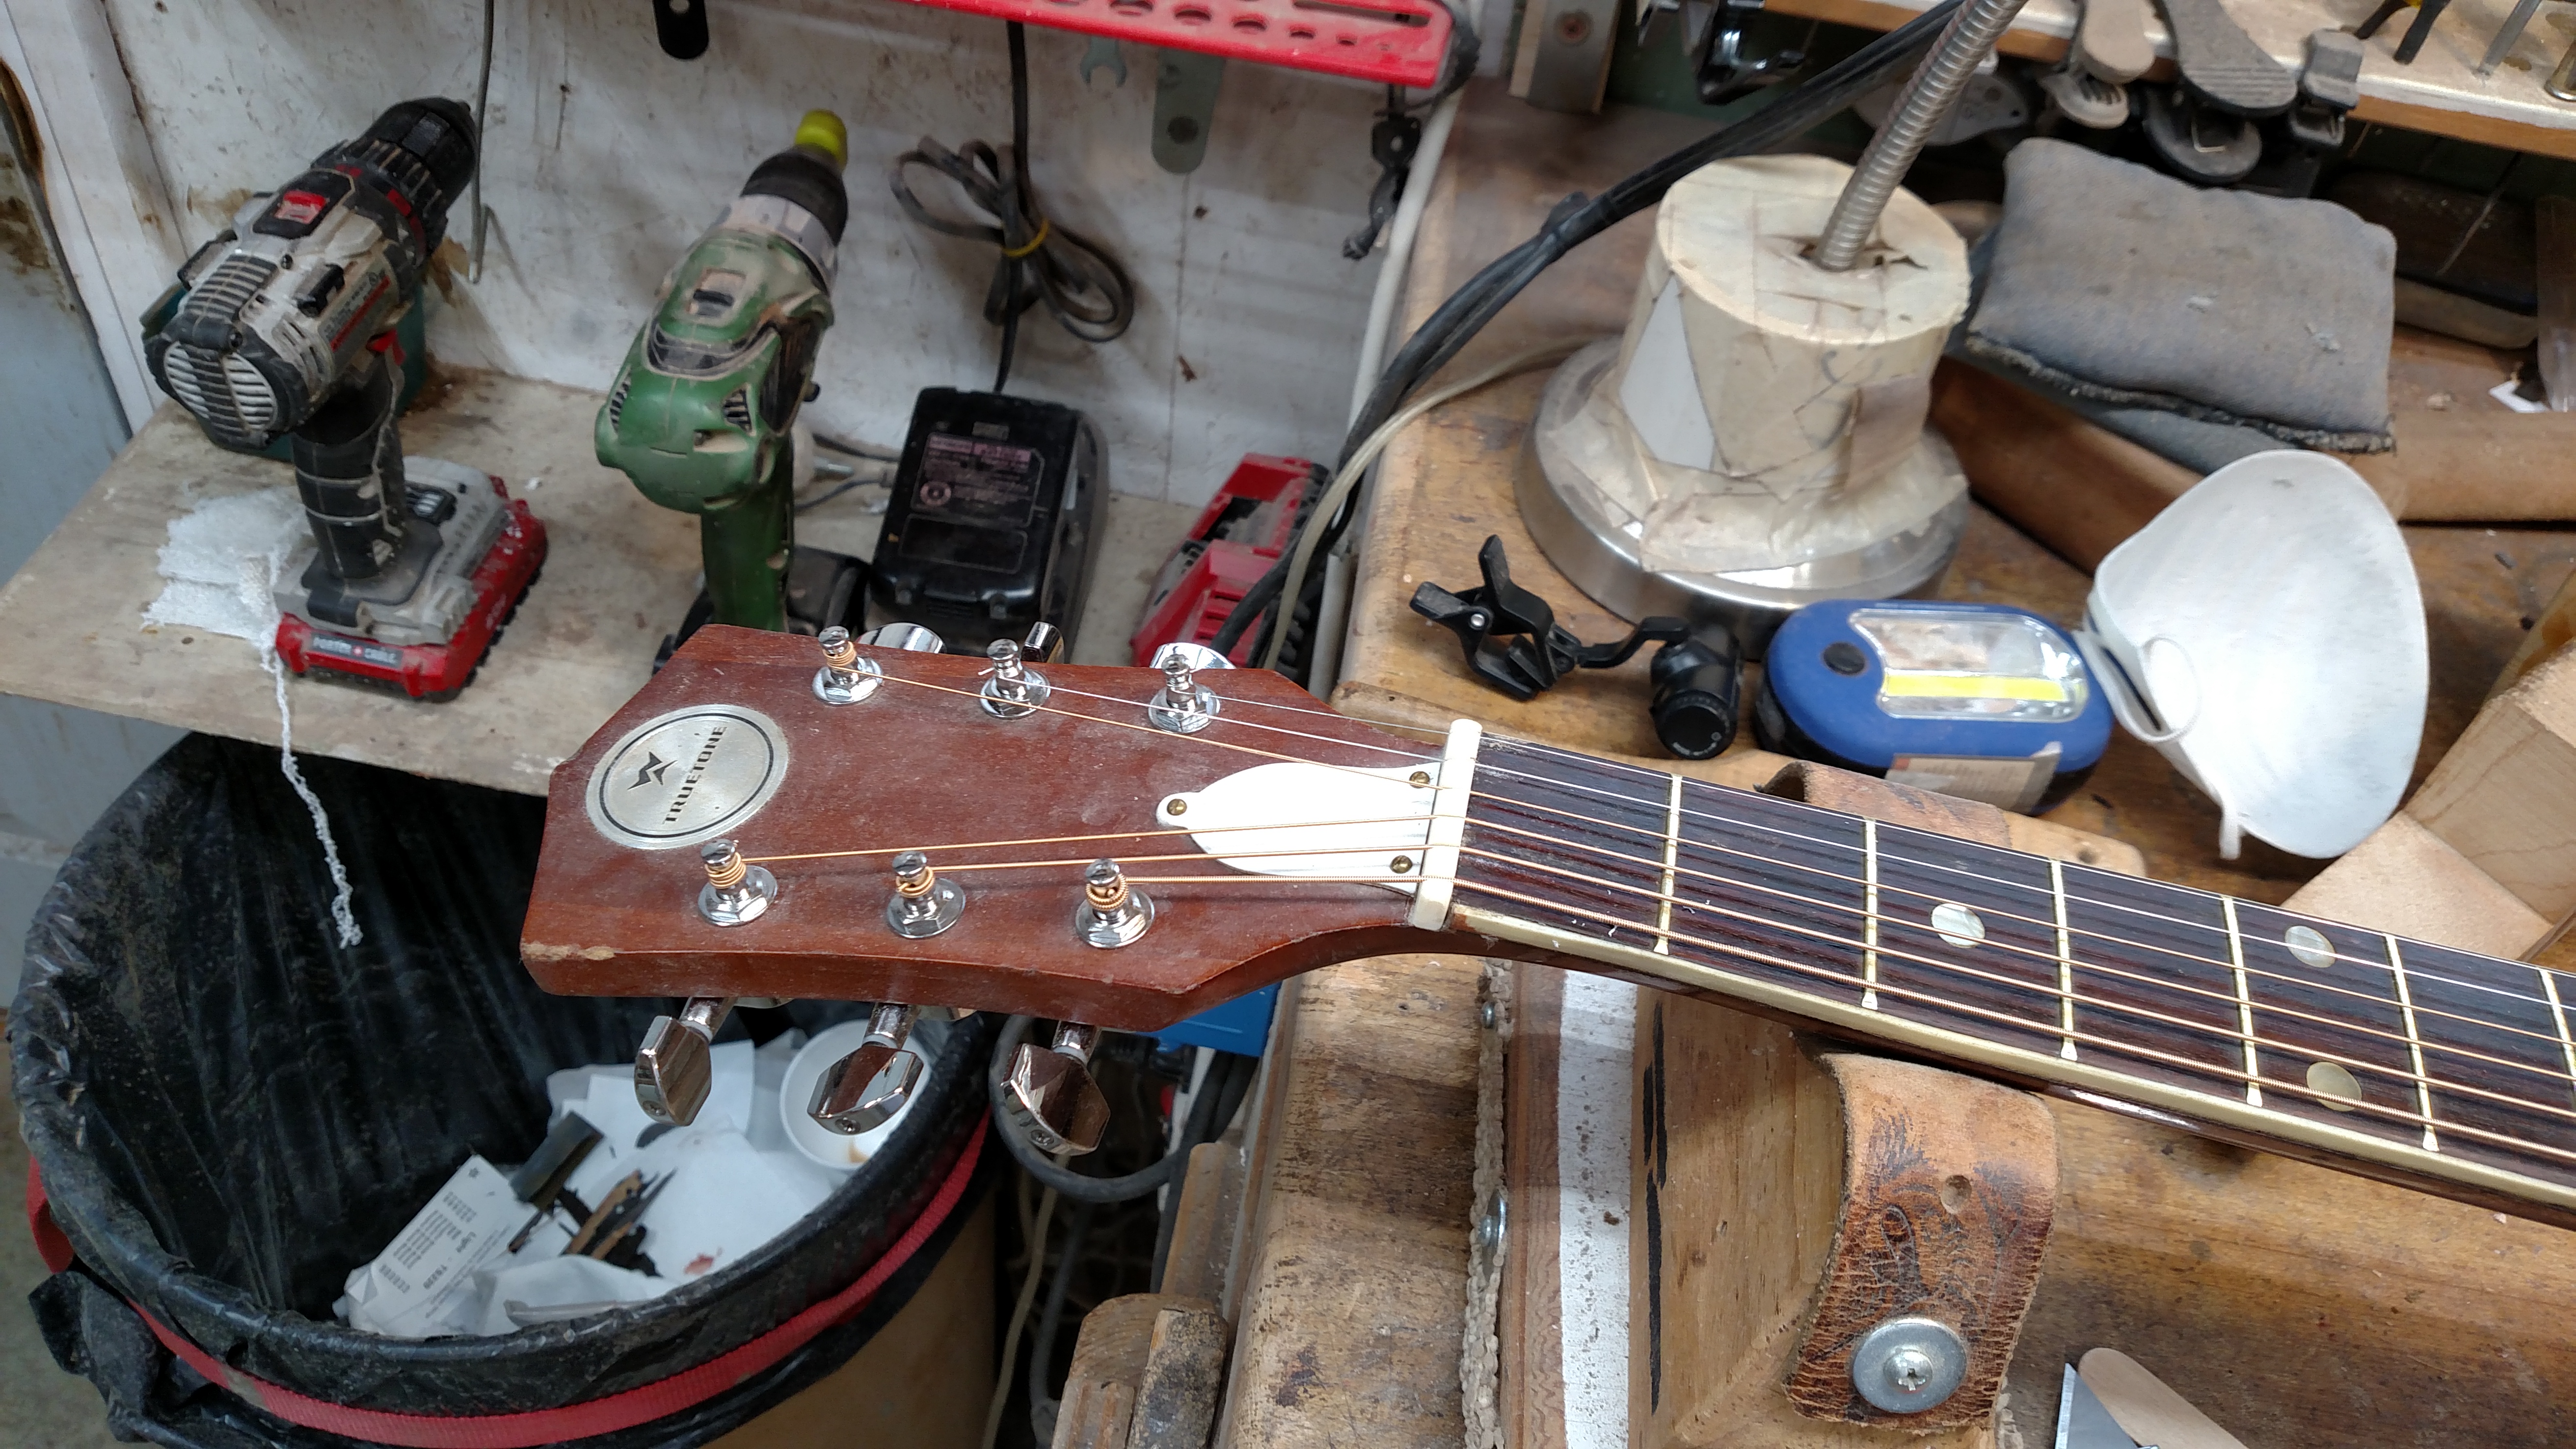
This guitar had a poplar neck in it. It is wider and thicker than most Martin type necks but it has a Gibson style truss rod in it. It had those Kluson Deluxe 3 on a plate tuners on it with the plastic knobs. The guitar wasn’t strung when I got it and the dovetail neck joint was obviously loose.

The back and sides of the body were mahogany and I’d guess that they were plywood and not solid wood. This guitar appeared to have seen some use and it had the normal wear and scratches and dings that you would expect from a 50 year old guitar.
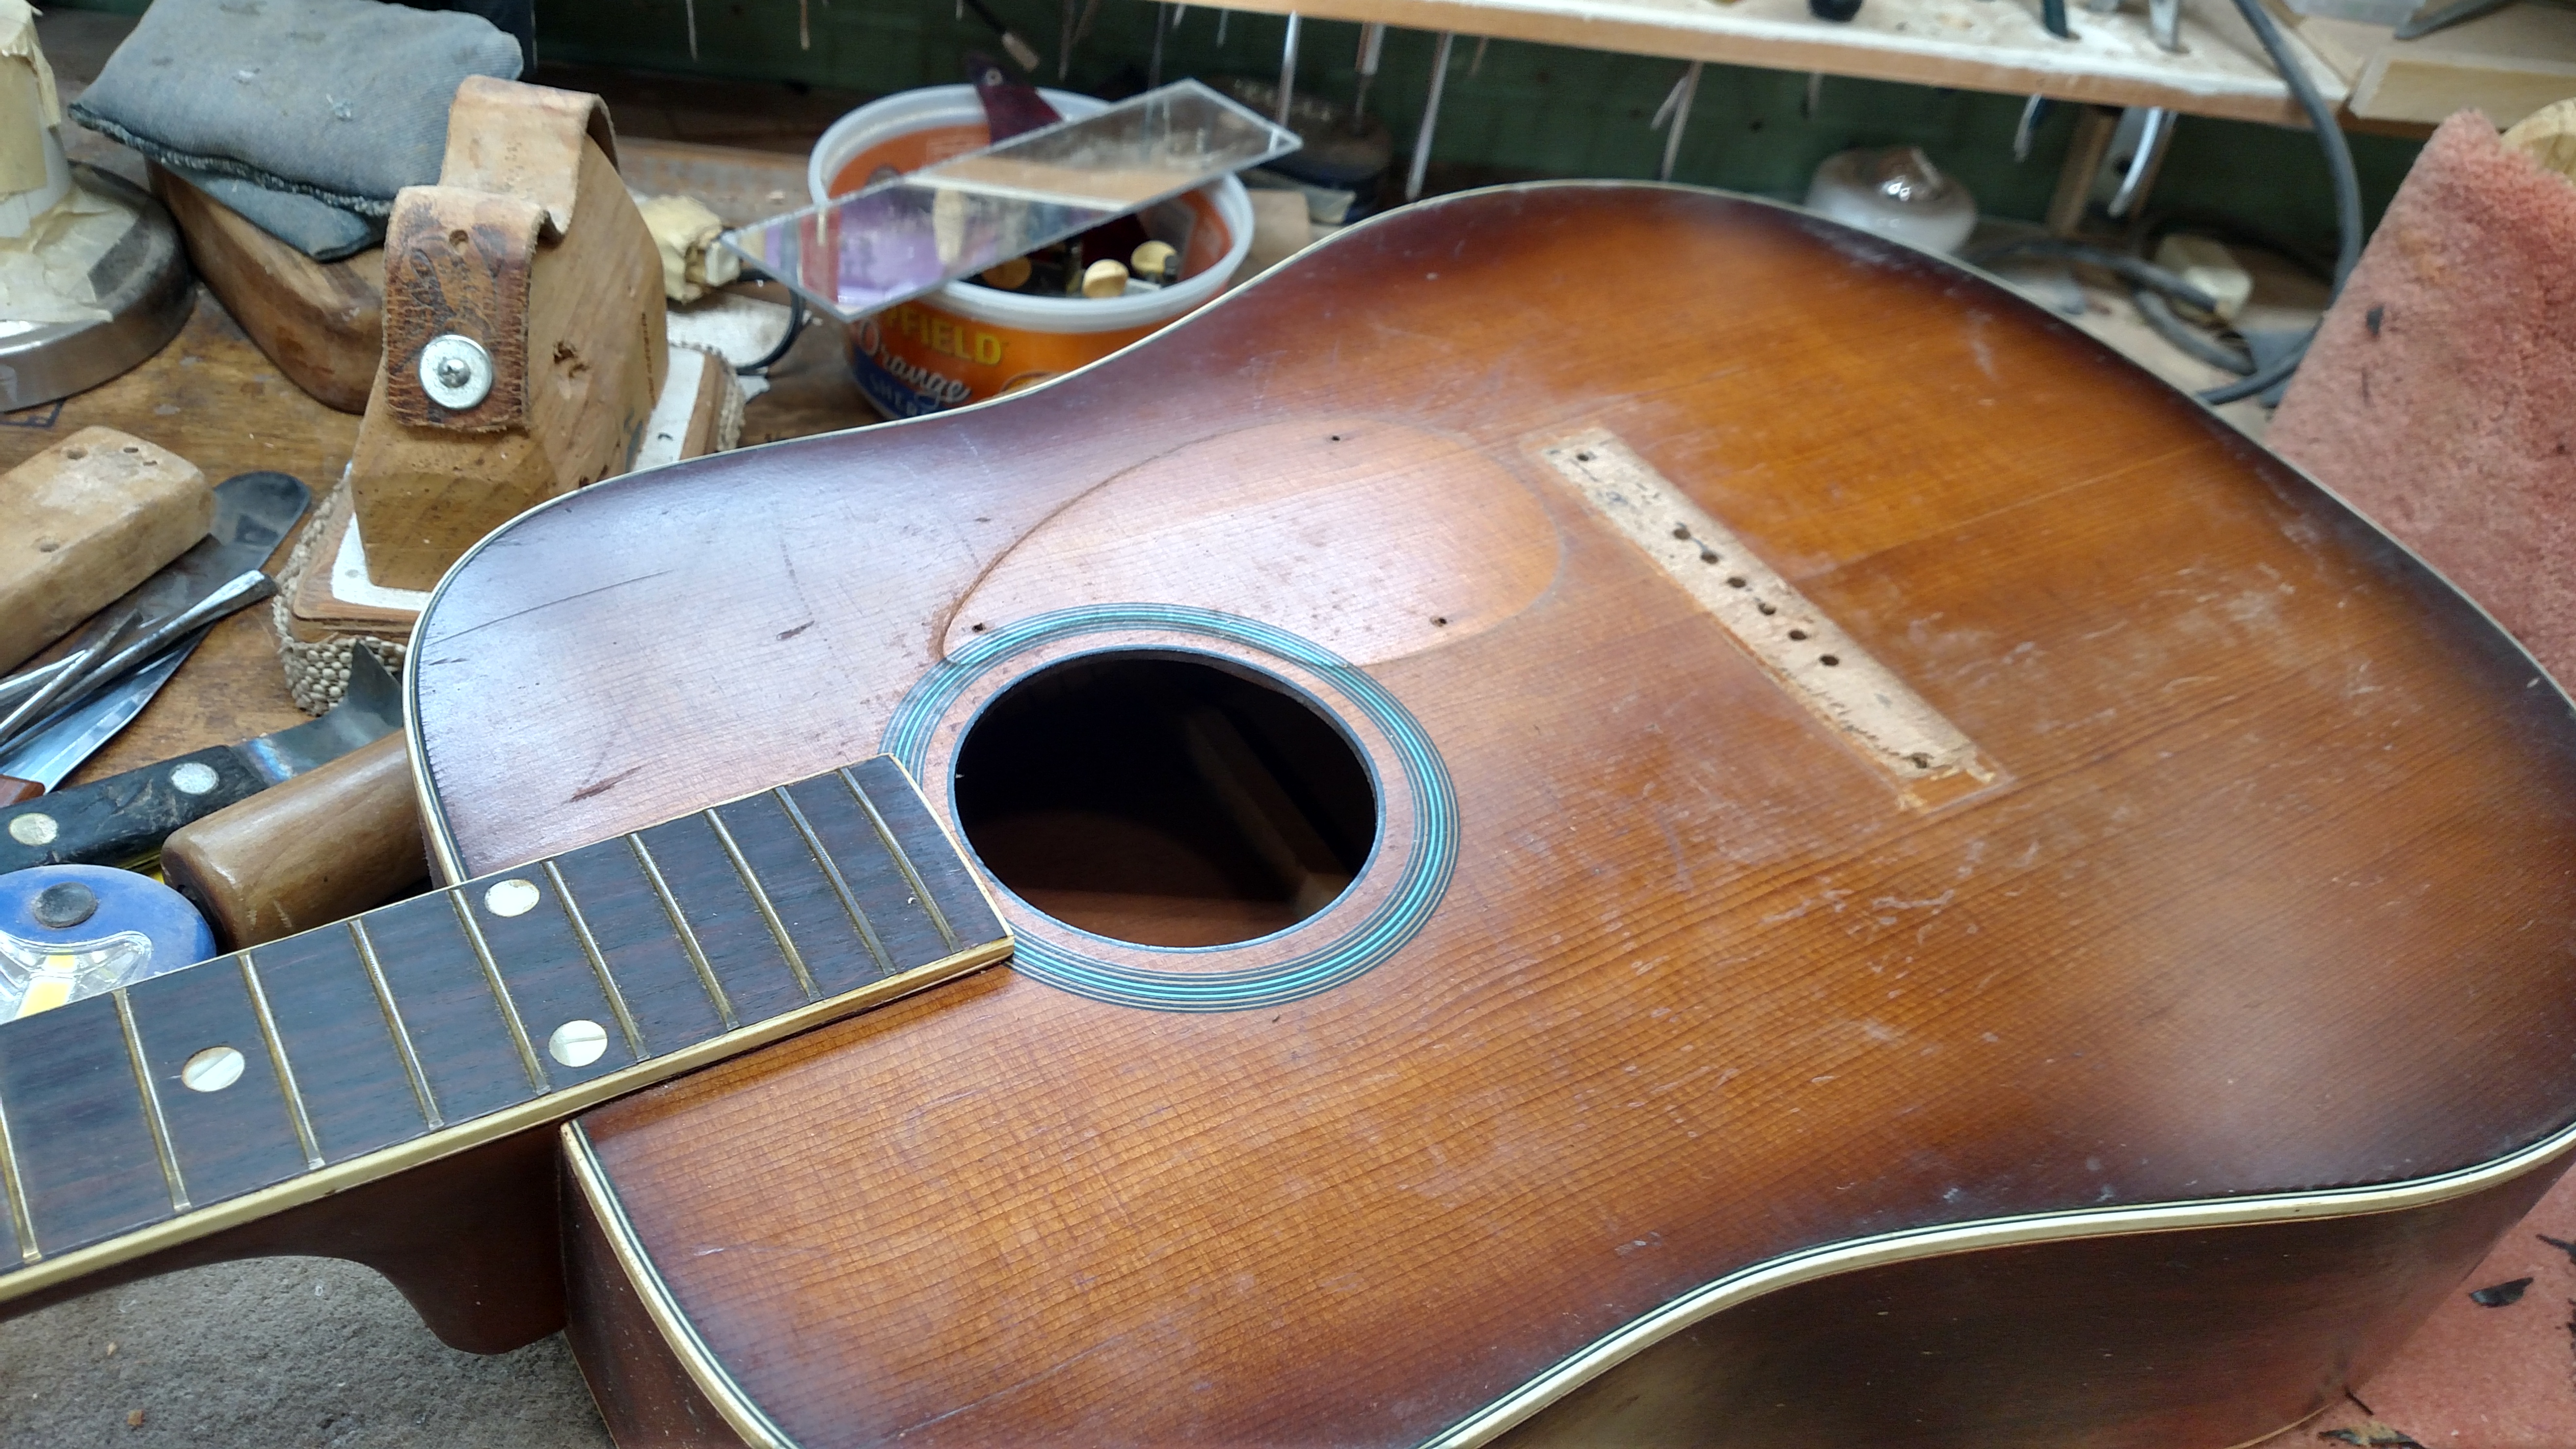
My plan was to reduce the size of the braces, reset the neck, replace the bridge and pickguard with a Martin style and try to do this without disturbing the old finish. I removed the old bridge. The wood in the guitar top looked like western cedar to me but I’m not 100% sure about this. It doesn’t matter because it is going to stay the same whatever it is. I like the color of this aged top and the tobacco sunburst color. I removed the old pickguard. I always thought the shape of these pickguards was ugly and I don’t like the mounting screws. The top was finished under it. Some of these old Martin guitars had the pickguard glued on the bare wood and the finish was applied over the pickguard.
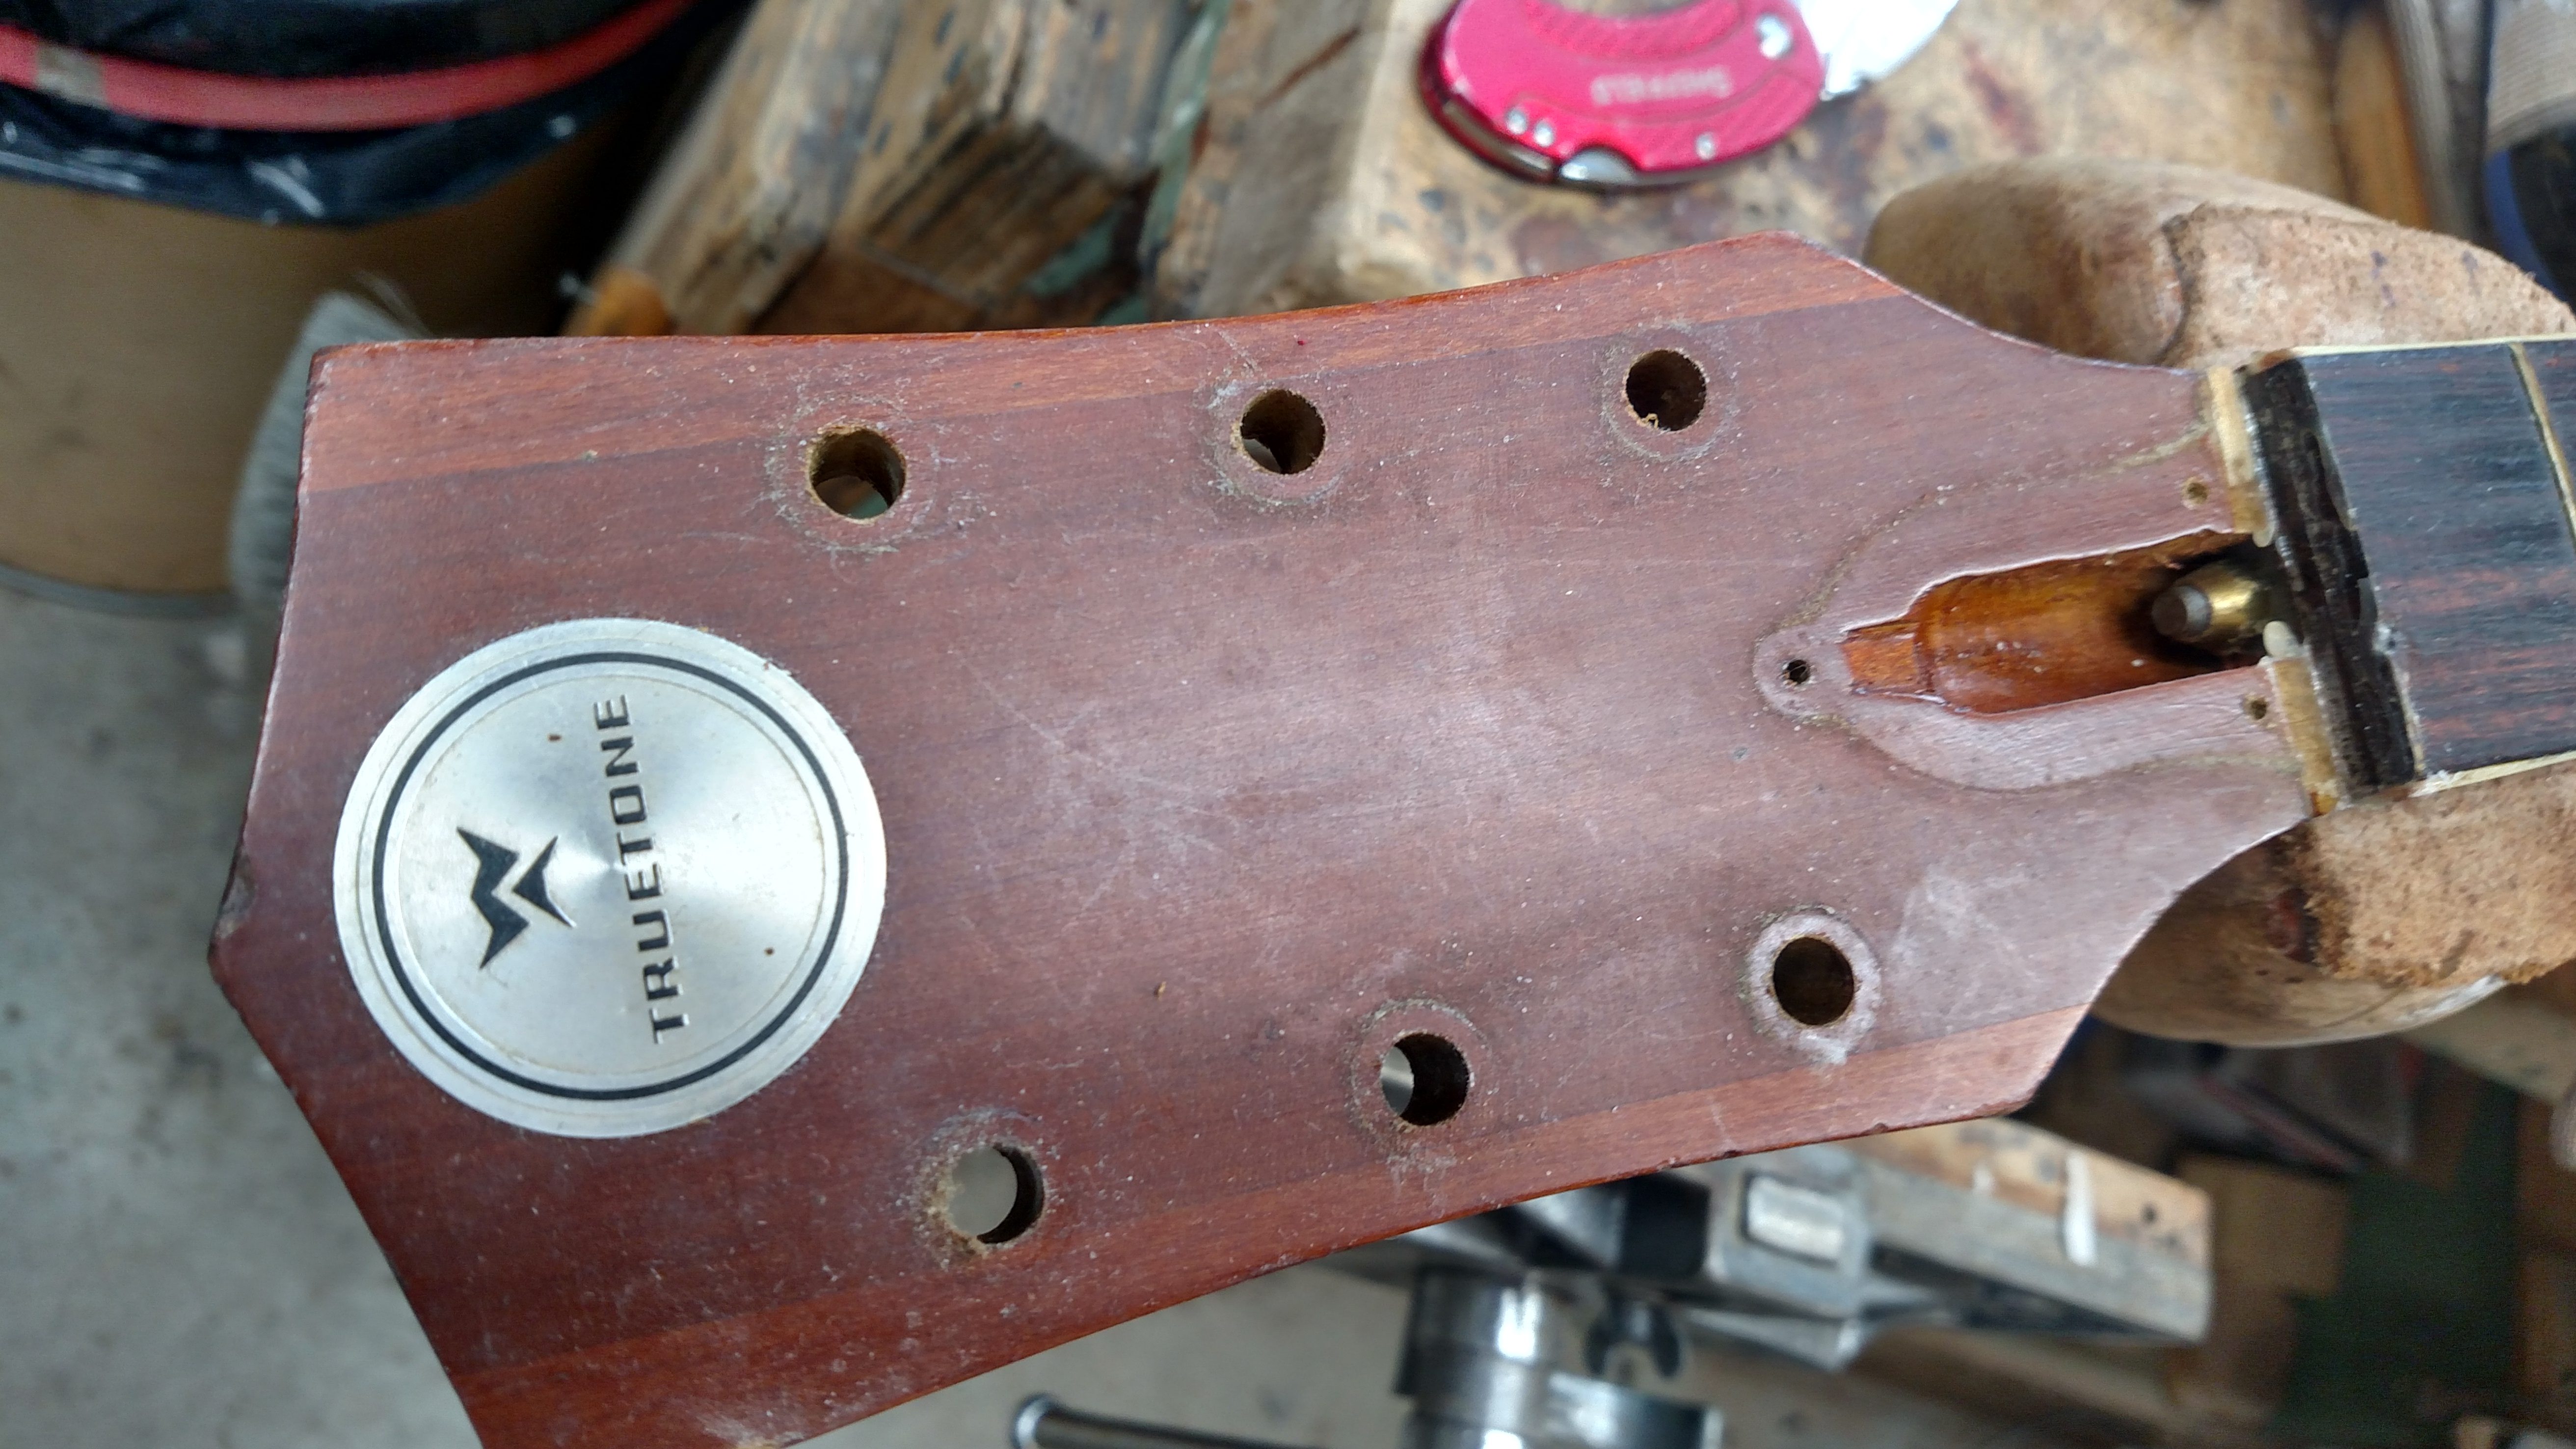
I removed the tuners and the bushings. I don’t like the Kluson Tuners because you need some vice grips or need to wear gloves to turn them without hurting your fingers. I’ve never shared the attraction that some folks have for these old tuners. I drilled the holes out carefully and fitted some modern Asian 12/1 ratio tuners in the larger holes. I’ve been happy with the way these cheap, sealed tuners work for me through the years. I don’t like having the bushings in the peghead. The sealed tuners are superior in every way (in my opinion). Please understand that the changes I’m making to this guitar are strictly for improving the sound. These old guitars are not collectible like an old Martin or Gibson. I wouldn’t make these modifications to a guitar that had some collector value. I’m modifying this guitar for me to play and not necessarily to sell. I have no use for a wall hanger guitar.
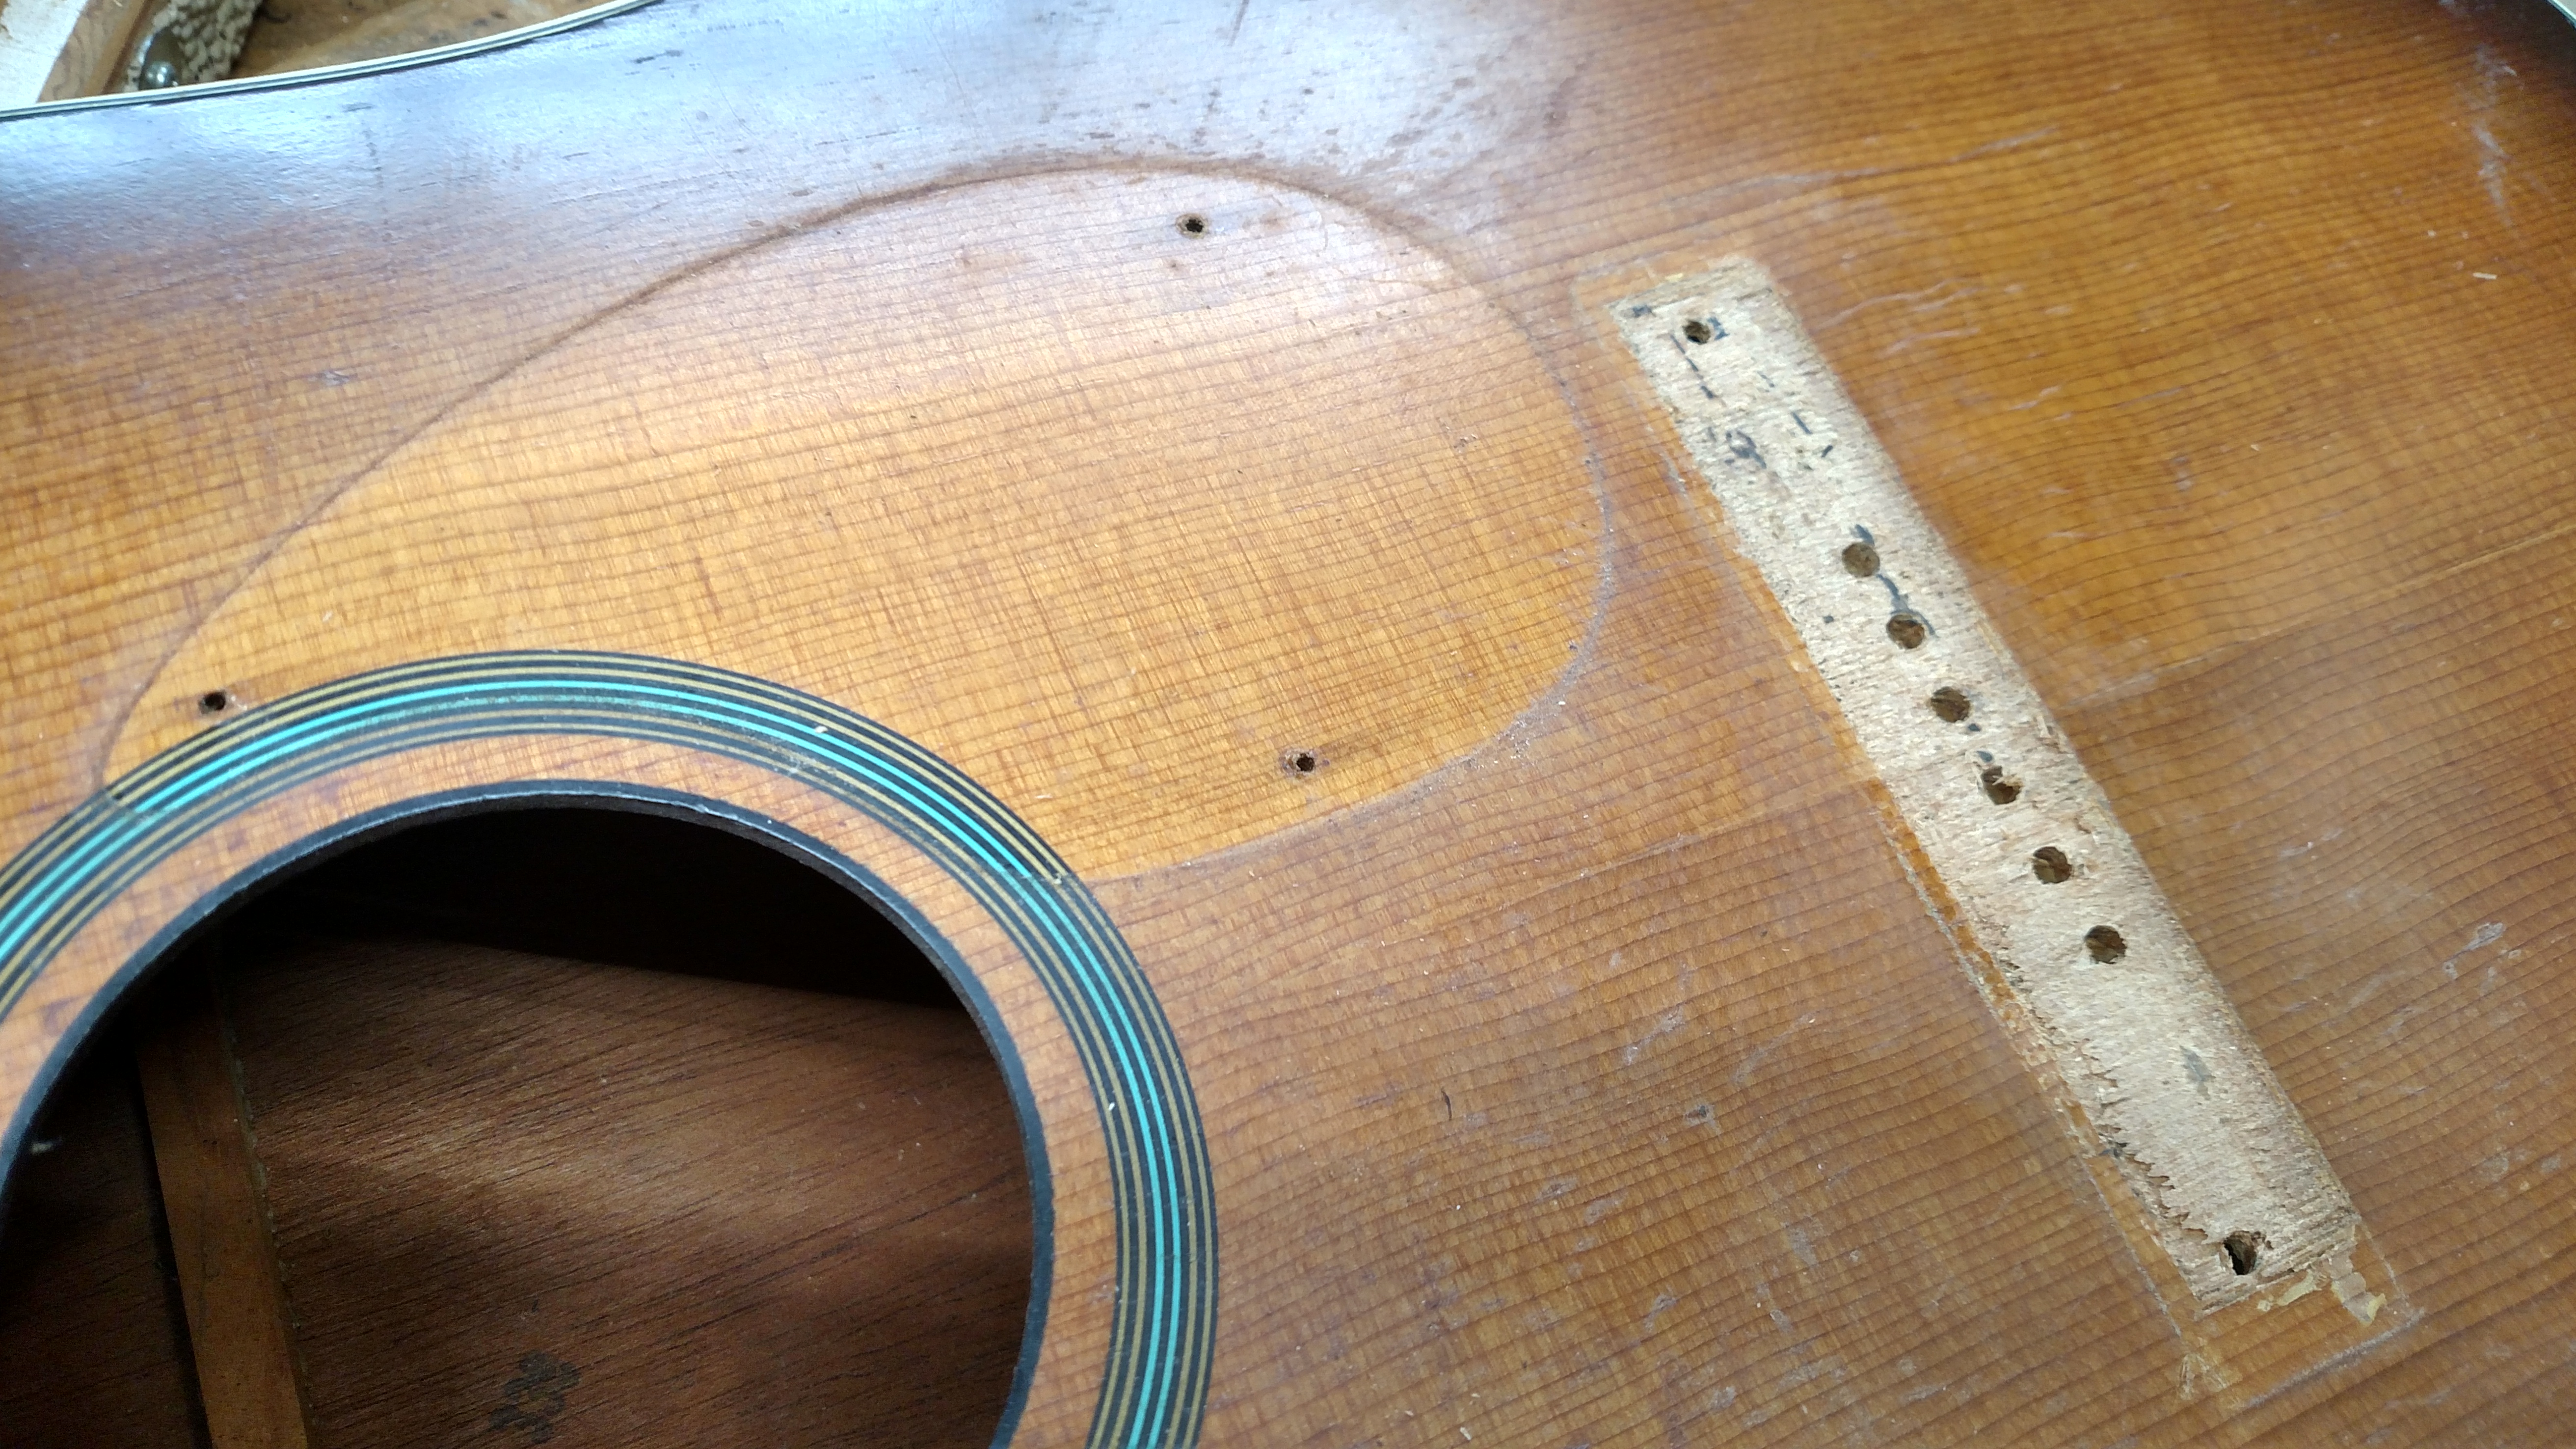
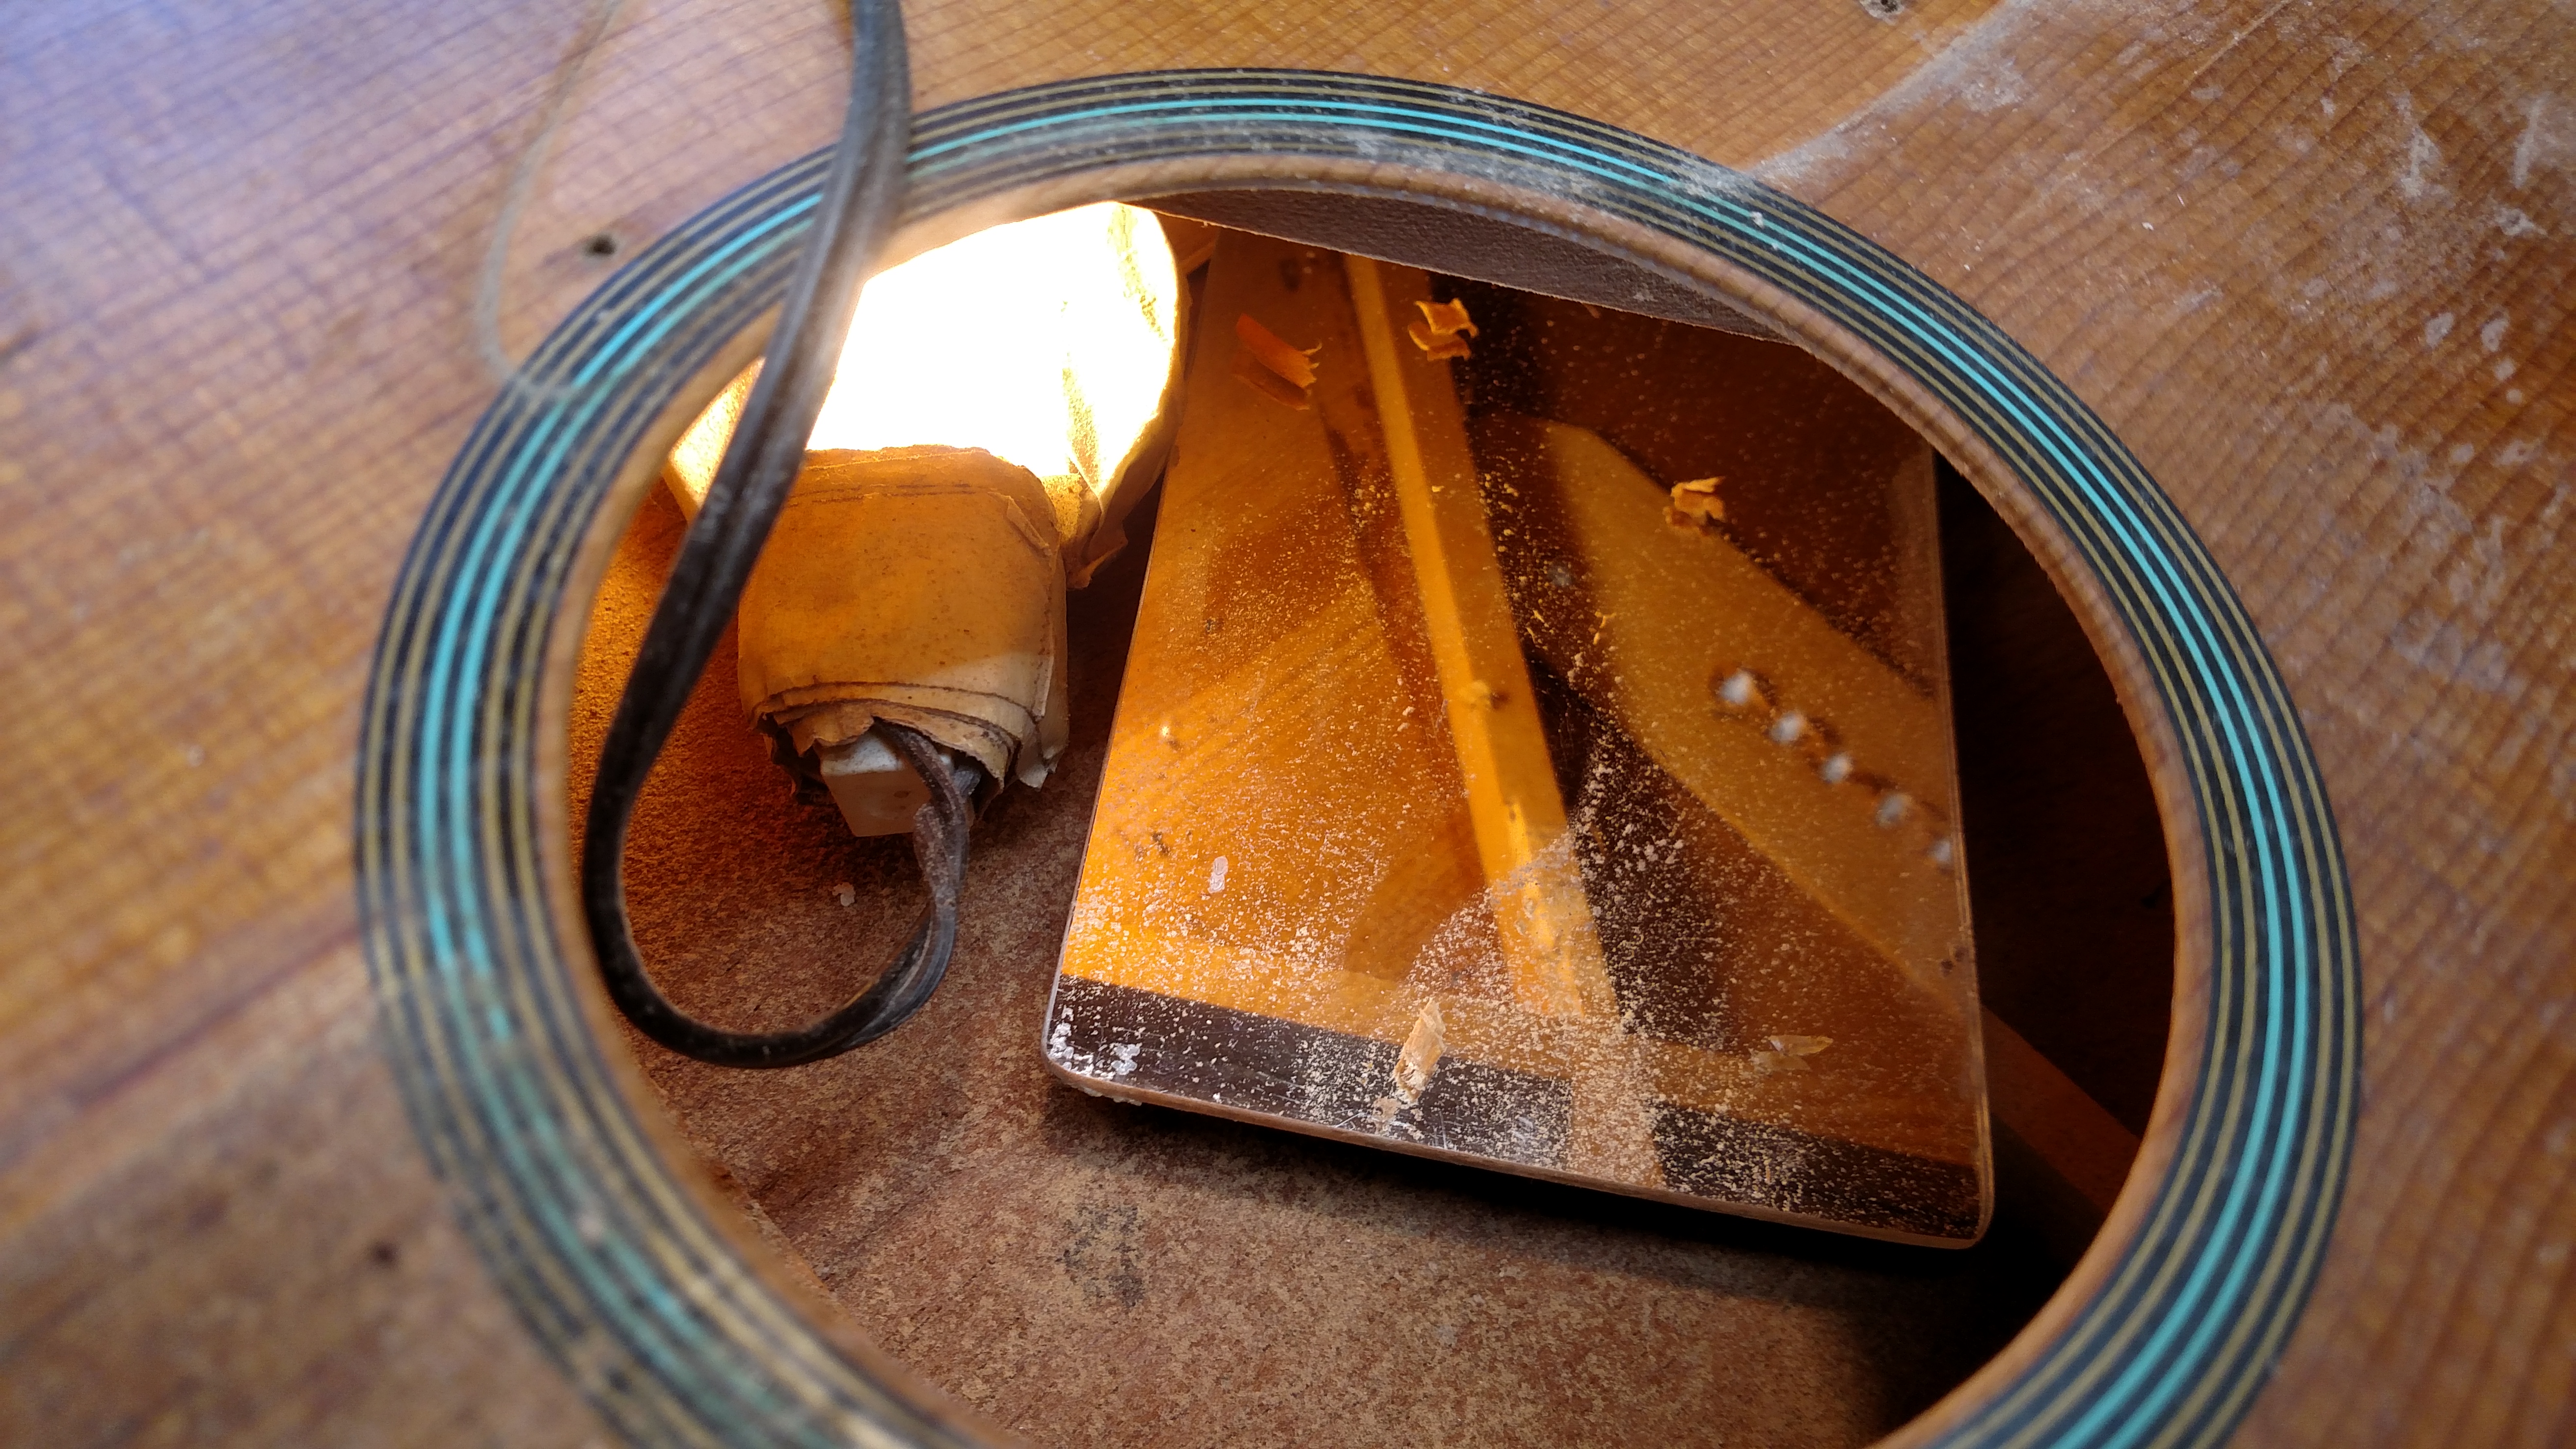
I removed the 15th fret and drilled some small holes through this fret slot. On a Martin, these holes will come out in the dovetail pocket. This dovetail is smaller than a Martin and the scale is slightly longer. These holes did not penetrate the dovetail pocket. This made it a challenge to get the neck steamed out, but I prevailed. You can see the 3 holes in the top in the above picture. I knew that I’d missed the pocket but I didn’t know which direction I needed to go. It was a good thing that the neck joint was so loose to begin with.
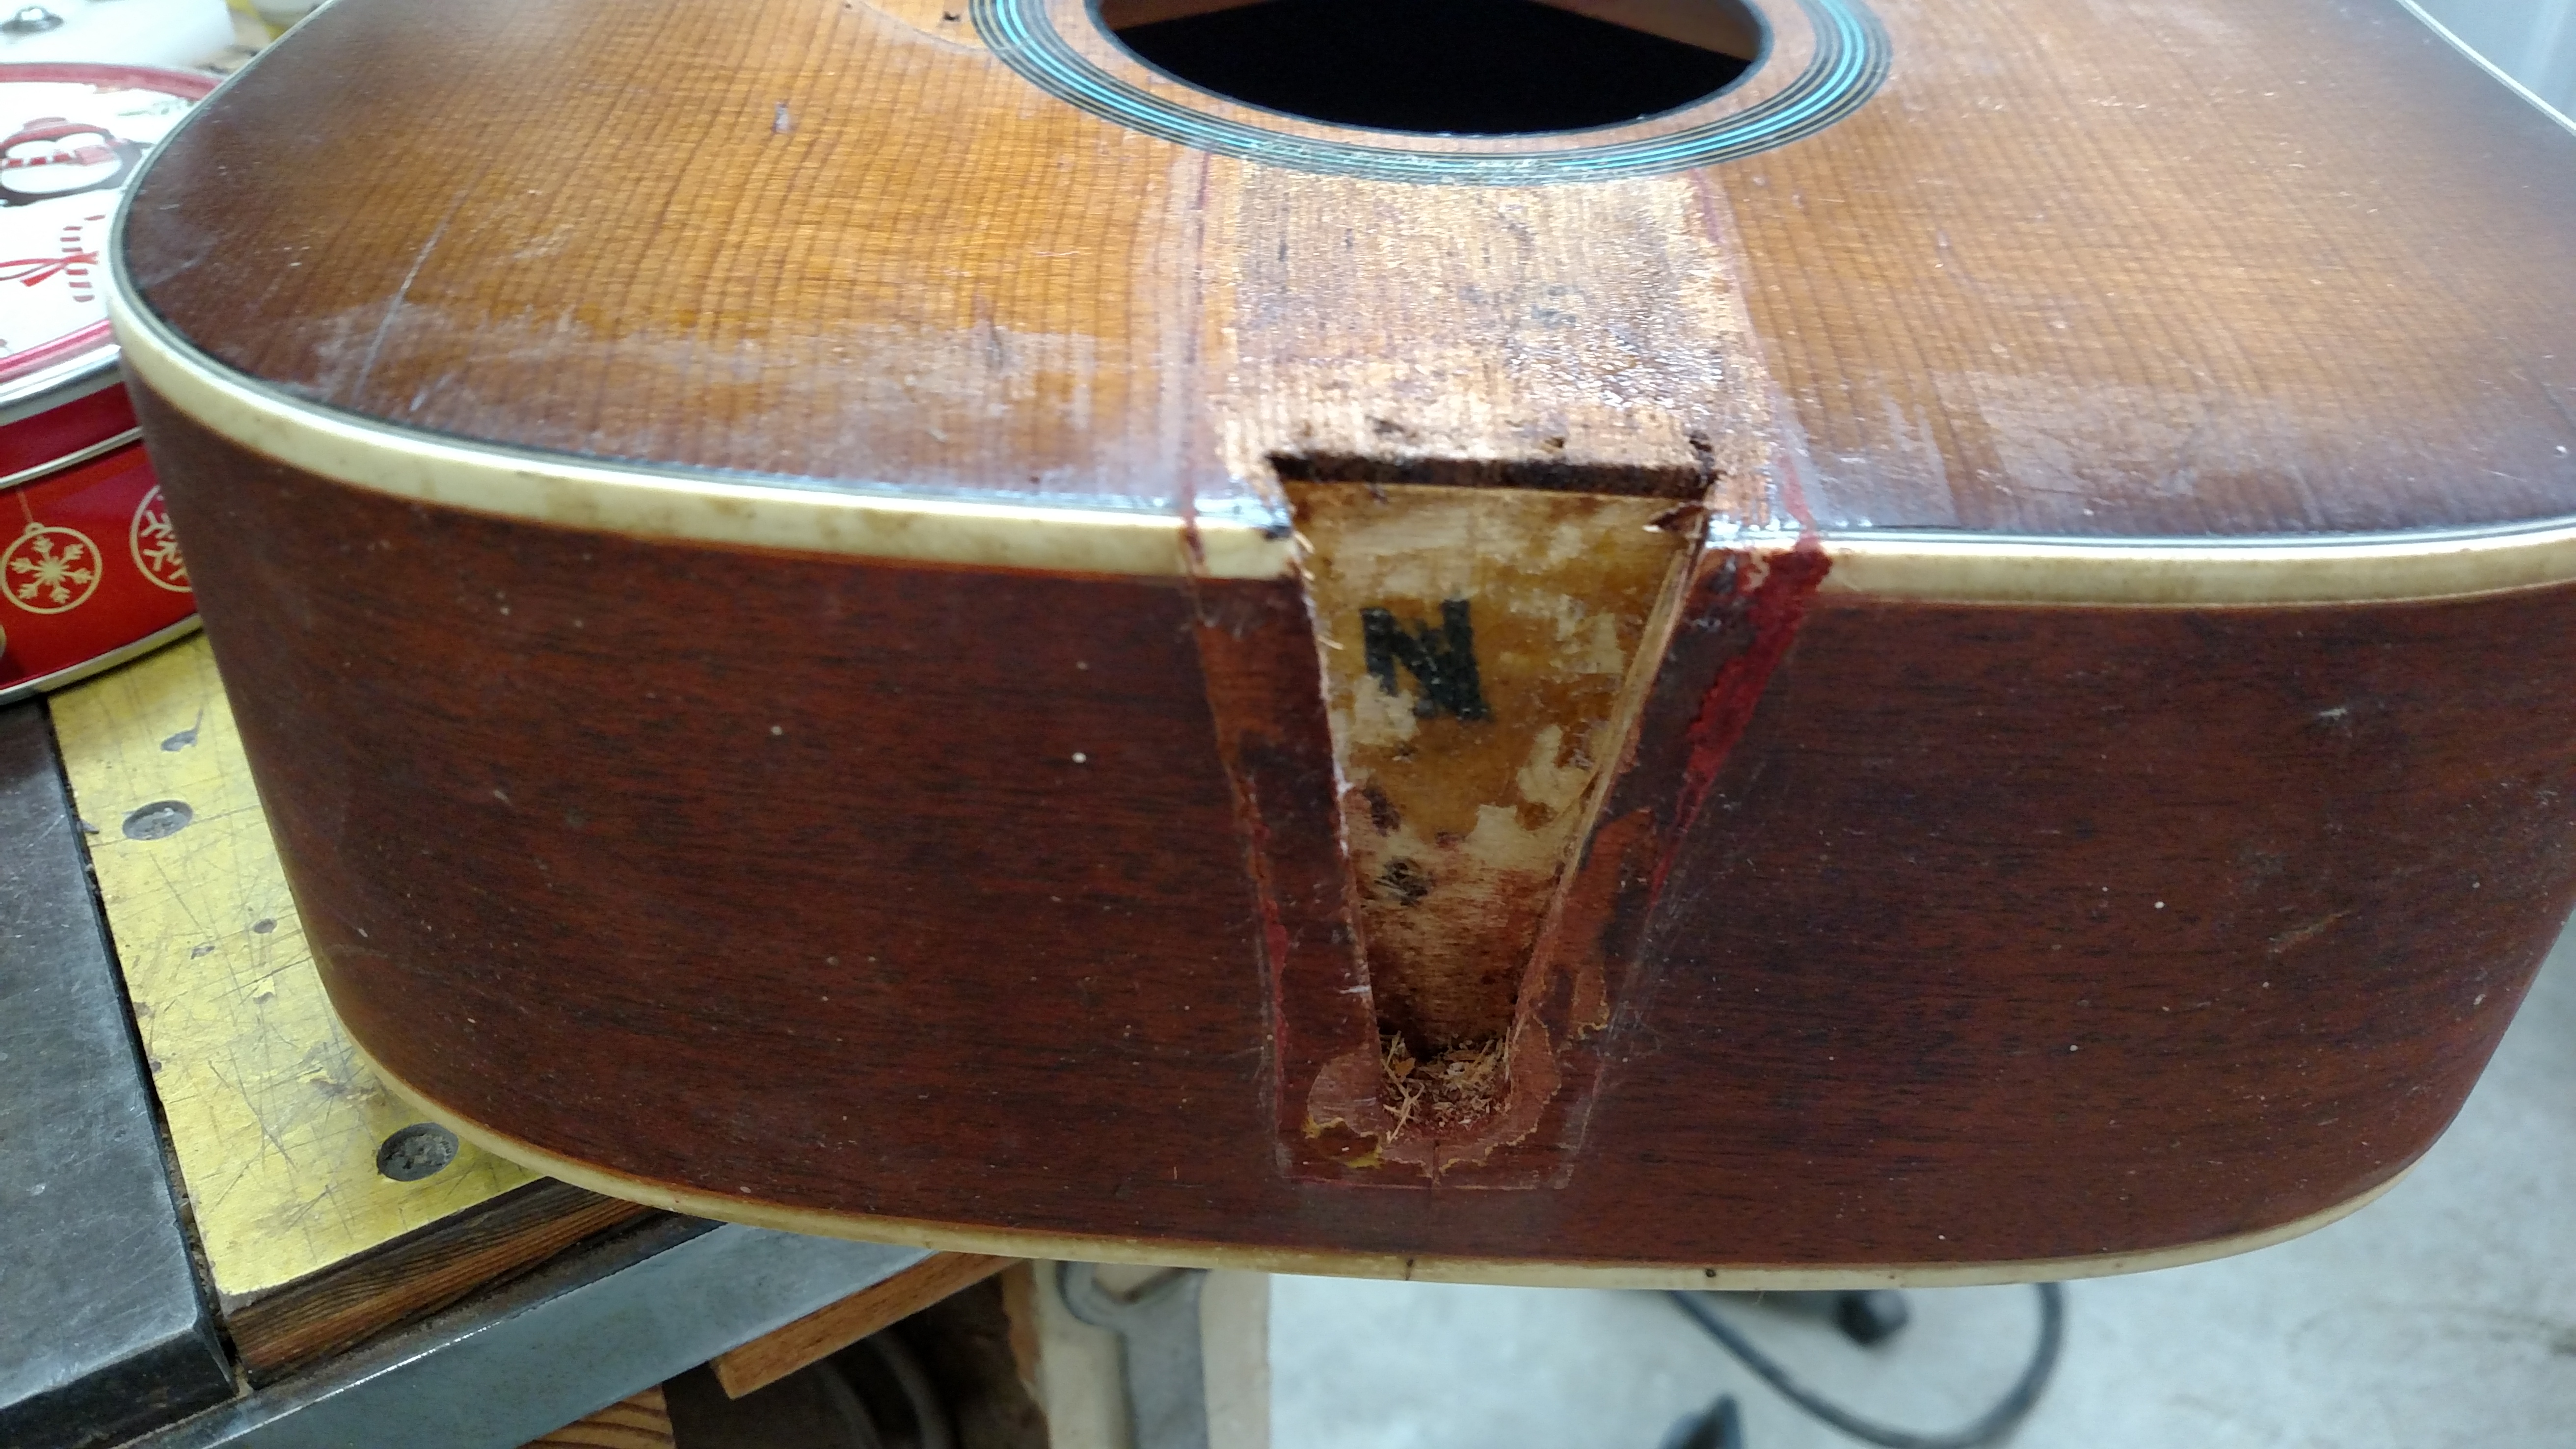
Above is a picture of the dovetail cavity. It has a letter “N” stamped in it. I don’t really know what this means, but I think they called some models an “N”. There was a lot of slack in the dovetail after I got the neck out. It had been shimmed at the factory and these thin wooden shims disintegrated when I disassembled the joint.
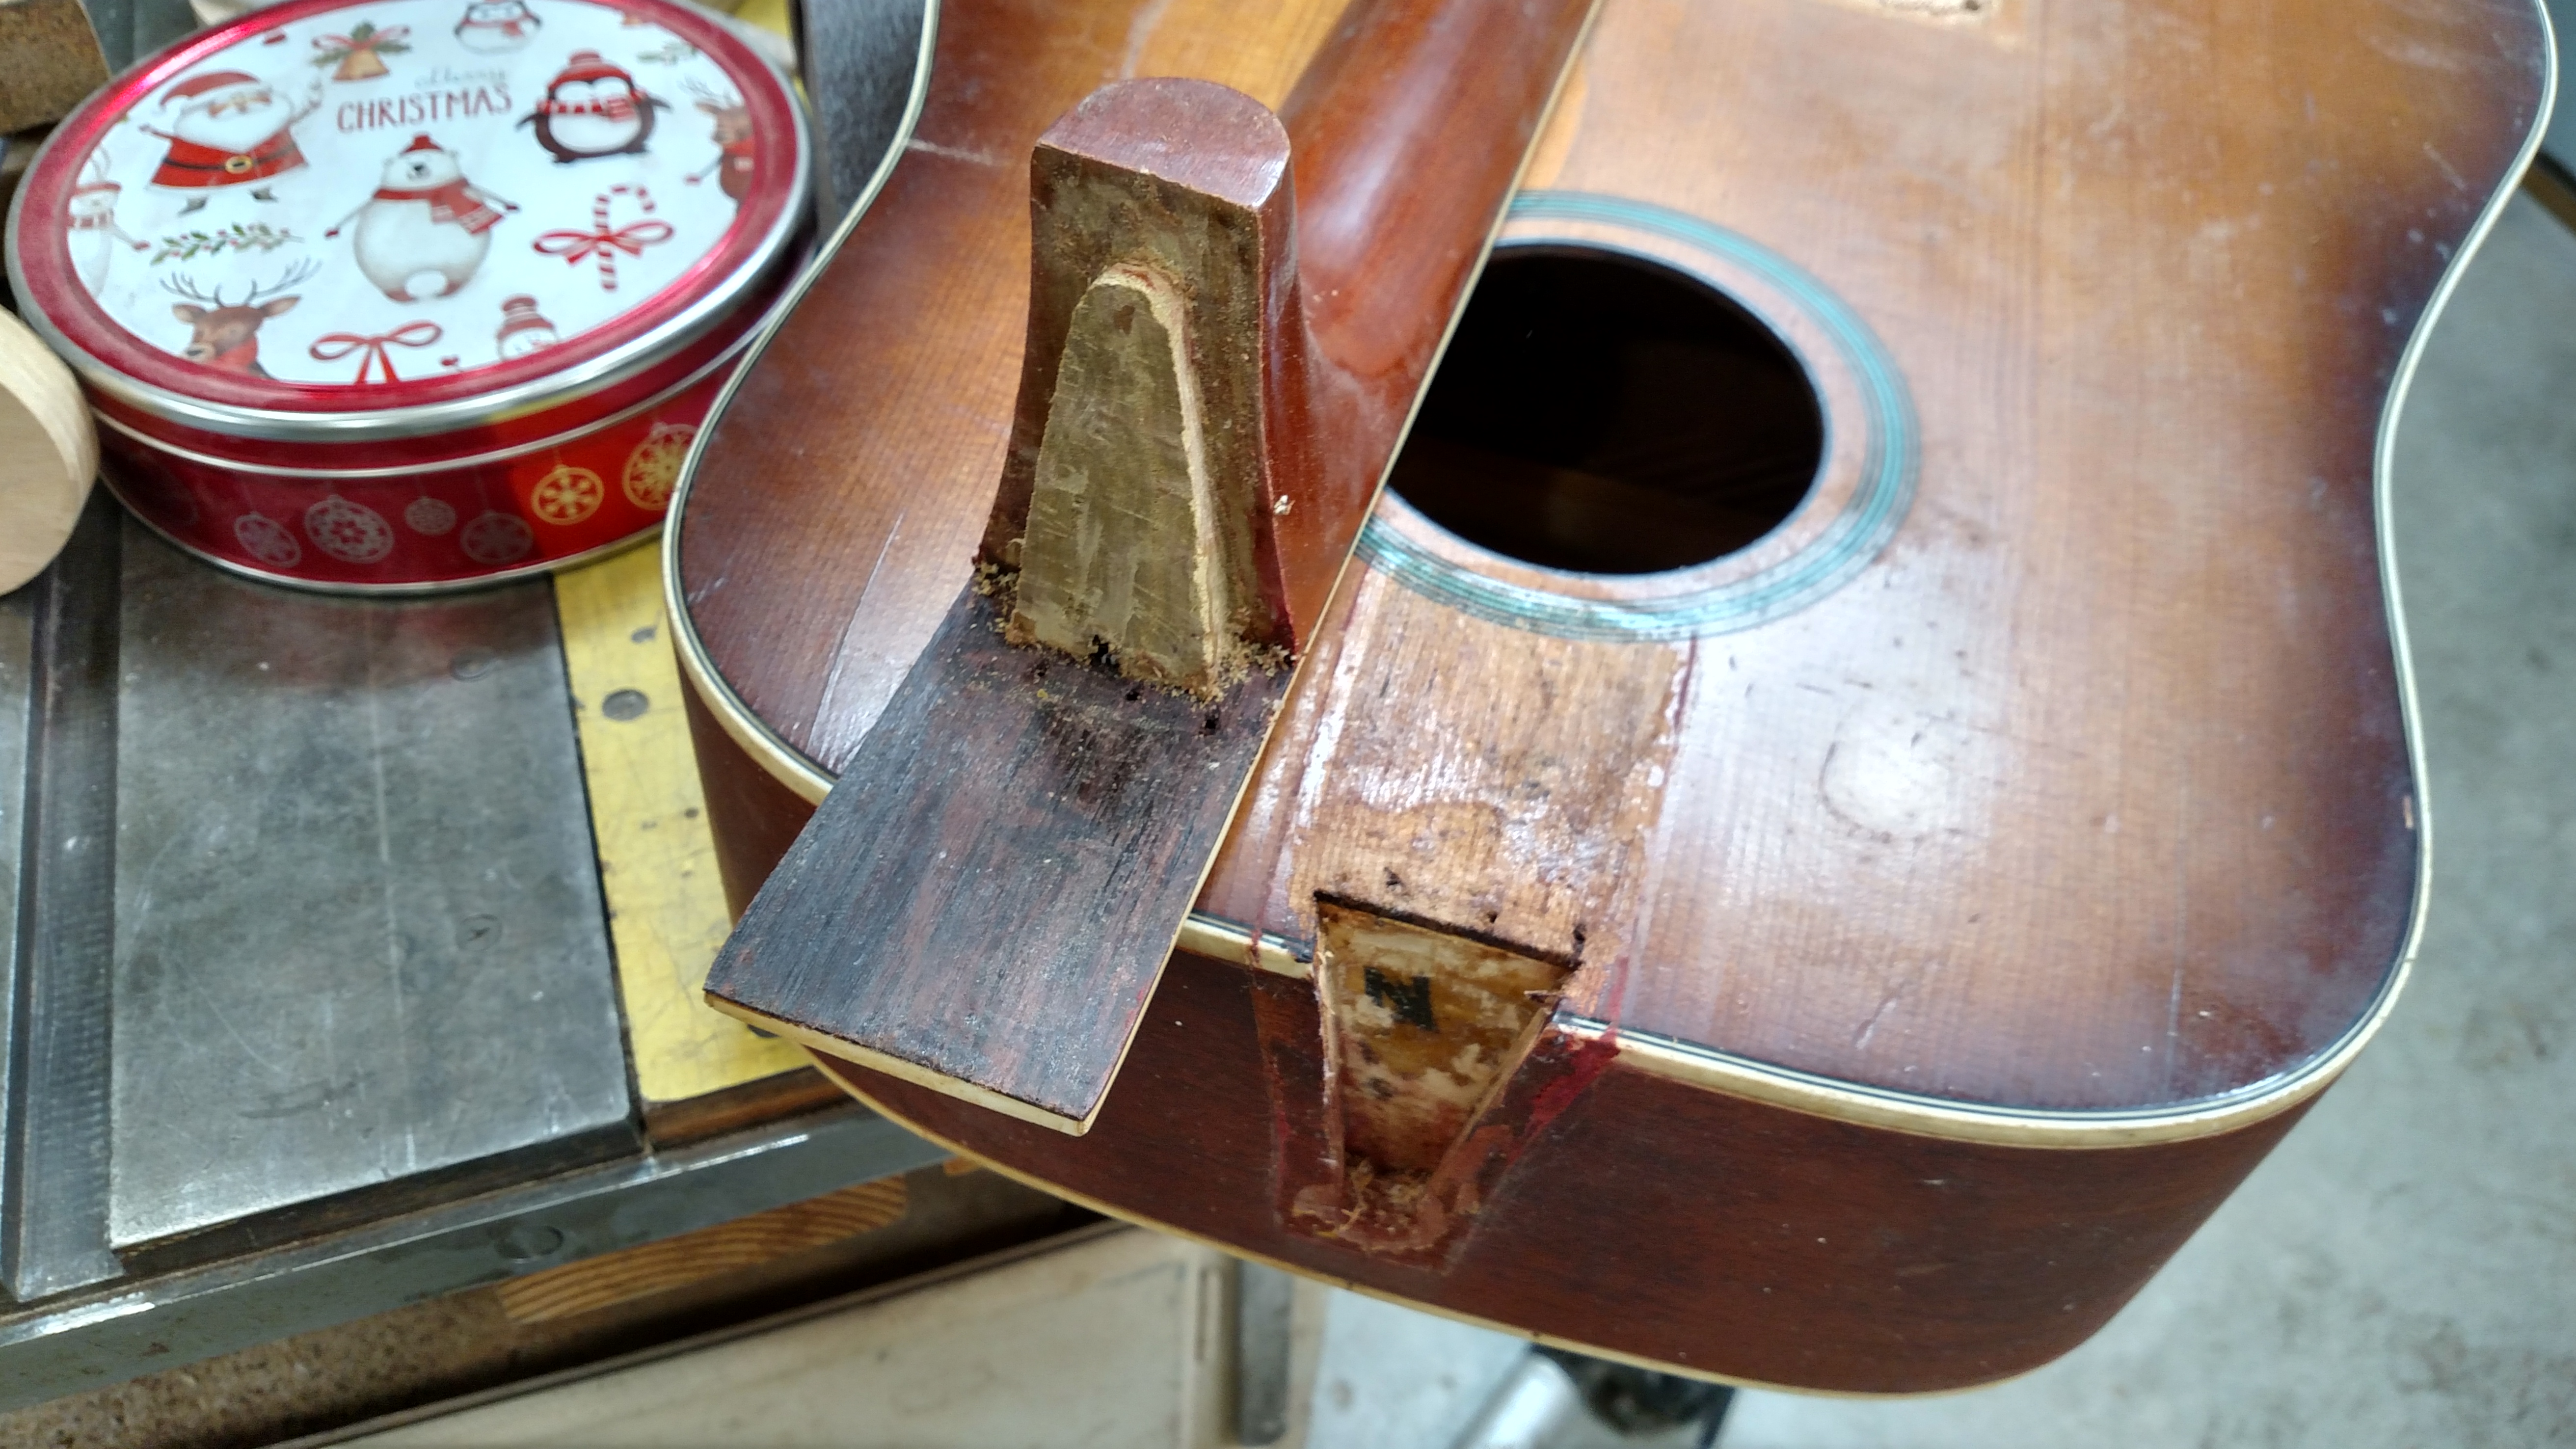
Above is a shot of the neck and body after I got them separated. You may be able to see the color of the poplar in the neck. This poplar can be found in a lot of the older cheaper guitars I’ve worked on through the years. A lot of neck blocks and kerfed linings were poplar in these old guitars. Some (not all) of the old upright Kay Basses I’ve seen had poplar necks in them. Most of the poplar guitar necks I’ve seen were thick and bulky feeling. Maybe they thought this wood wasn’t very strong. I think the poplar wood is just as strong as mahogany and nearly as stable. Maybe the rising price of mahogany these days will bring back some poplar necks in some new guitars. Locally grown poplar can still be found for a reasonable price. The lack of an adjustable truss rod was the weakness in these old guitars. A lot of these poplar necks either had a steel non-adjustable bar or had no reinforcement at all. It is not unusual to see one of these old guitars with a severe bow in the neck that pretty much makes them unplayable. That is one reason I was attracted to this guitar. It has the adjustable truss rod in the neck.
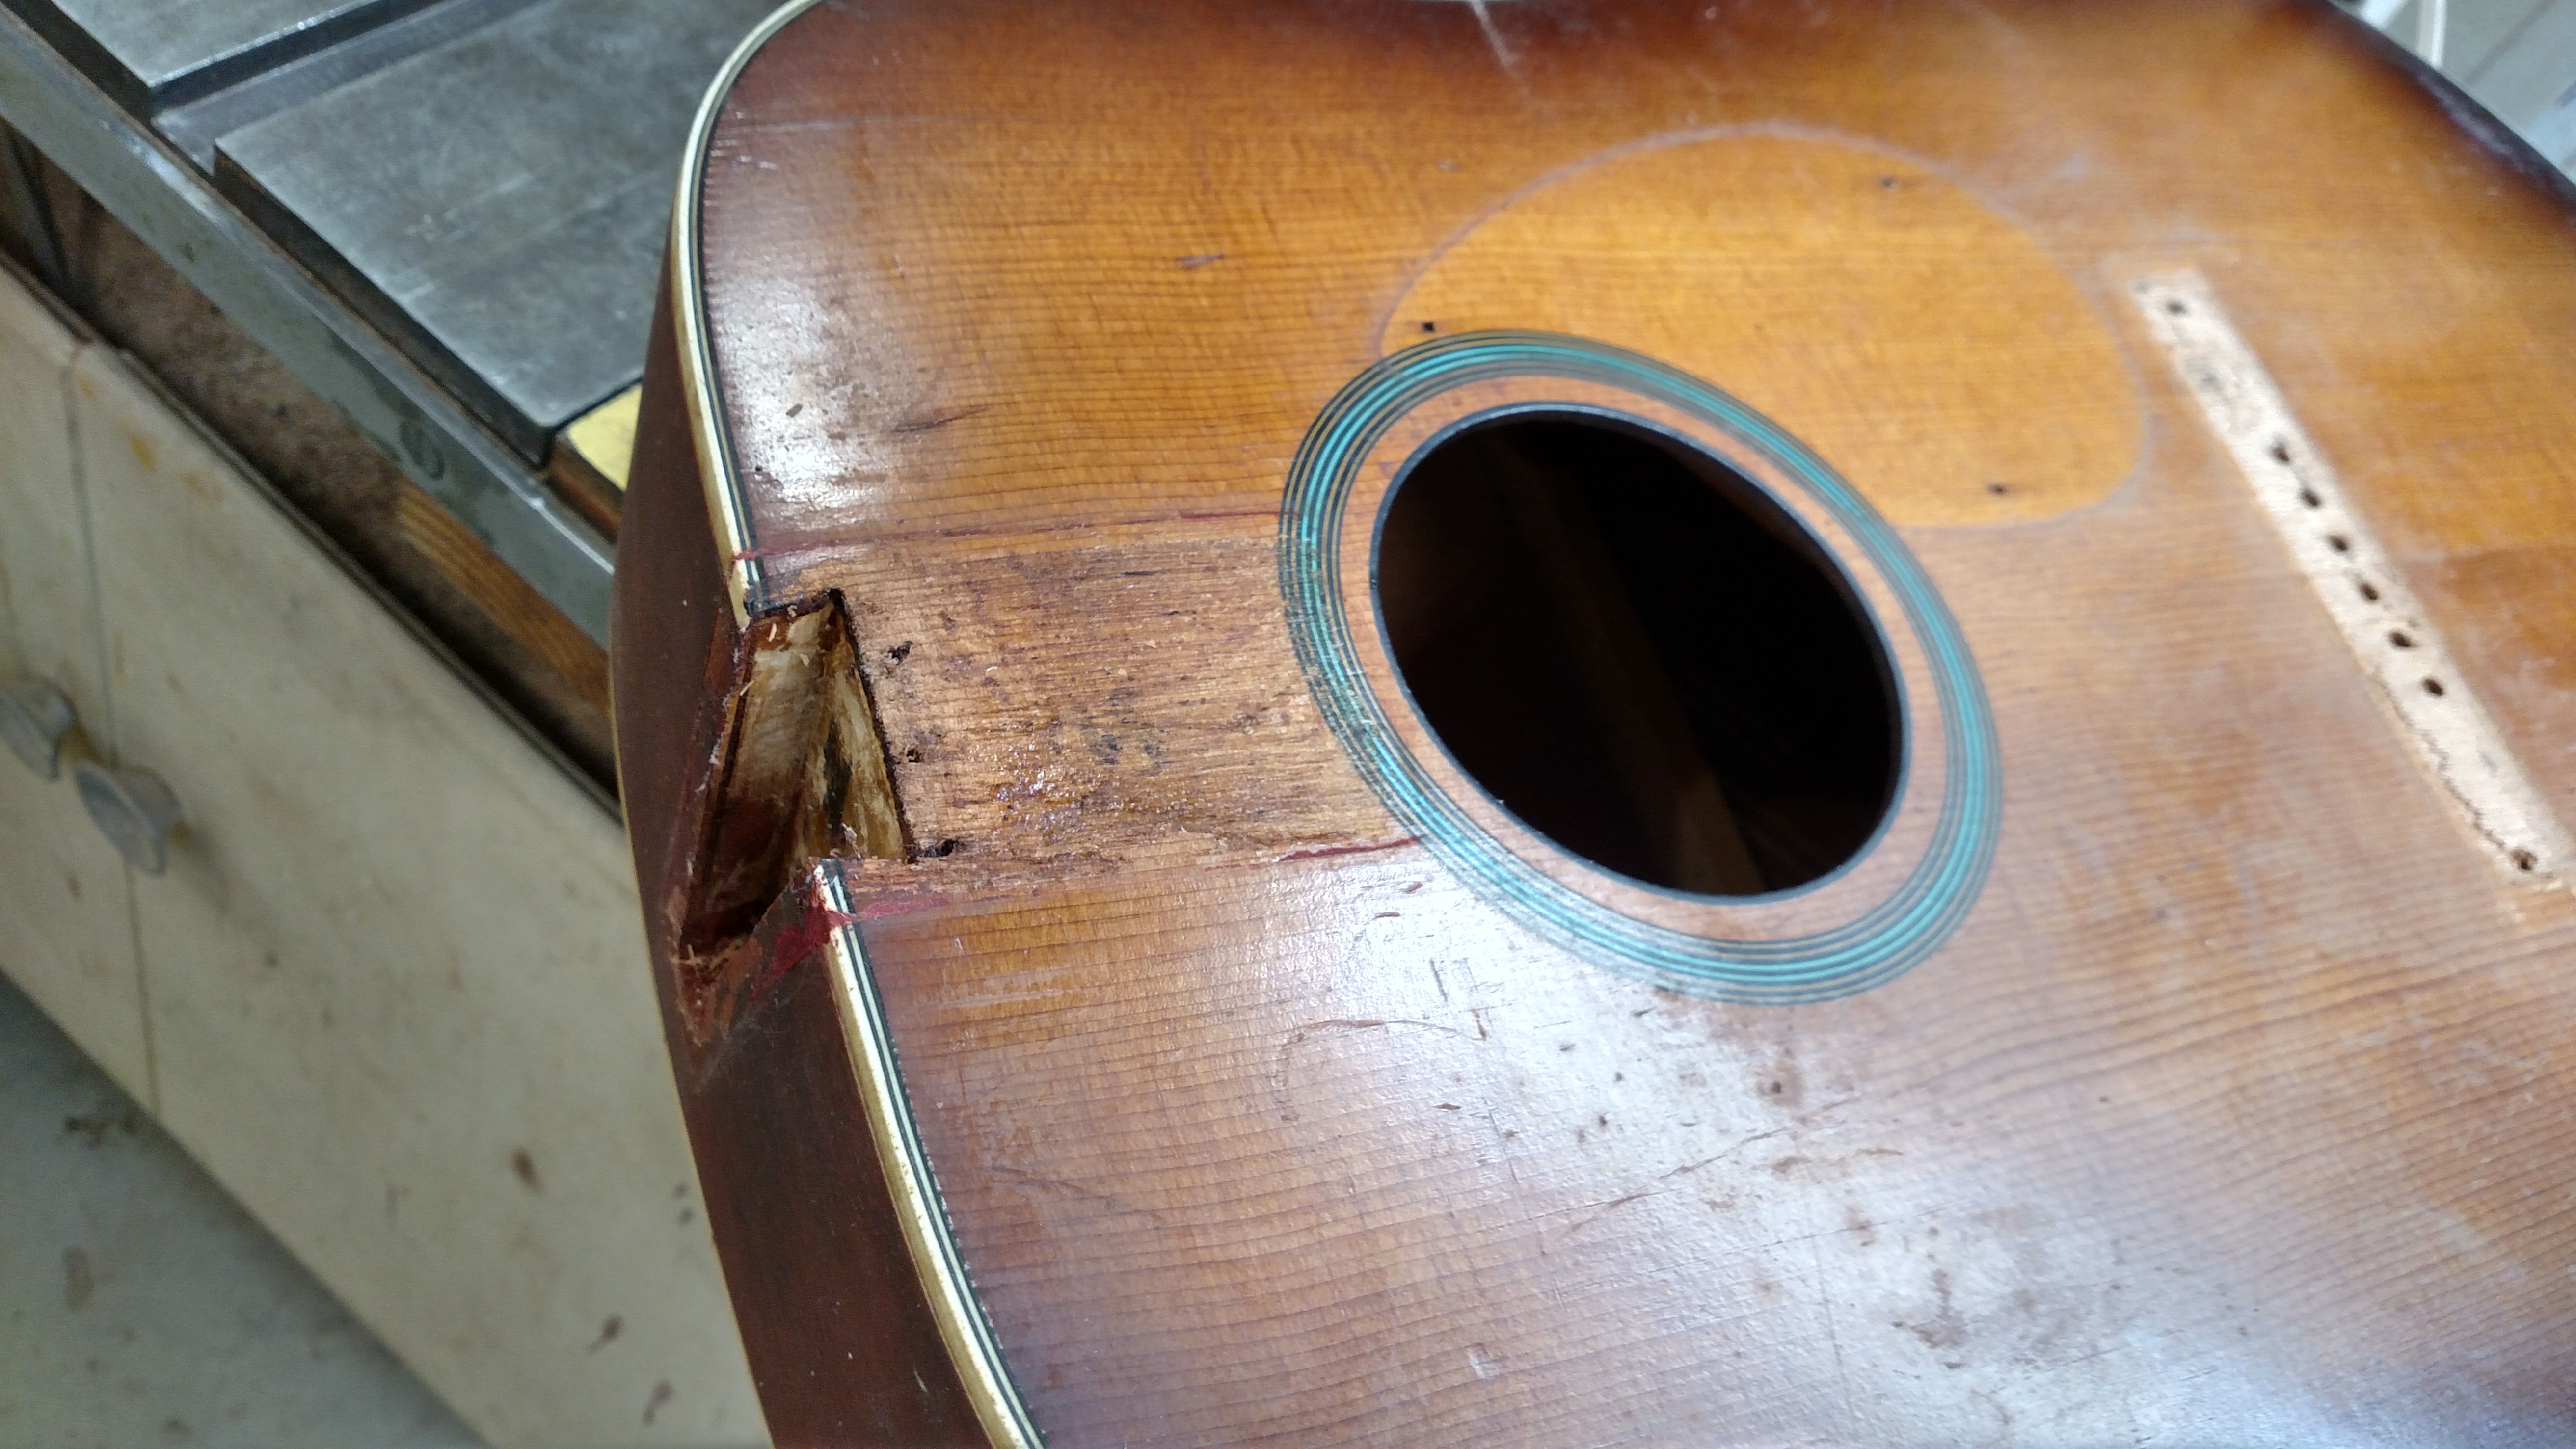
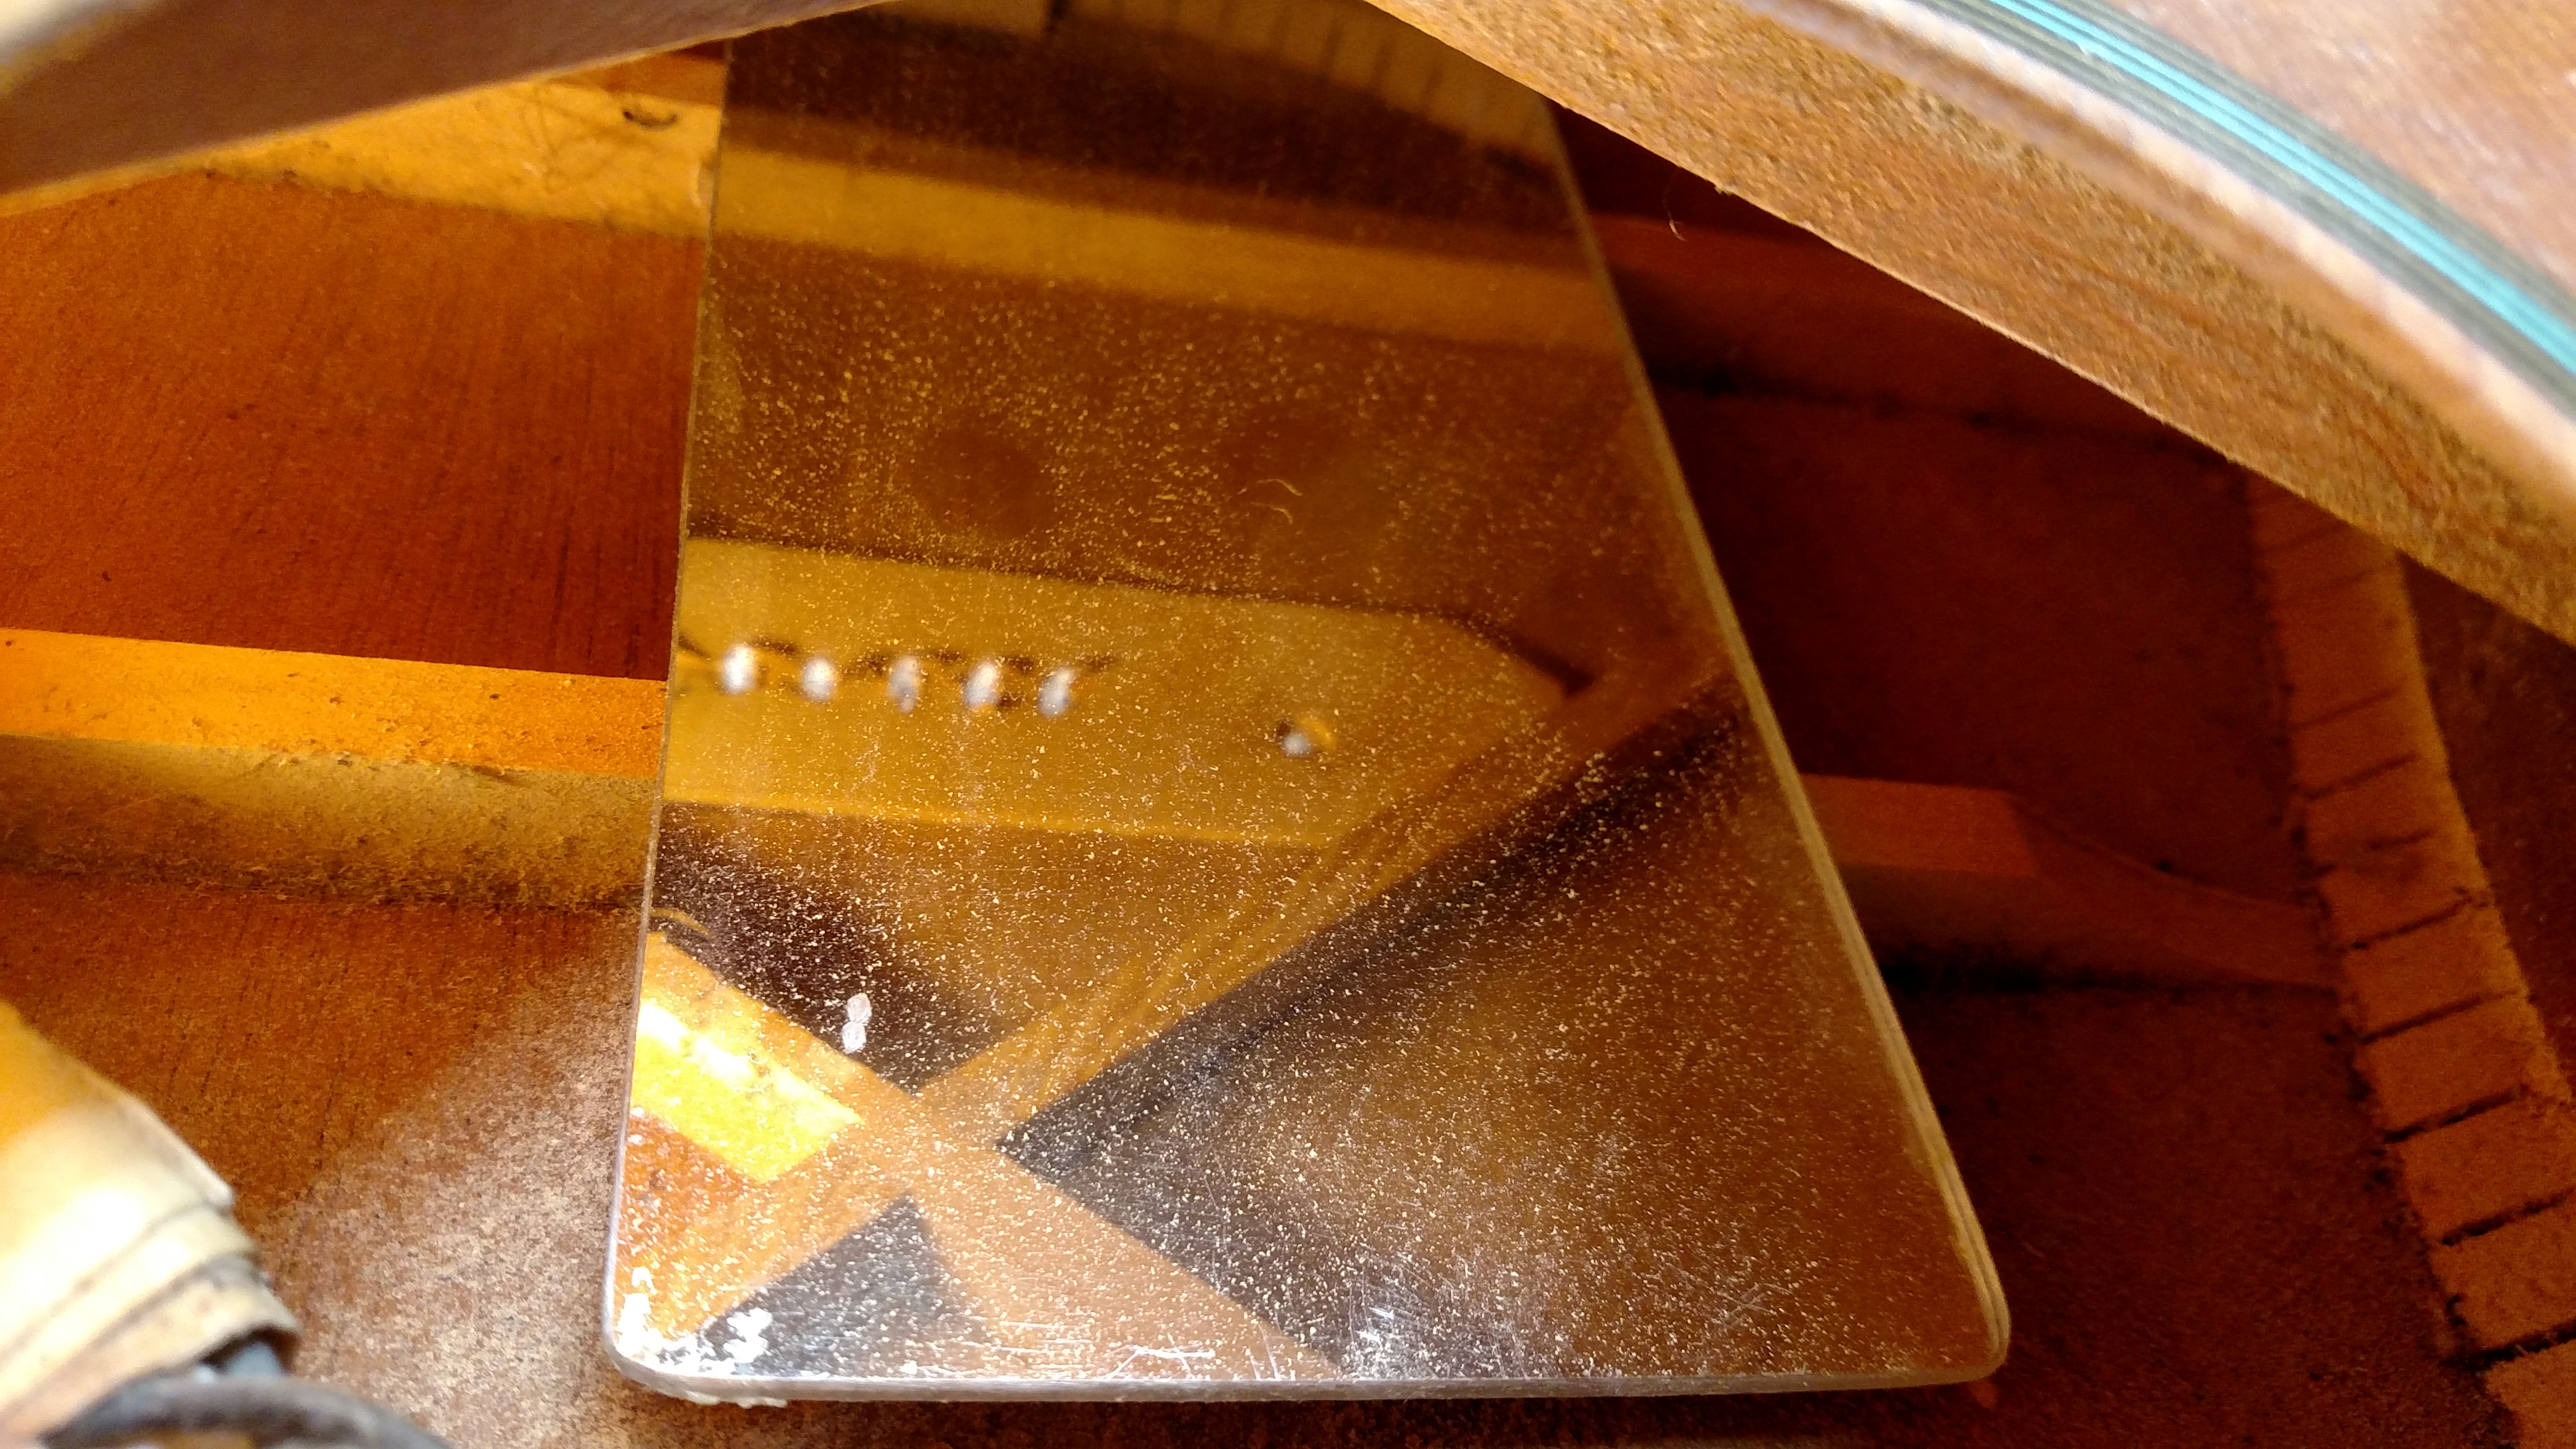
The above shot shows the black plastic piece that surrounded the sound hole. I used a drill and a round sanding drum with coarse sandpaper to enlarge the sound hole. Maybe you can see the difference in the photo below.
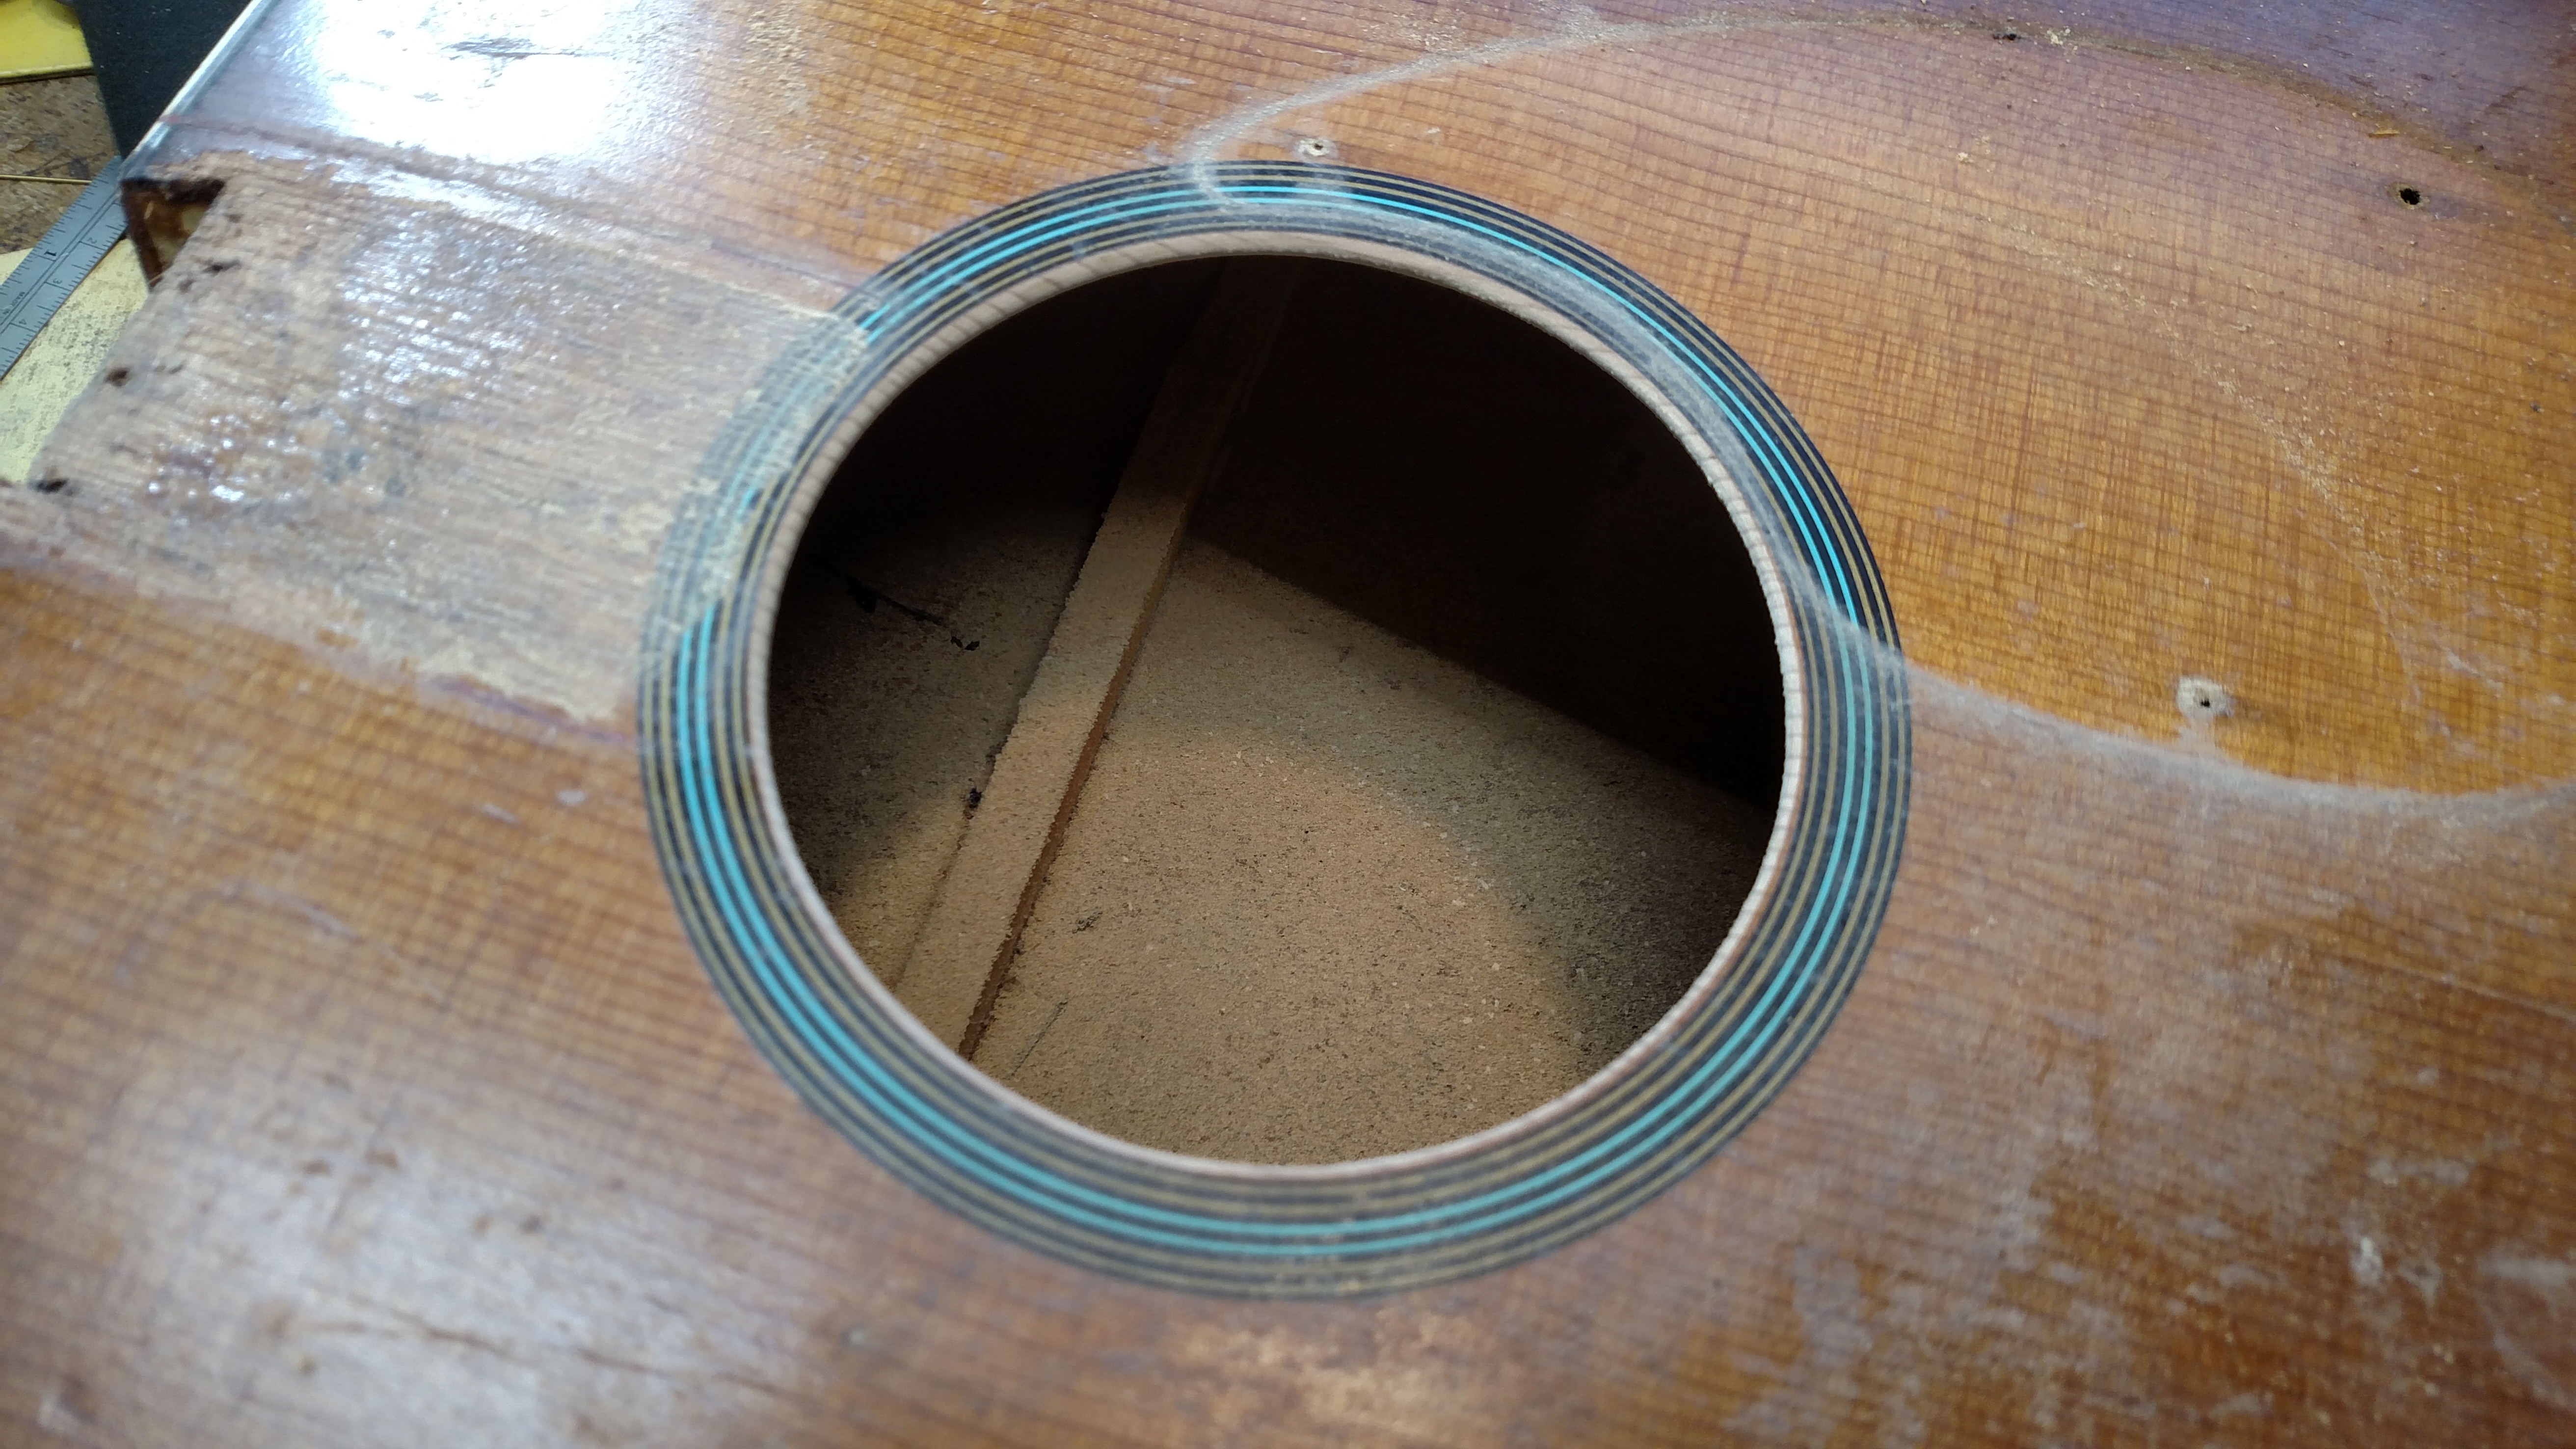
The purpose of enlarging this hole is twofold. It enhances the sound (in my opinion) and it makes it a little easier to work on the braces through this hole. I have some special home made chisels and planes and other tools that I use to work on these braces. It is a challenge to work on these braces through the sound hole. The final size on this sound hole is around 3-7/8 inches. This is slightly smaller than Martin’s standard 4 inch sound holes. I left it that way because of the position of the rosette. I felt it would look strange if I enlarged it any more.
Above is a shot of these large square braces. They were strong but I believe they were so big that they hindered the sound that the guitar produced. They didn’t take any pains in shaping these braces. These guitars were not expensive and I’m sure the factory couldn’t spend a lot of time shaping these braces.
Another shot of these braces. I spent quite a while removing wood from these braces. I rounded them off and tried to make them look more like a traditional Martin style Dreadnought. I also removed some wood from the back braces.
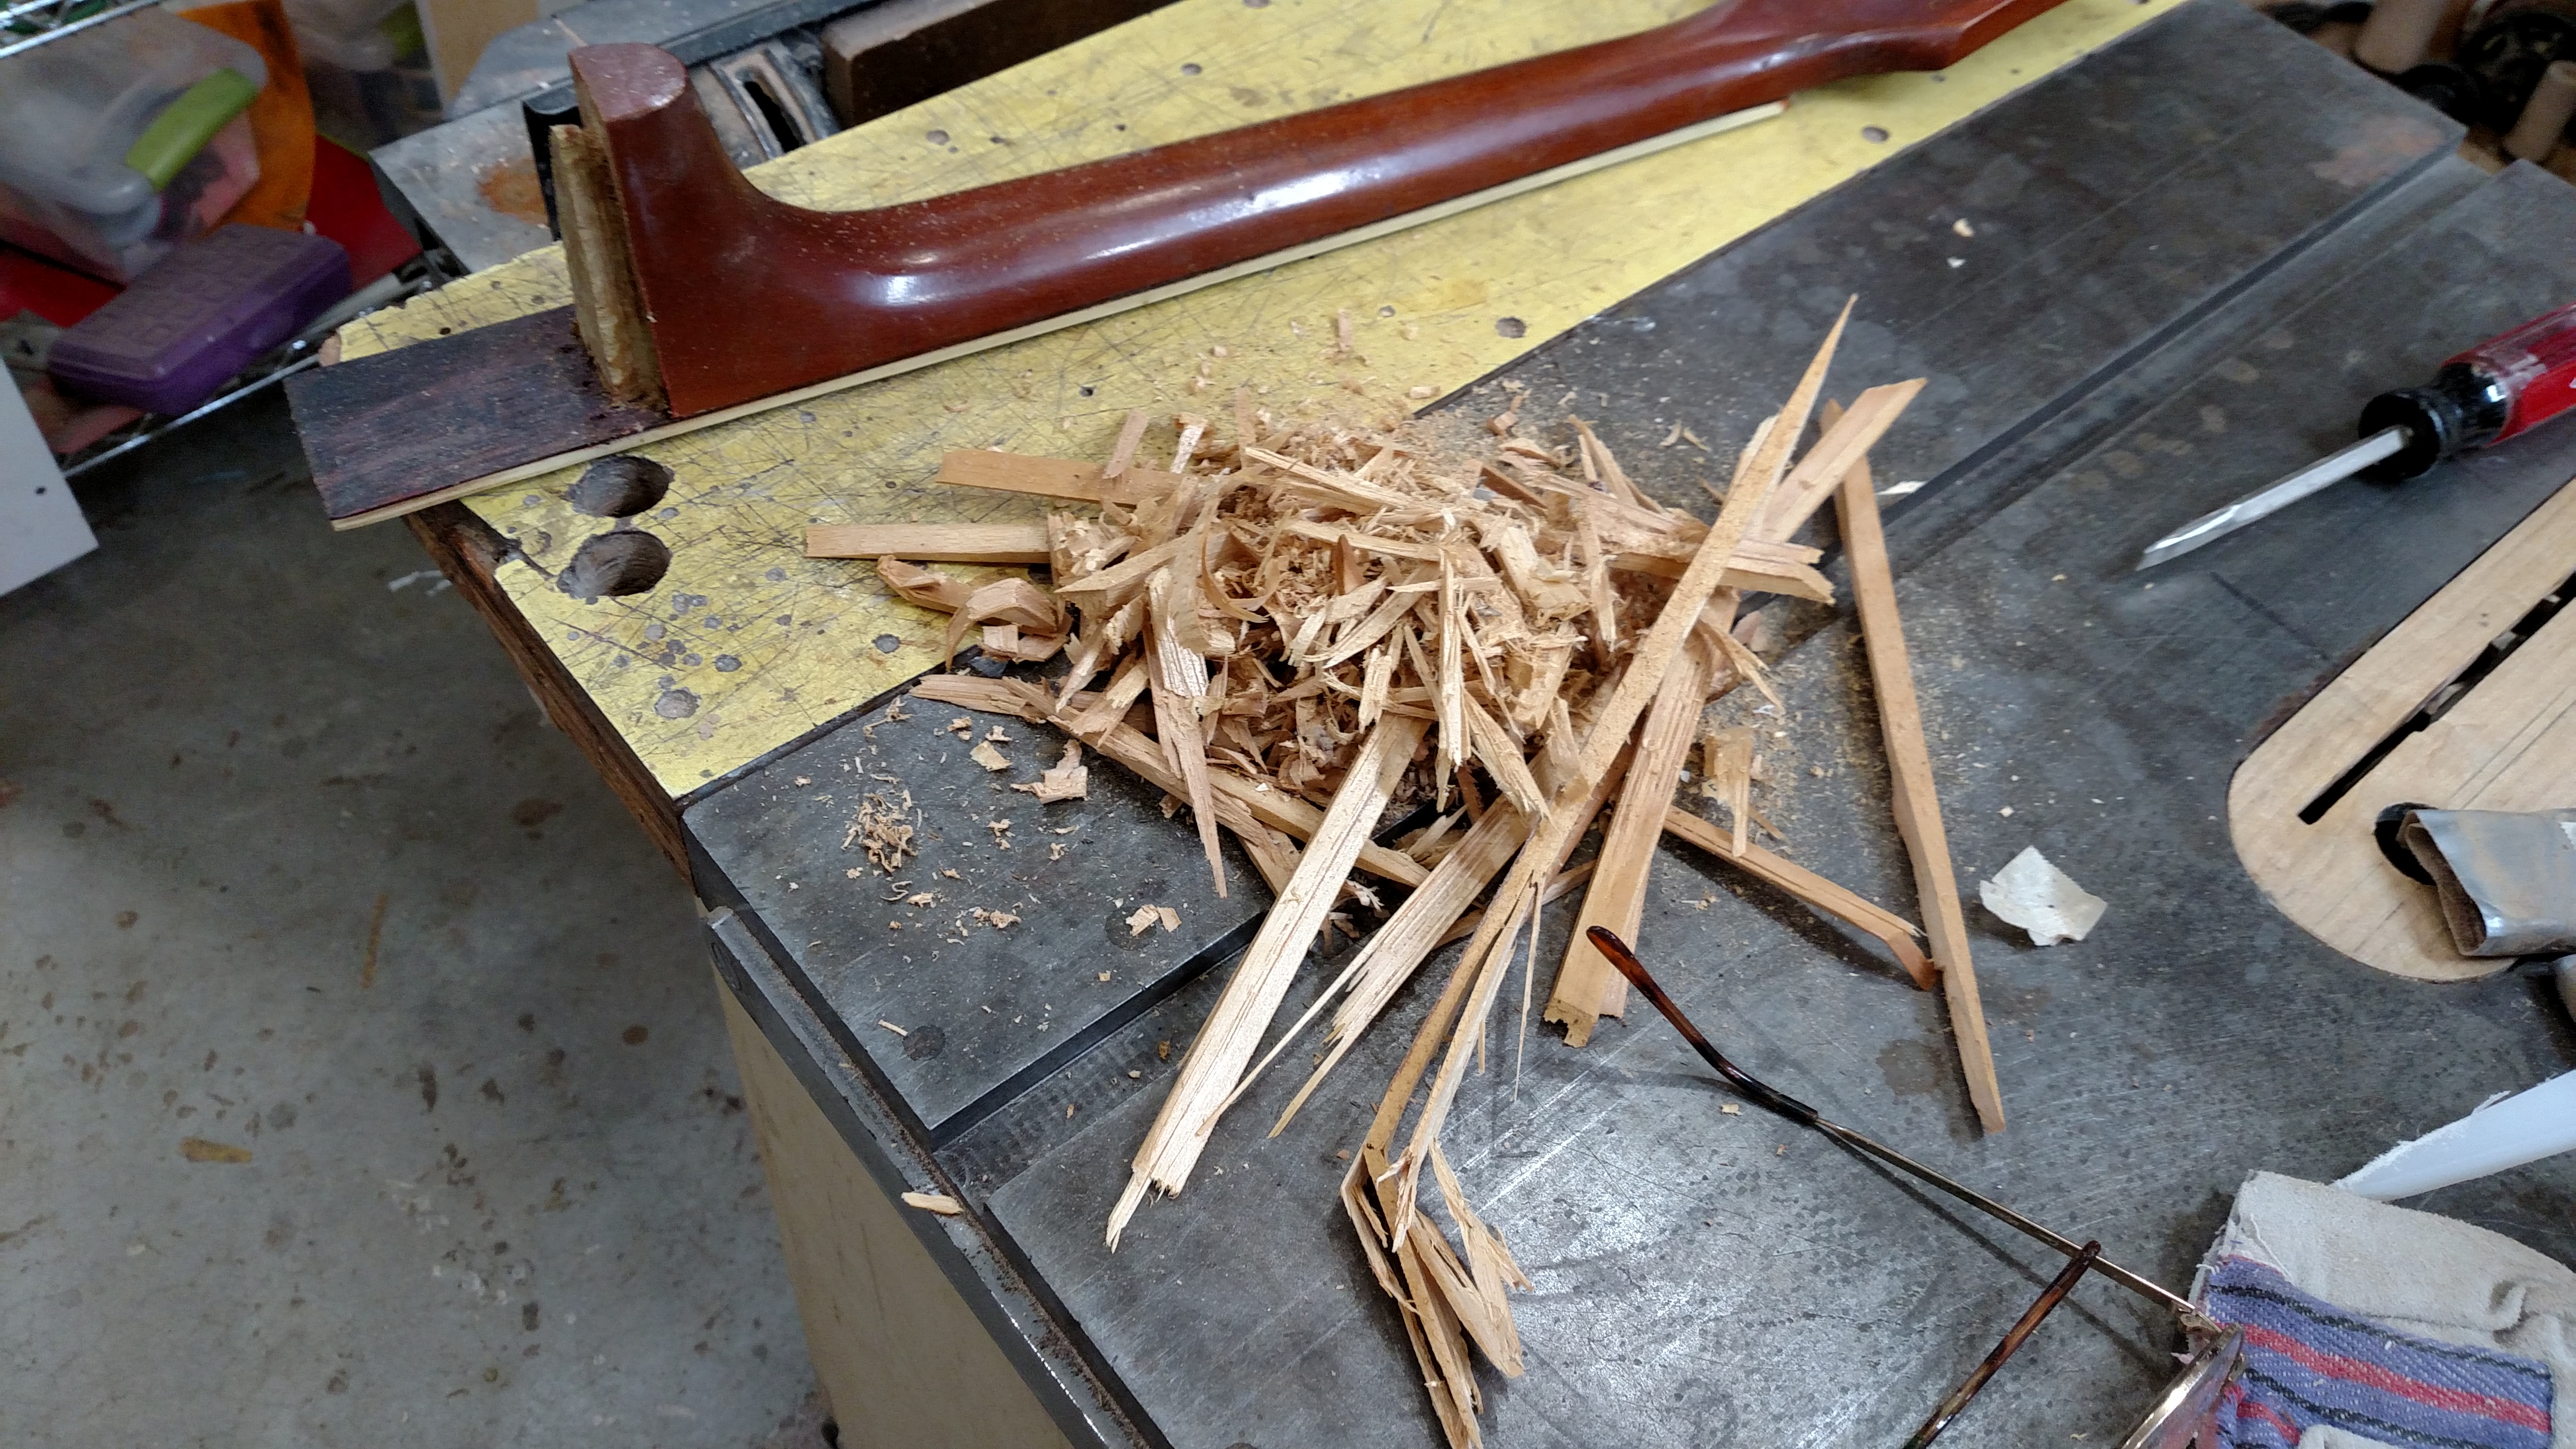
Here is the pile of wood I removed from the inside of this guitar body. This is a lot of excess wood. These braces were spruce and appeared to be pretty good quality wood. One thing I’ve noticed through the years about guitar braces is that they always seem to have an excessive amount of grain runout in them. I don’t think these makers tried to split the wood out of a billet to make it stronger. The old time wheelwrights always split the wood in the hickory spokes to make the grain run straight to increase the strength. I think the guitar braces sound better and are stronger when the grain runs straight. I didn’t take any pictures of the braces after I worked on them. You will have to take my word that they were a lot lighter with rounded corners and more like a Martin Dreadnought when I got through with them. I left the old bridge plate in this body. It was attached well and I didn’t think it would hinder the sound. The chance of damaging the top when removing it is always present, too.
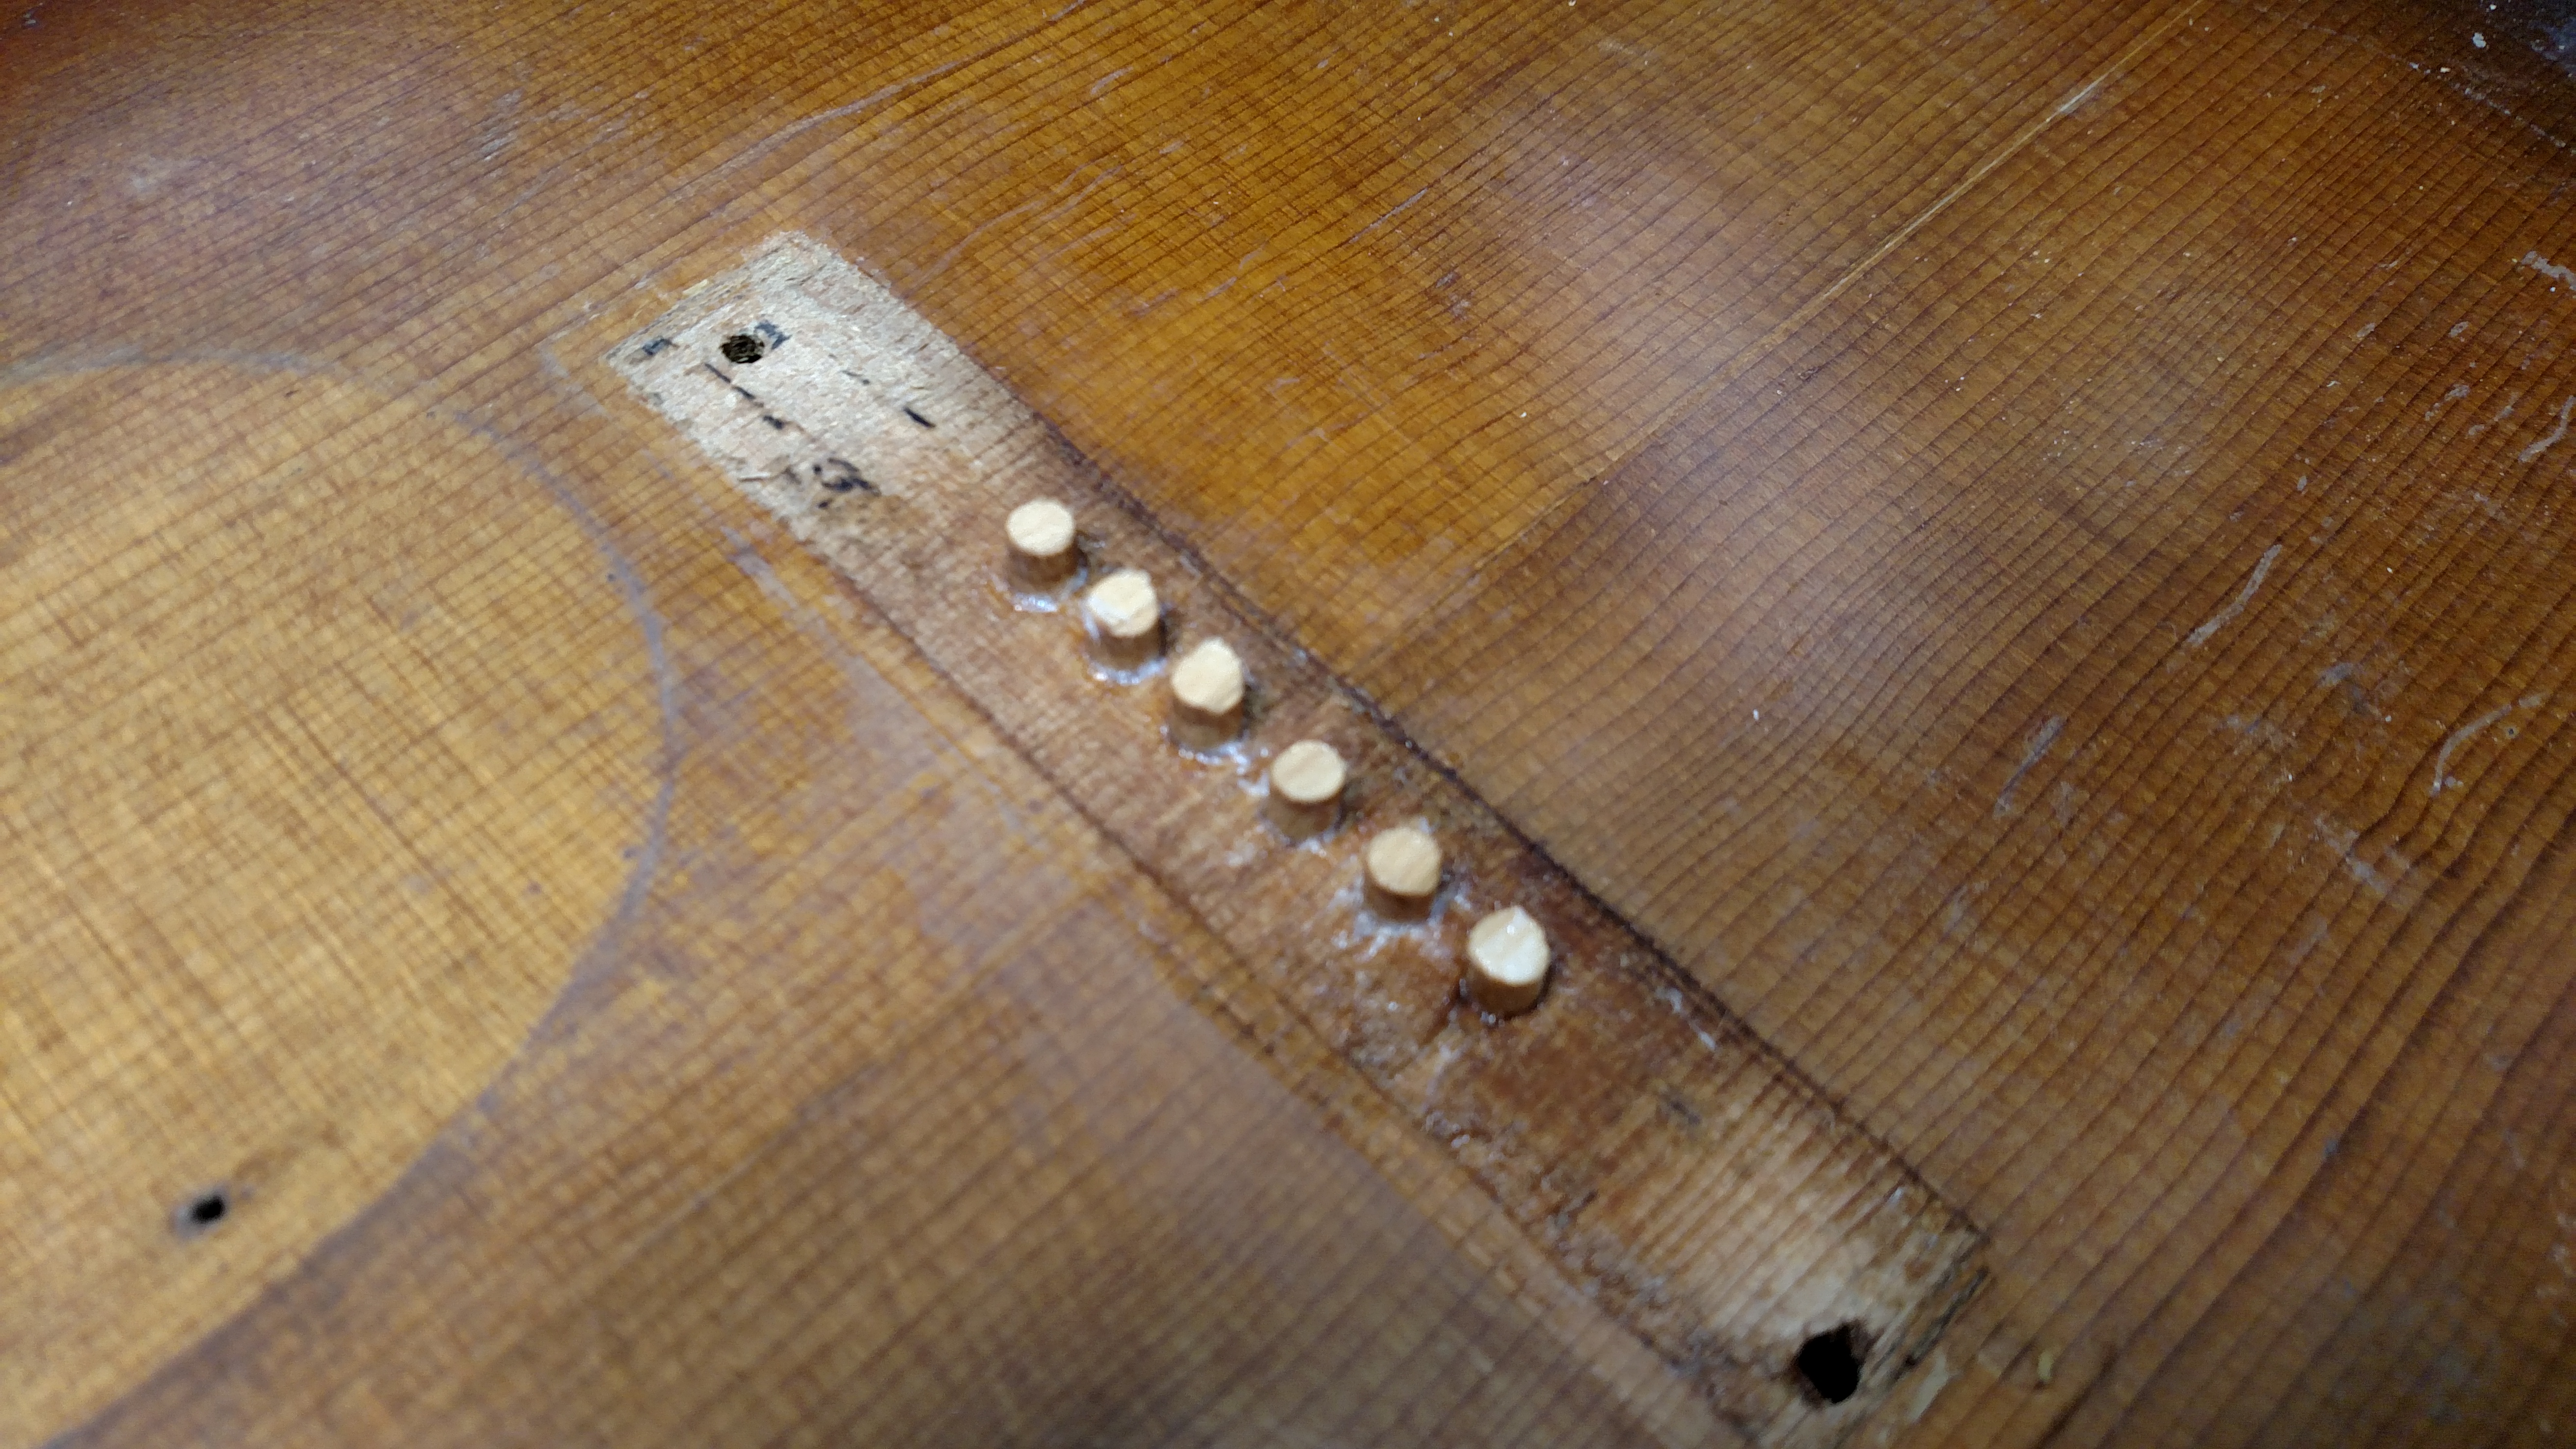
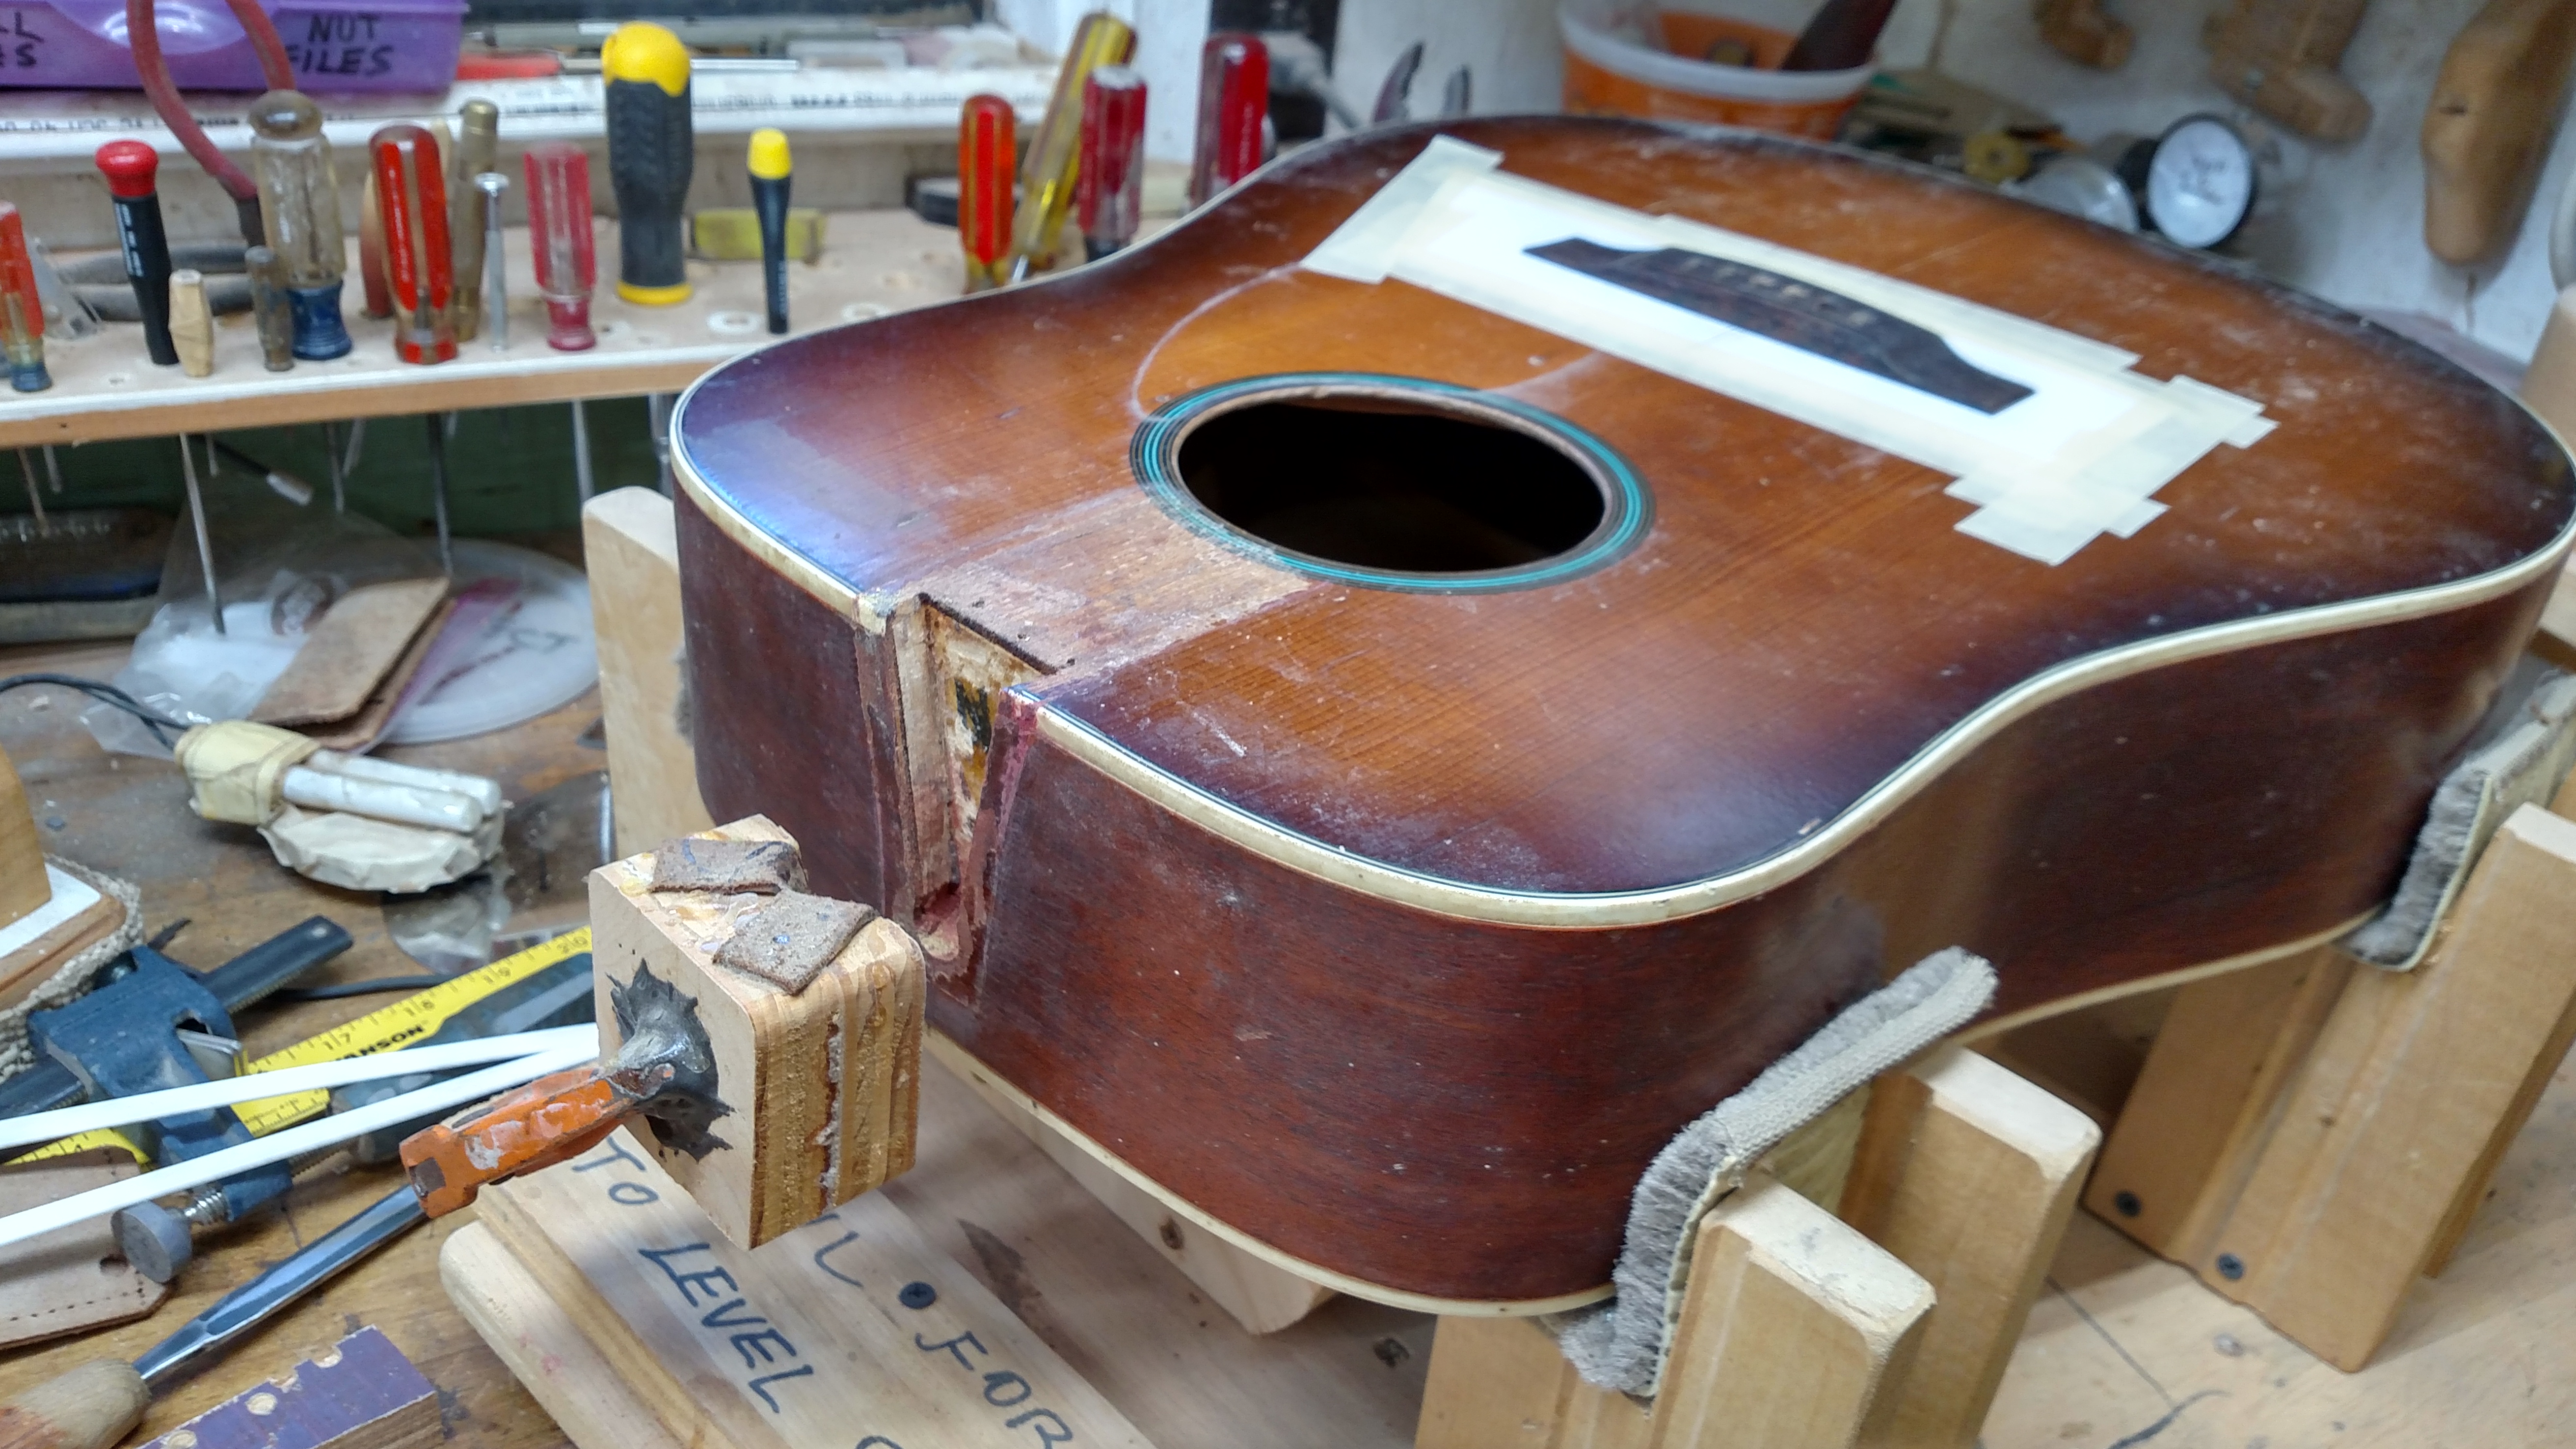
Since I planned to use a Martin style bridge, it would follow that the bridge pins would not be in exactly the same place. I had a Brazilian rosewood Martin take off bridge in my pile of parts and I decided to use it. I fabricated some maple plugs to fill the old bridge pin holes in the top and bridge plate. I glued them in and leveled them to match the contour of the top. I did not try to fill the old screw holes in the top. The Martin style bridge will cover them.
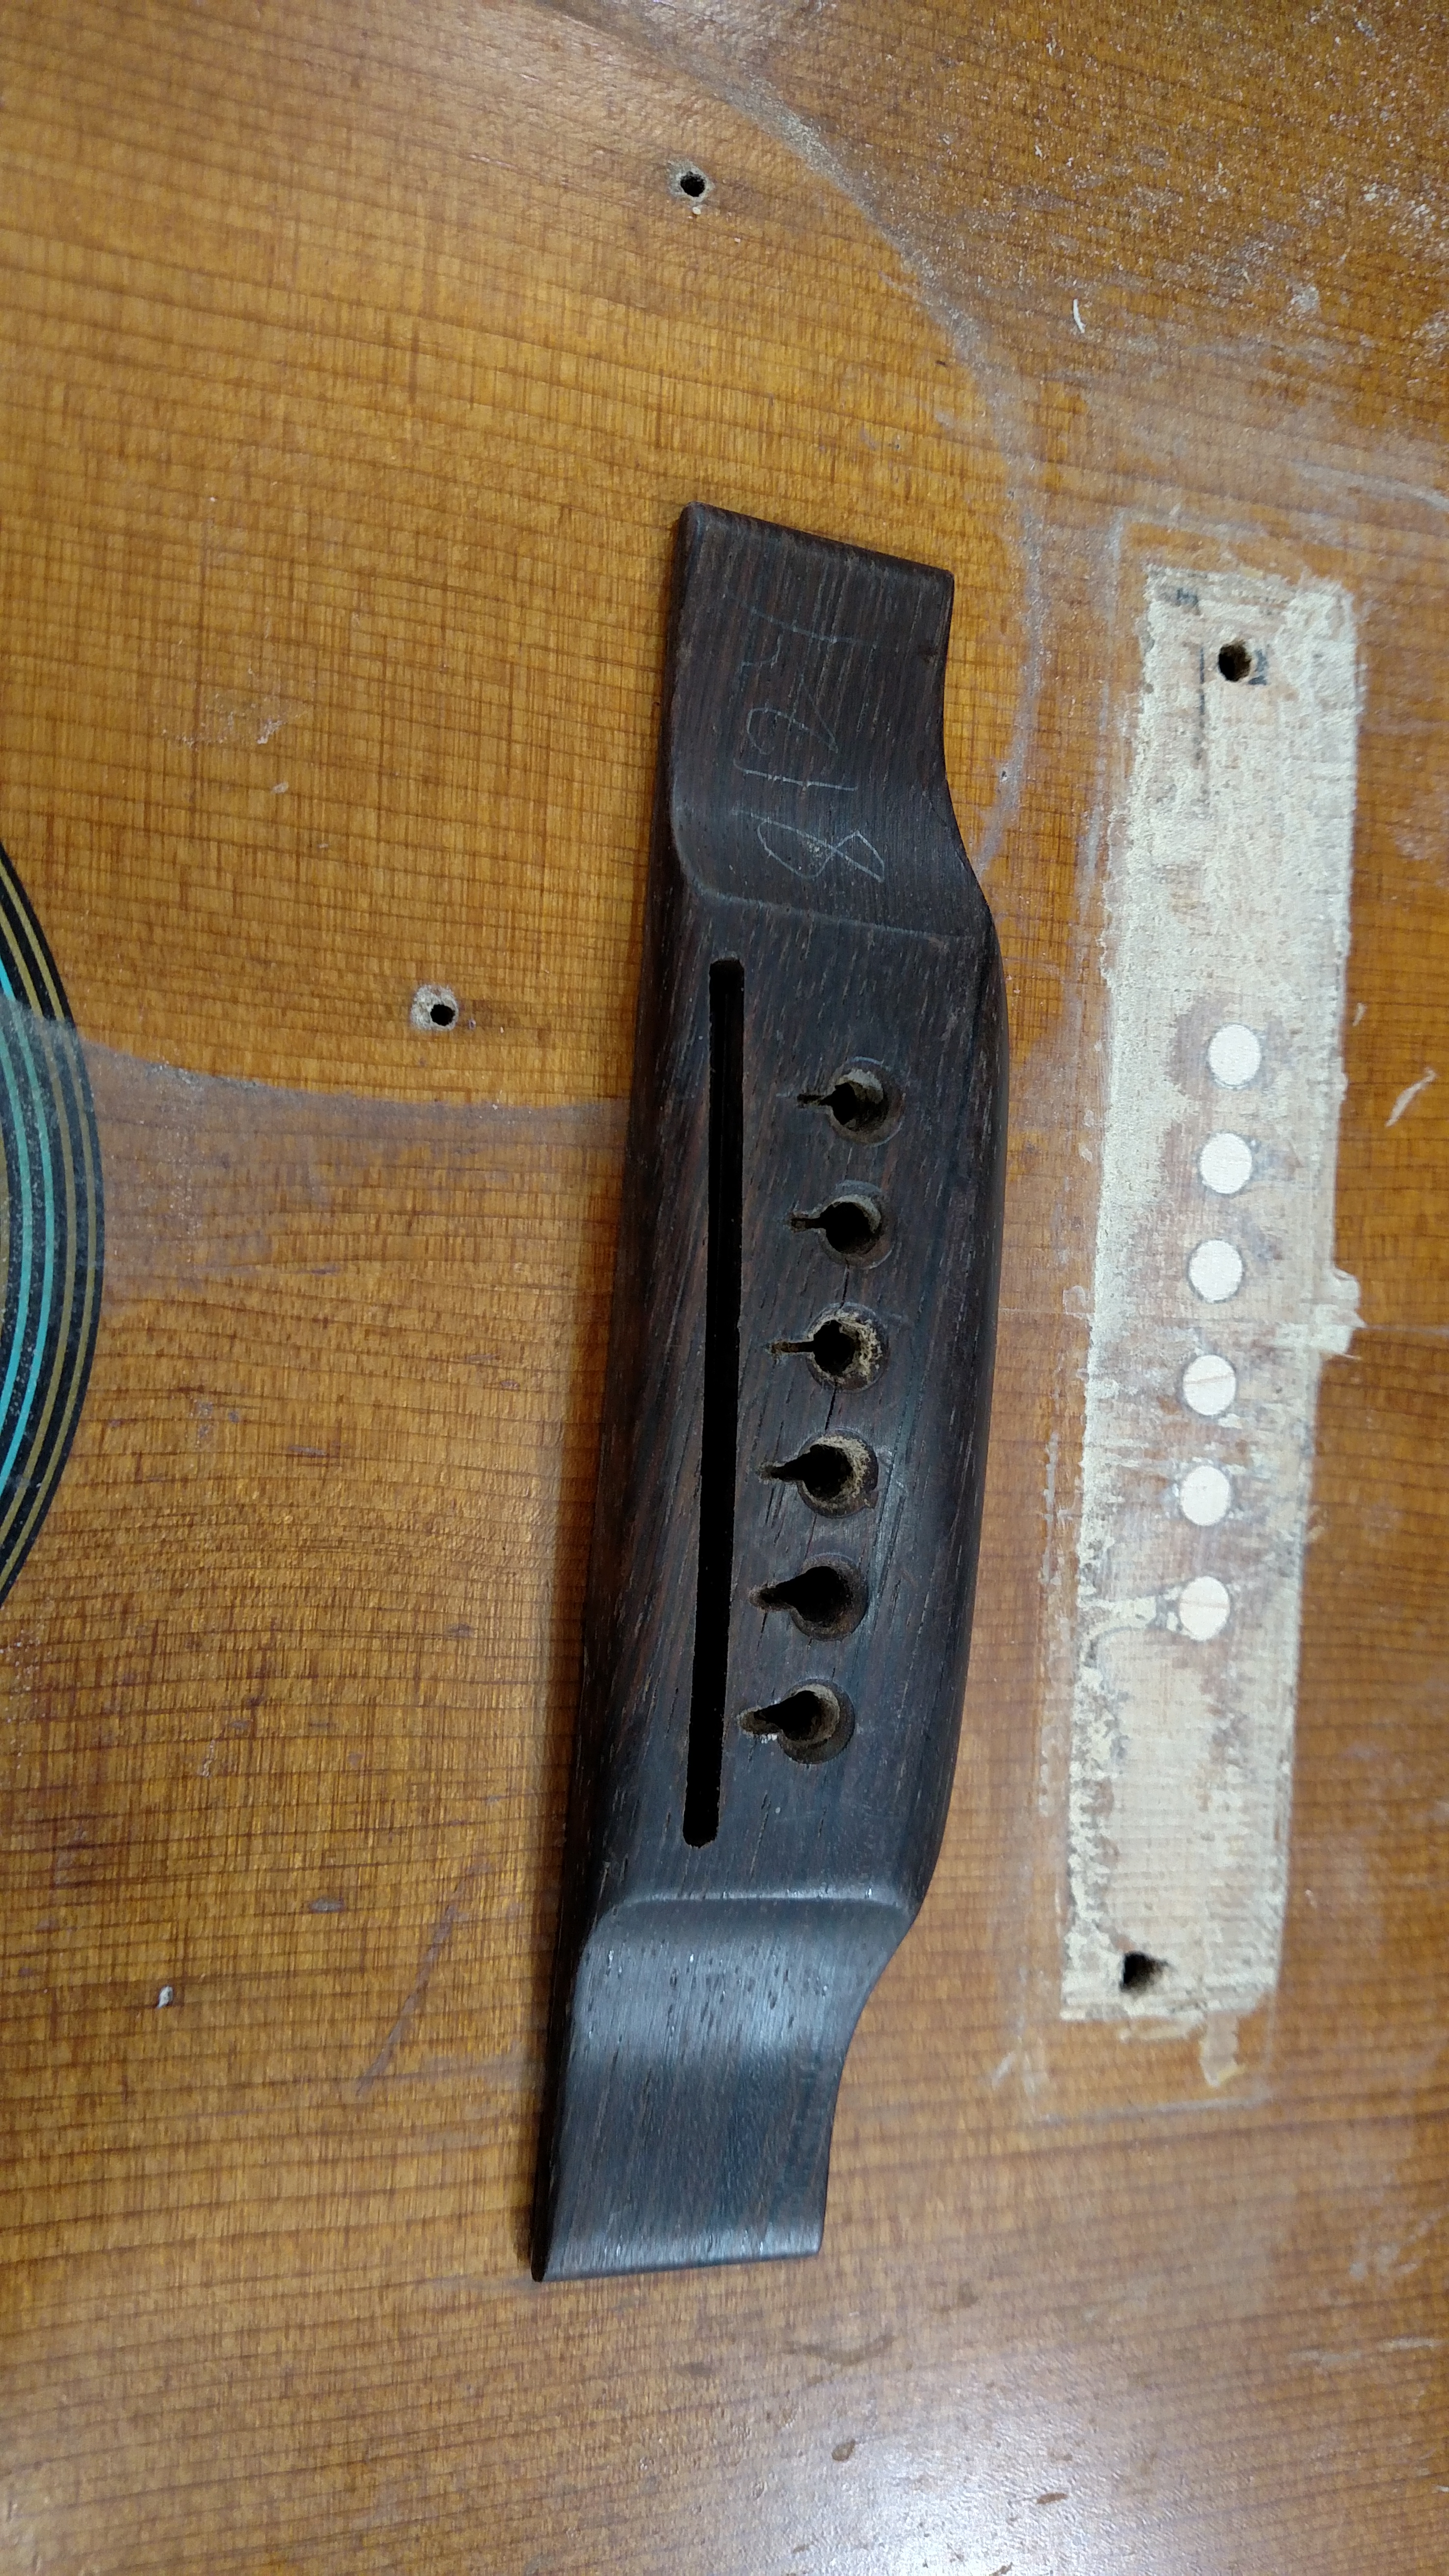
Above is the bridge I planned to use and the plugged holes. I purchased a lot of parts a few years ago from Larry Mathis. These bridges were in those parts and they came from the Martin Factory. They were some that were removed from a guitar in a warranty repair years ago. Most of them had the last 4 numbers of the serial number written on them. It looks like this bridge came off guitar number 8124. I had widened the saddle slot because I prefer the wider bone saddle over the narrow size. The saddle i used is around 1/8 inch wide. I have seen these narrow 3/32 saddles fail when they were tall enough to do the job because of the forward pressure the strings put on them.
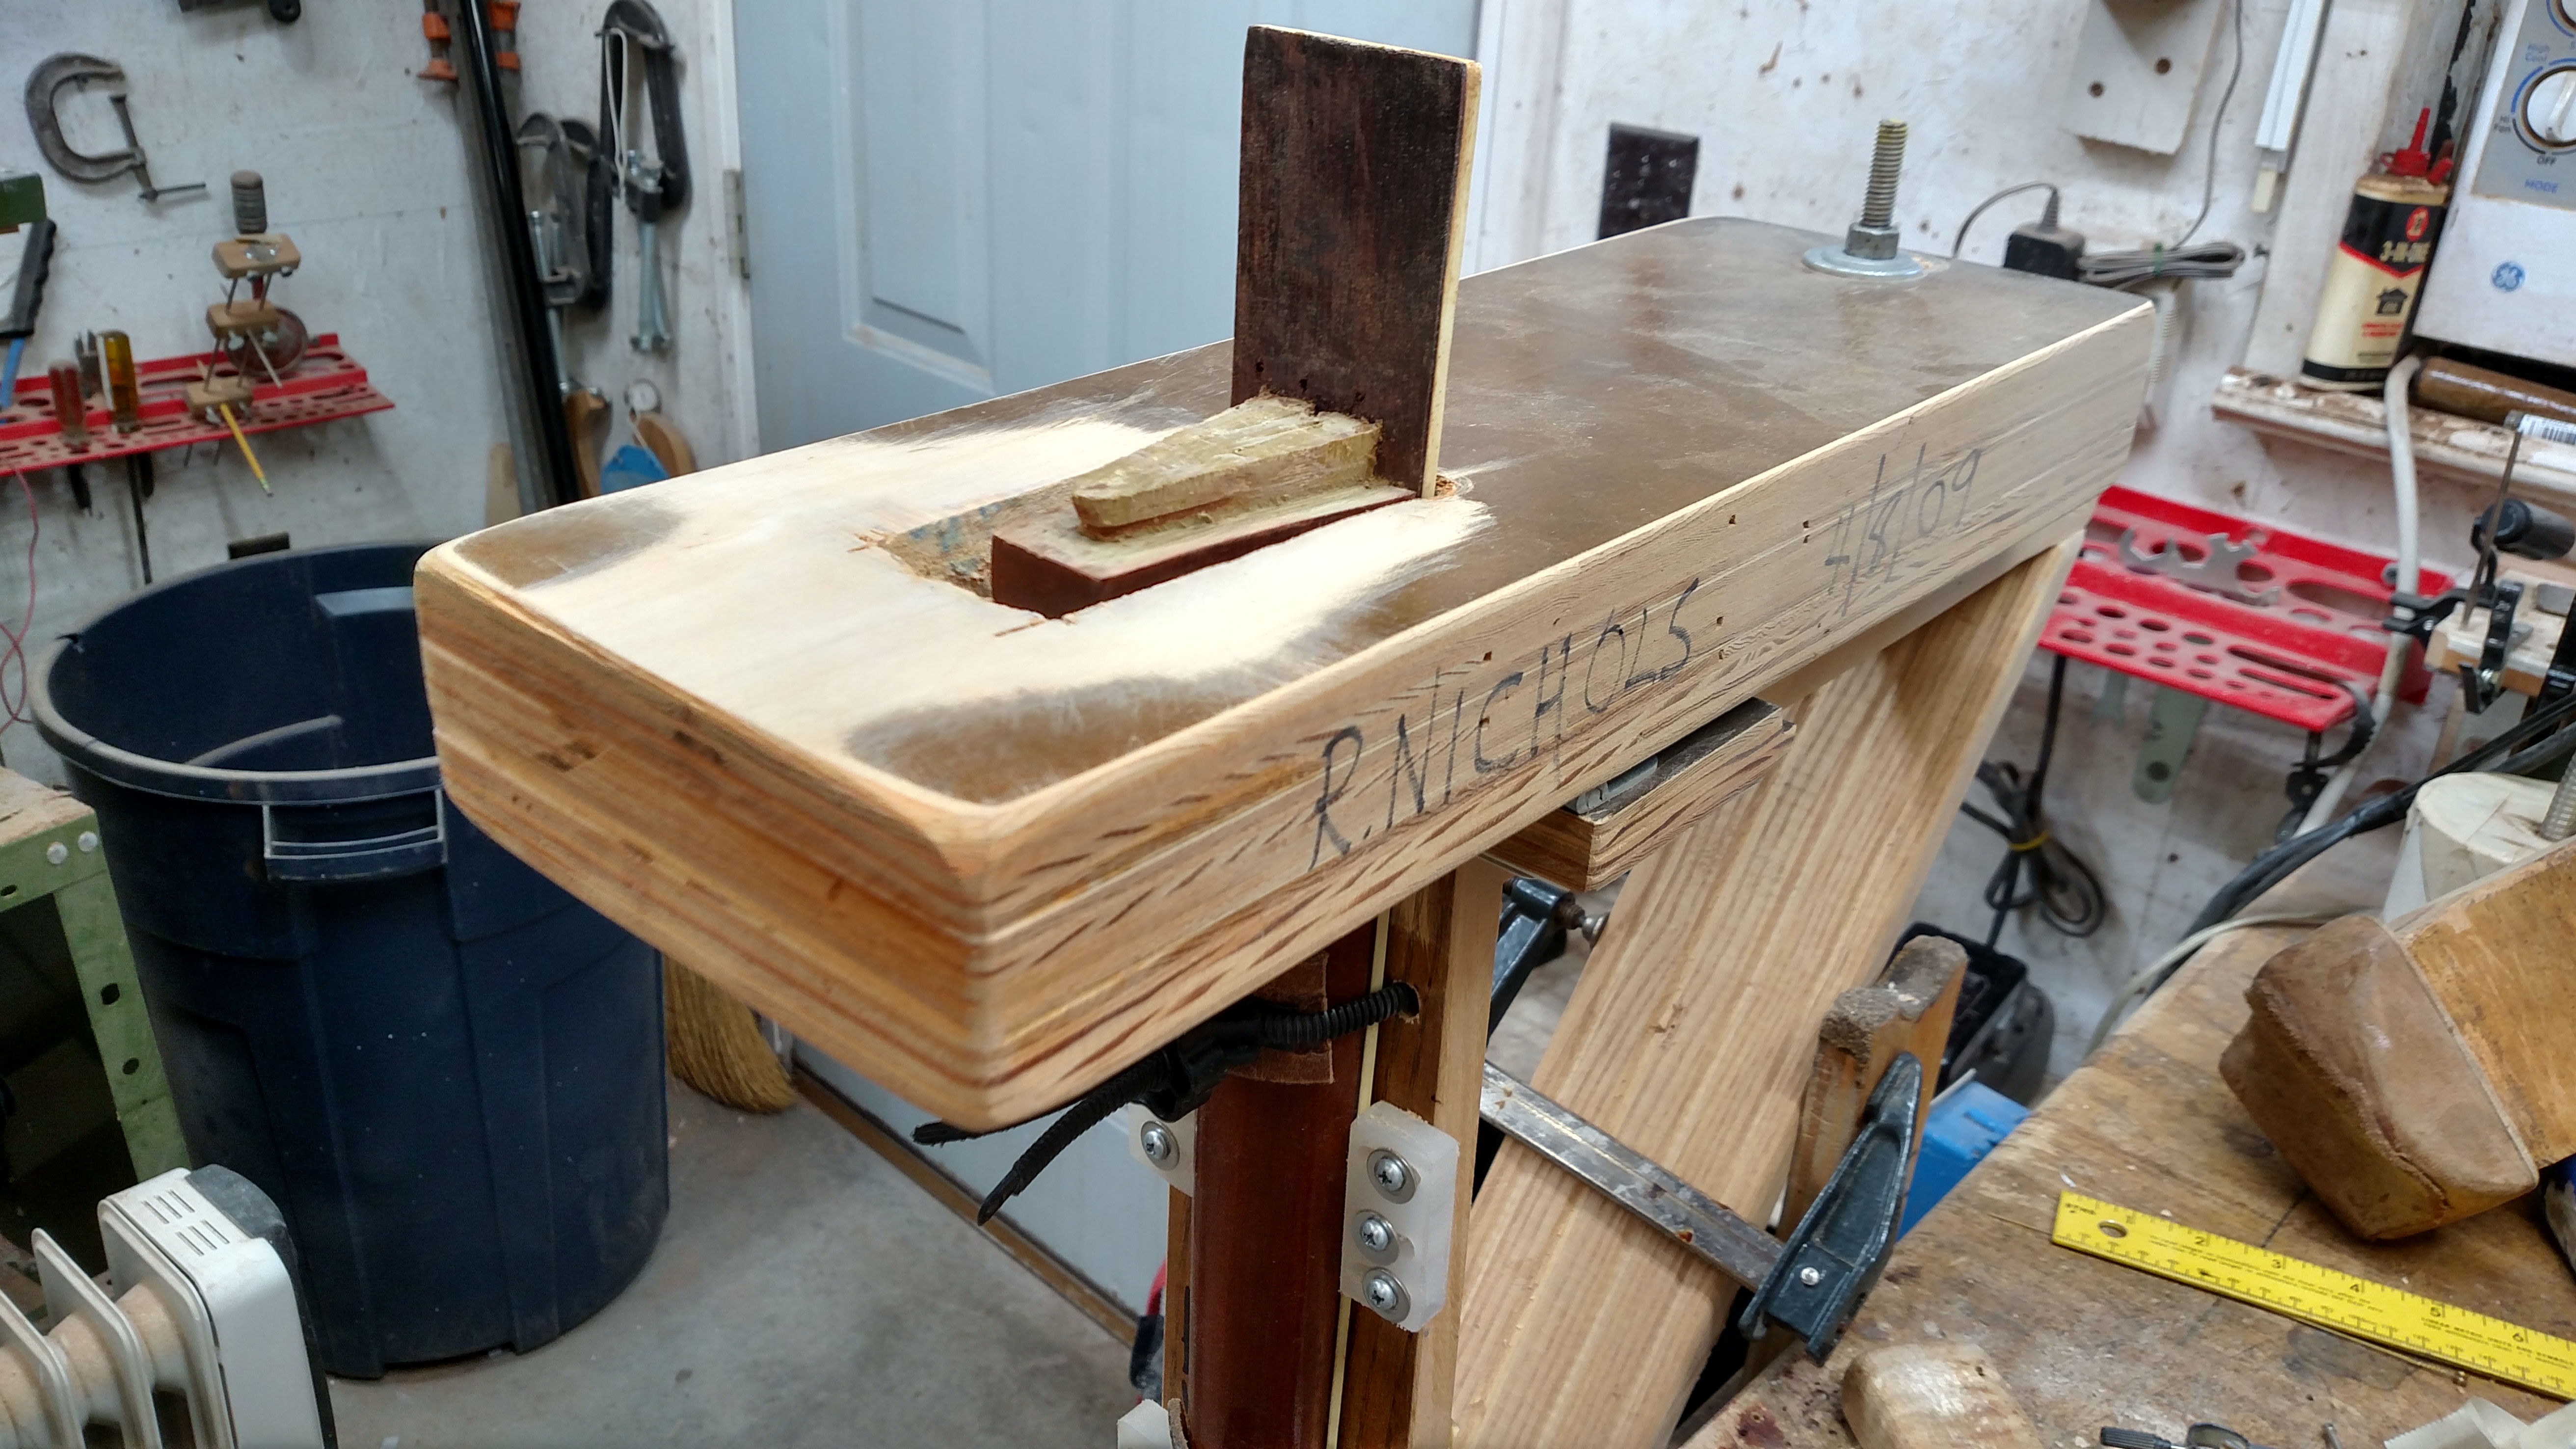
Now I started working on the angle on the neck joint. Here is my home made jig to re-cut the neck angle. It can be adjusted to take about any acoustic neck. It helps control how much I remove from the heel of the neck by having a reference point for my chisels. It has worked well for me for the last 10 years.
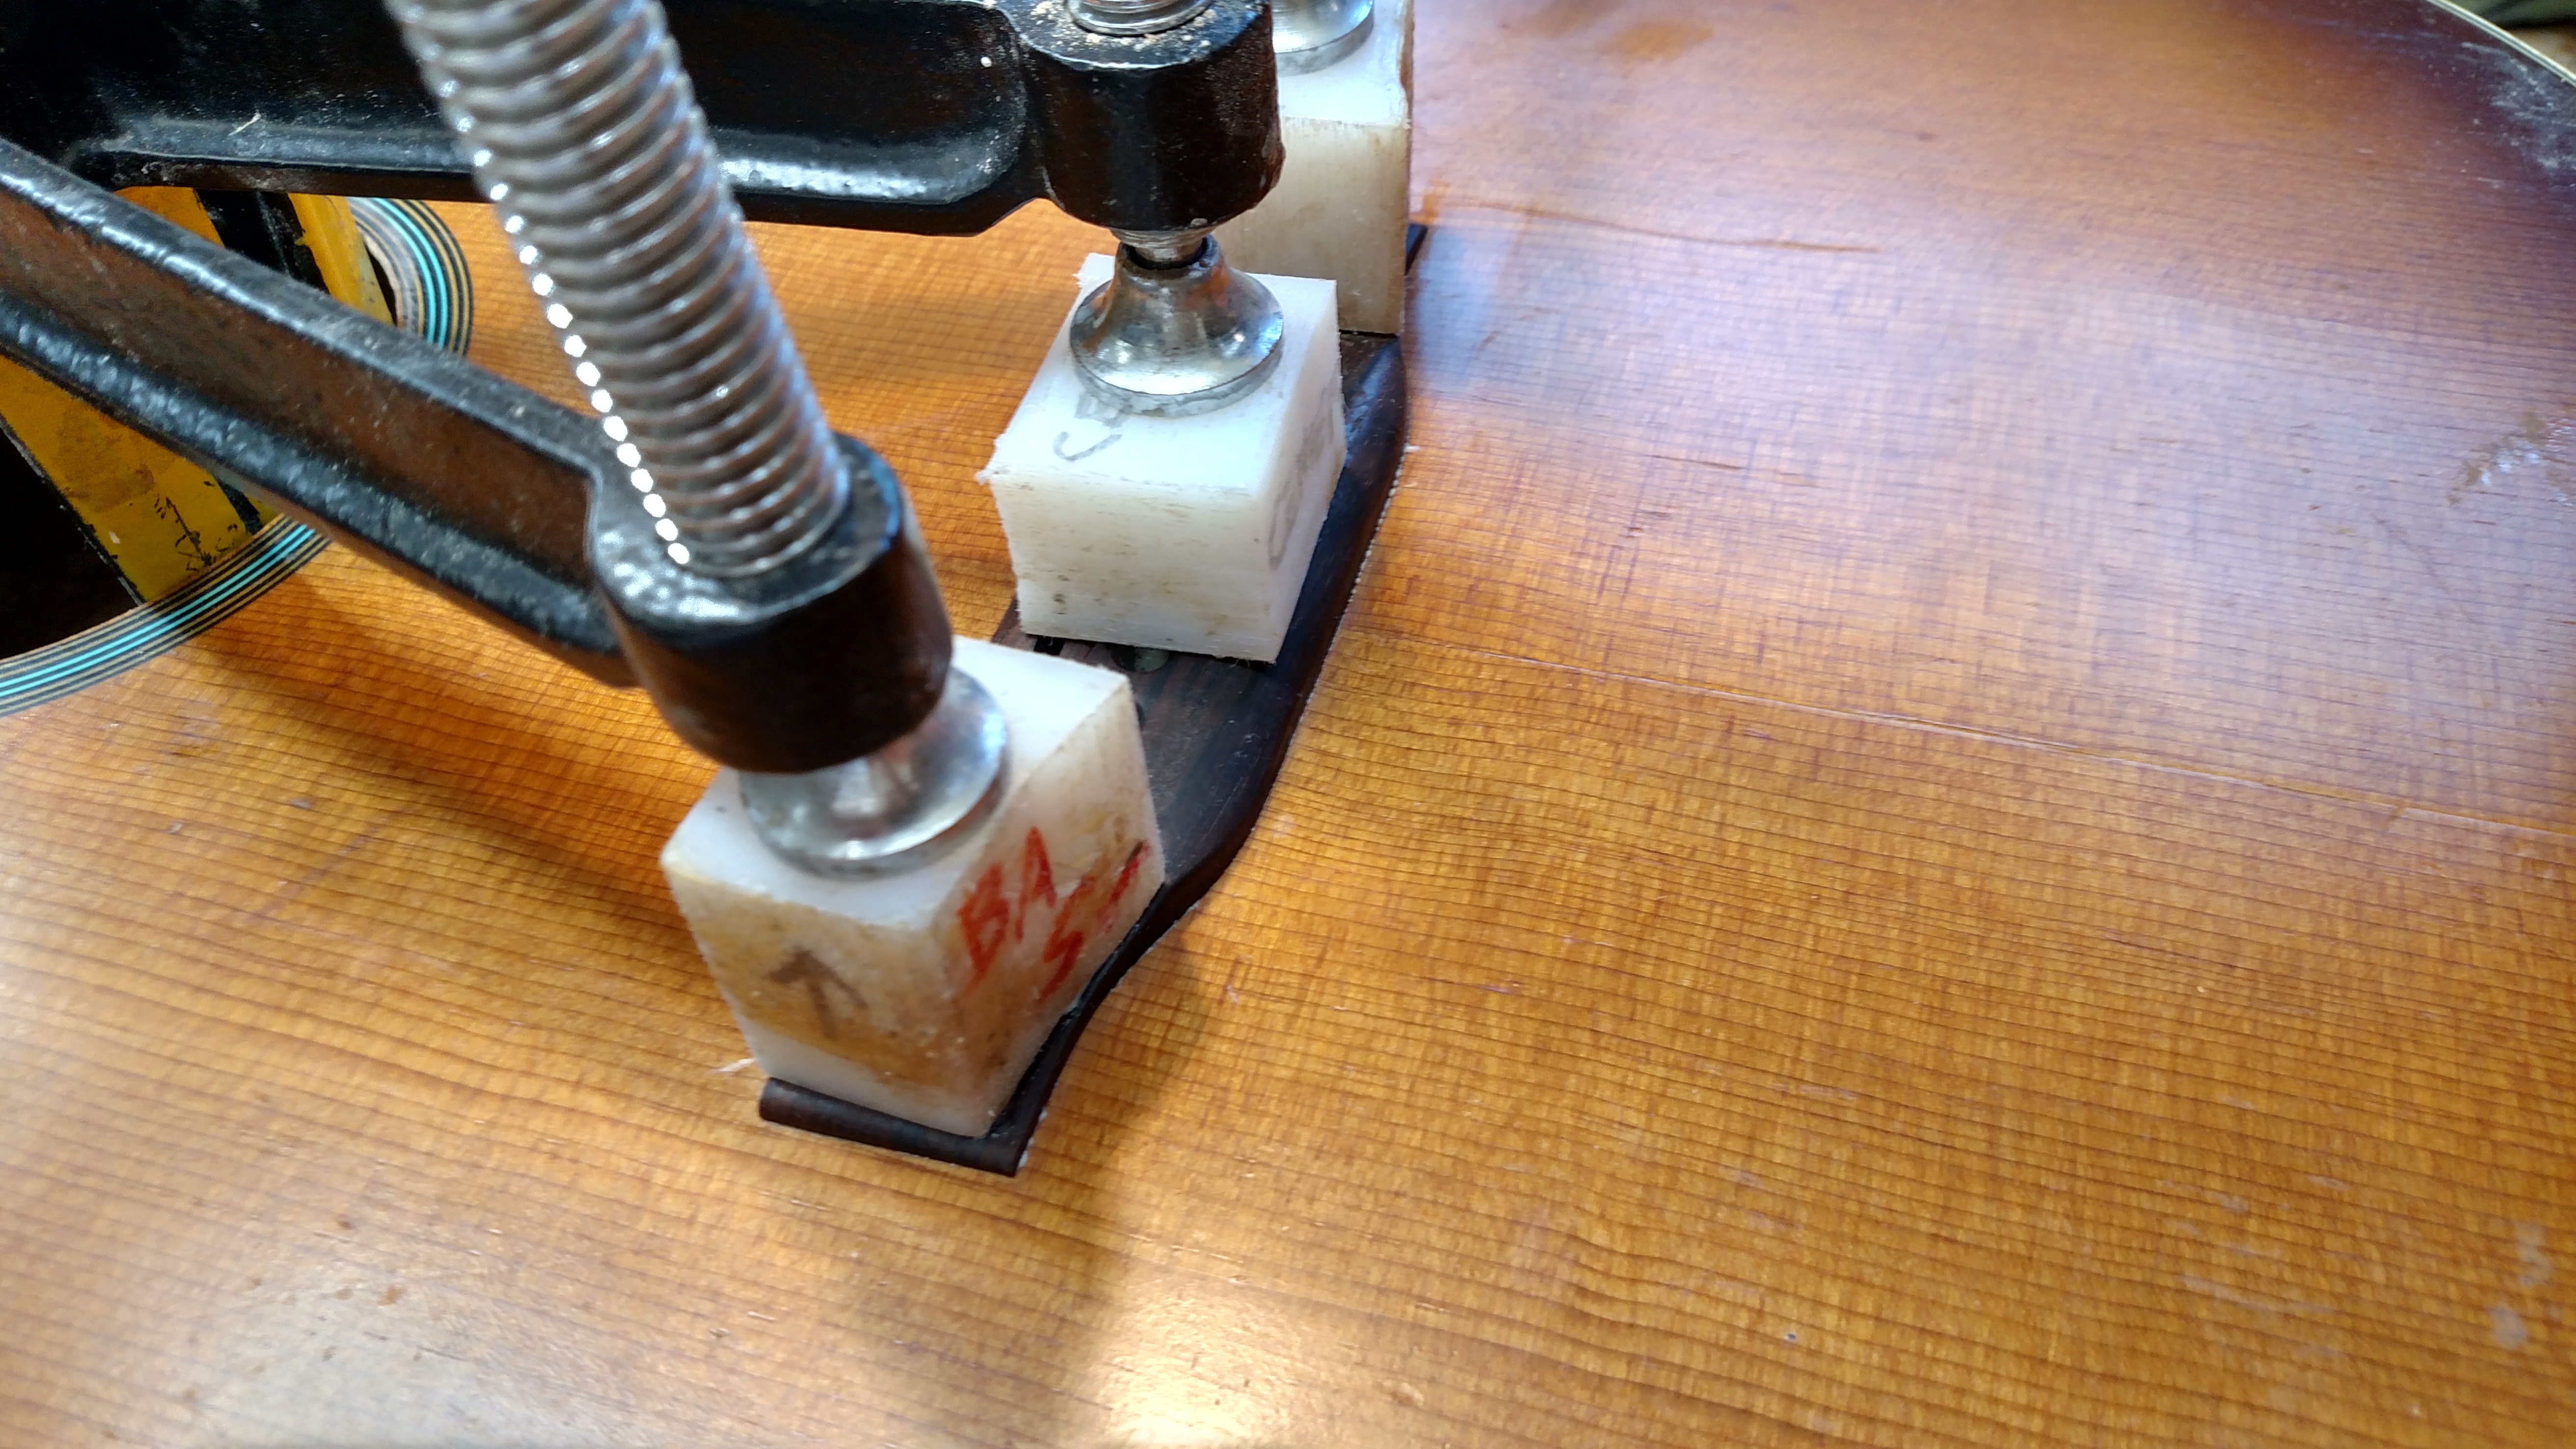
I cut one of my plastic templates that serves to locate the bridge in the correct spot. This thin plastic piece can be taped down to position the bridge in the proper place so it doesn’t slip while I clamp it. The jig the body is setting in serves to clamp the neck into position to check the heel angle and check that it is centered properly prior to gluing.
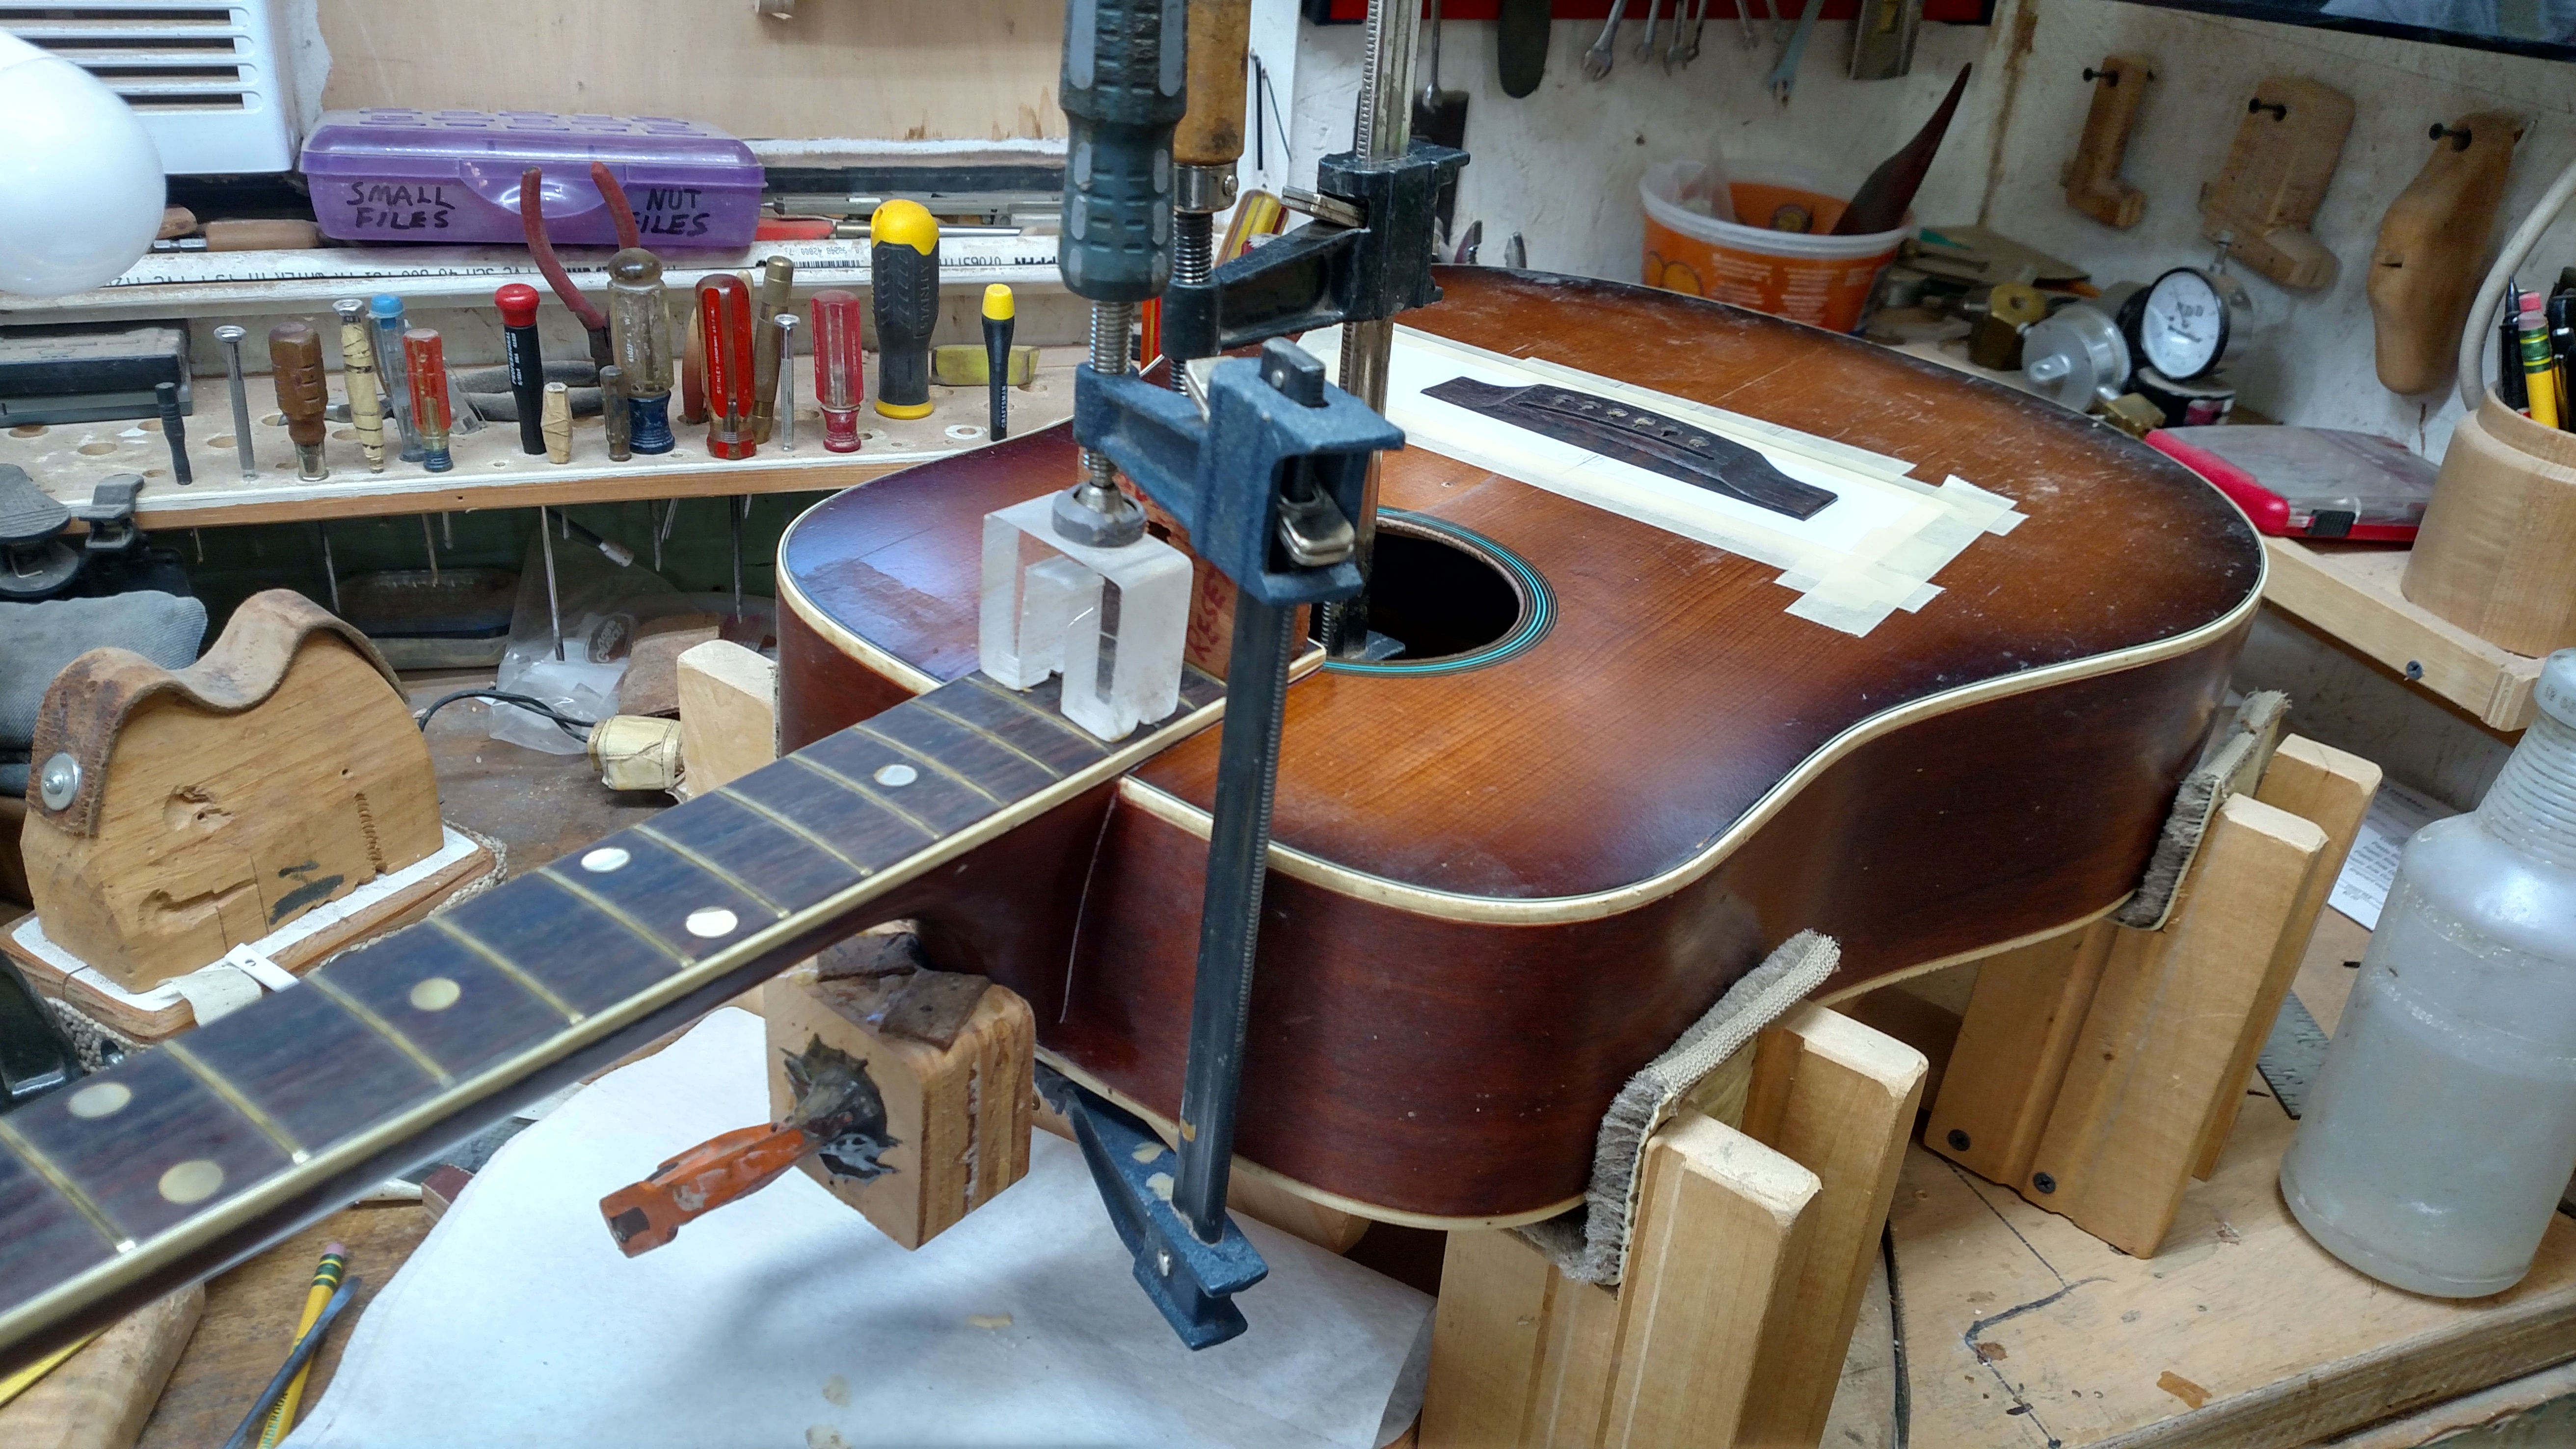
Here is the setup for getting the angle right. After the proper angle is achieved, I can shim the dovetail to pull the neck into it’s final position.
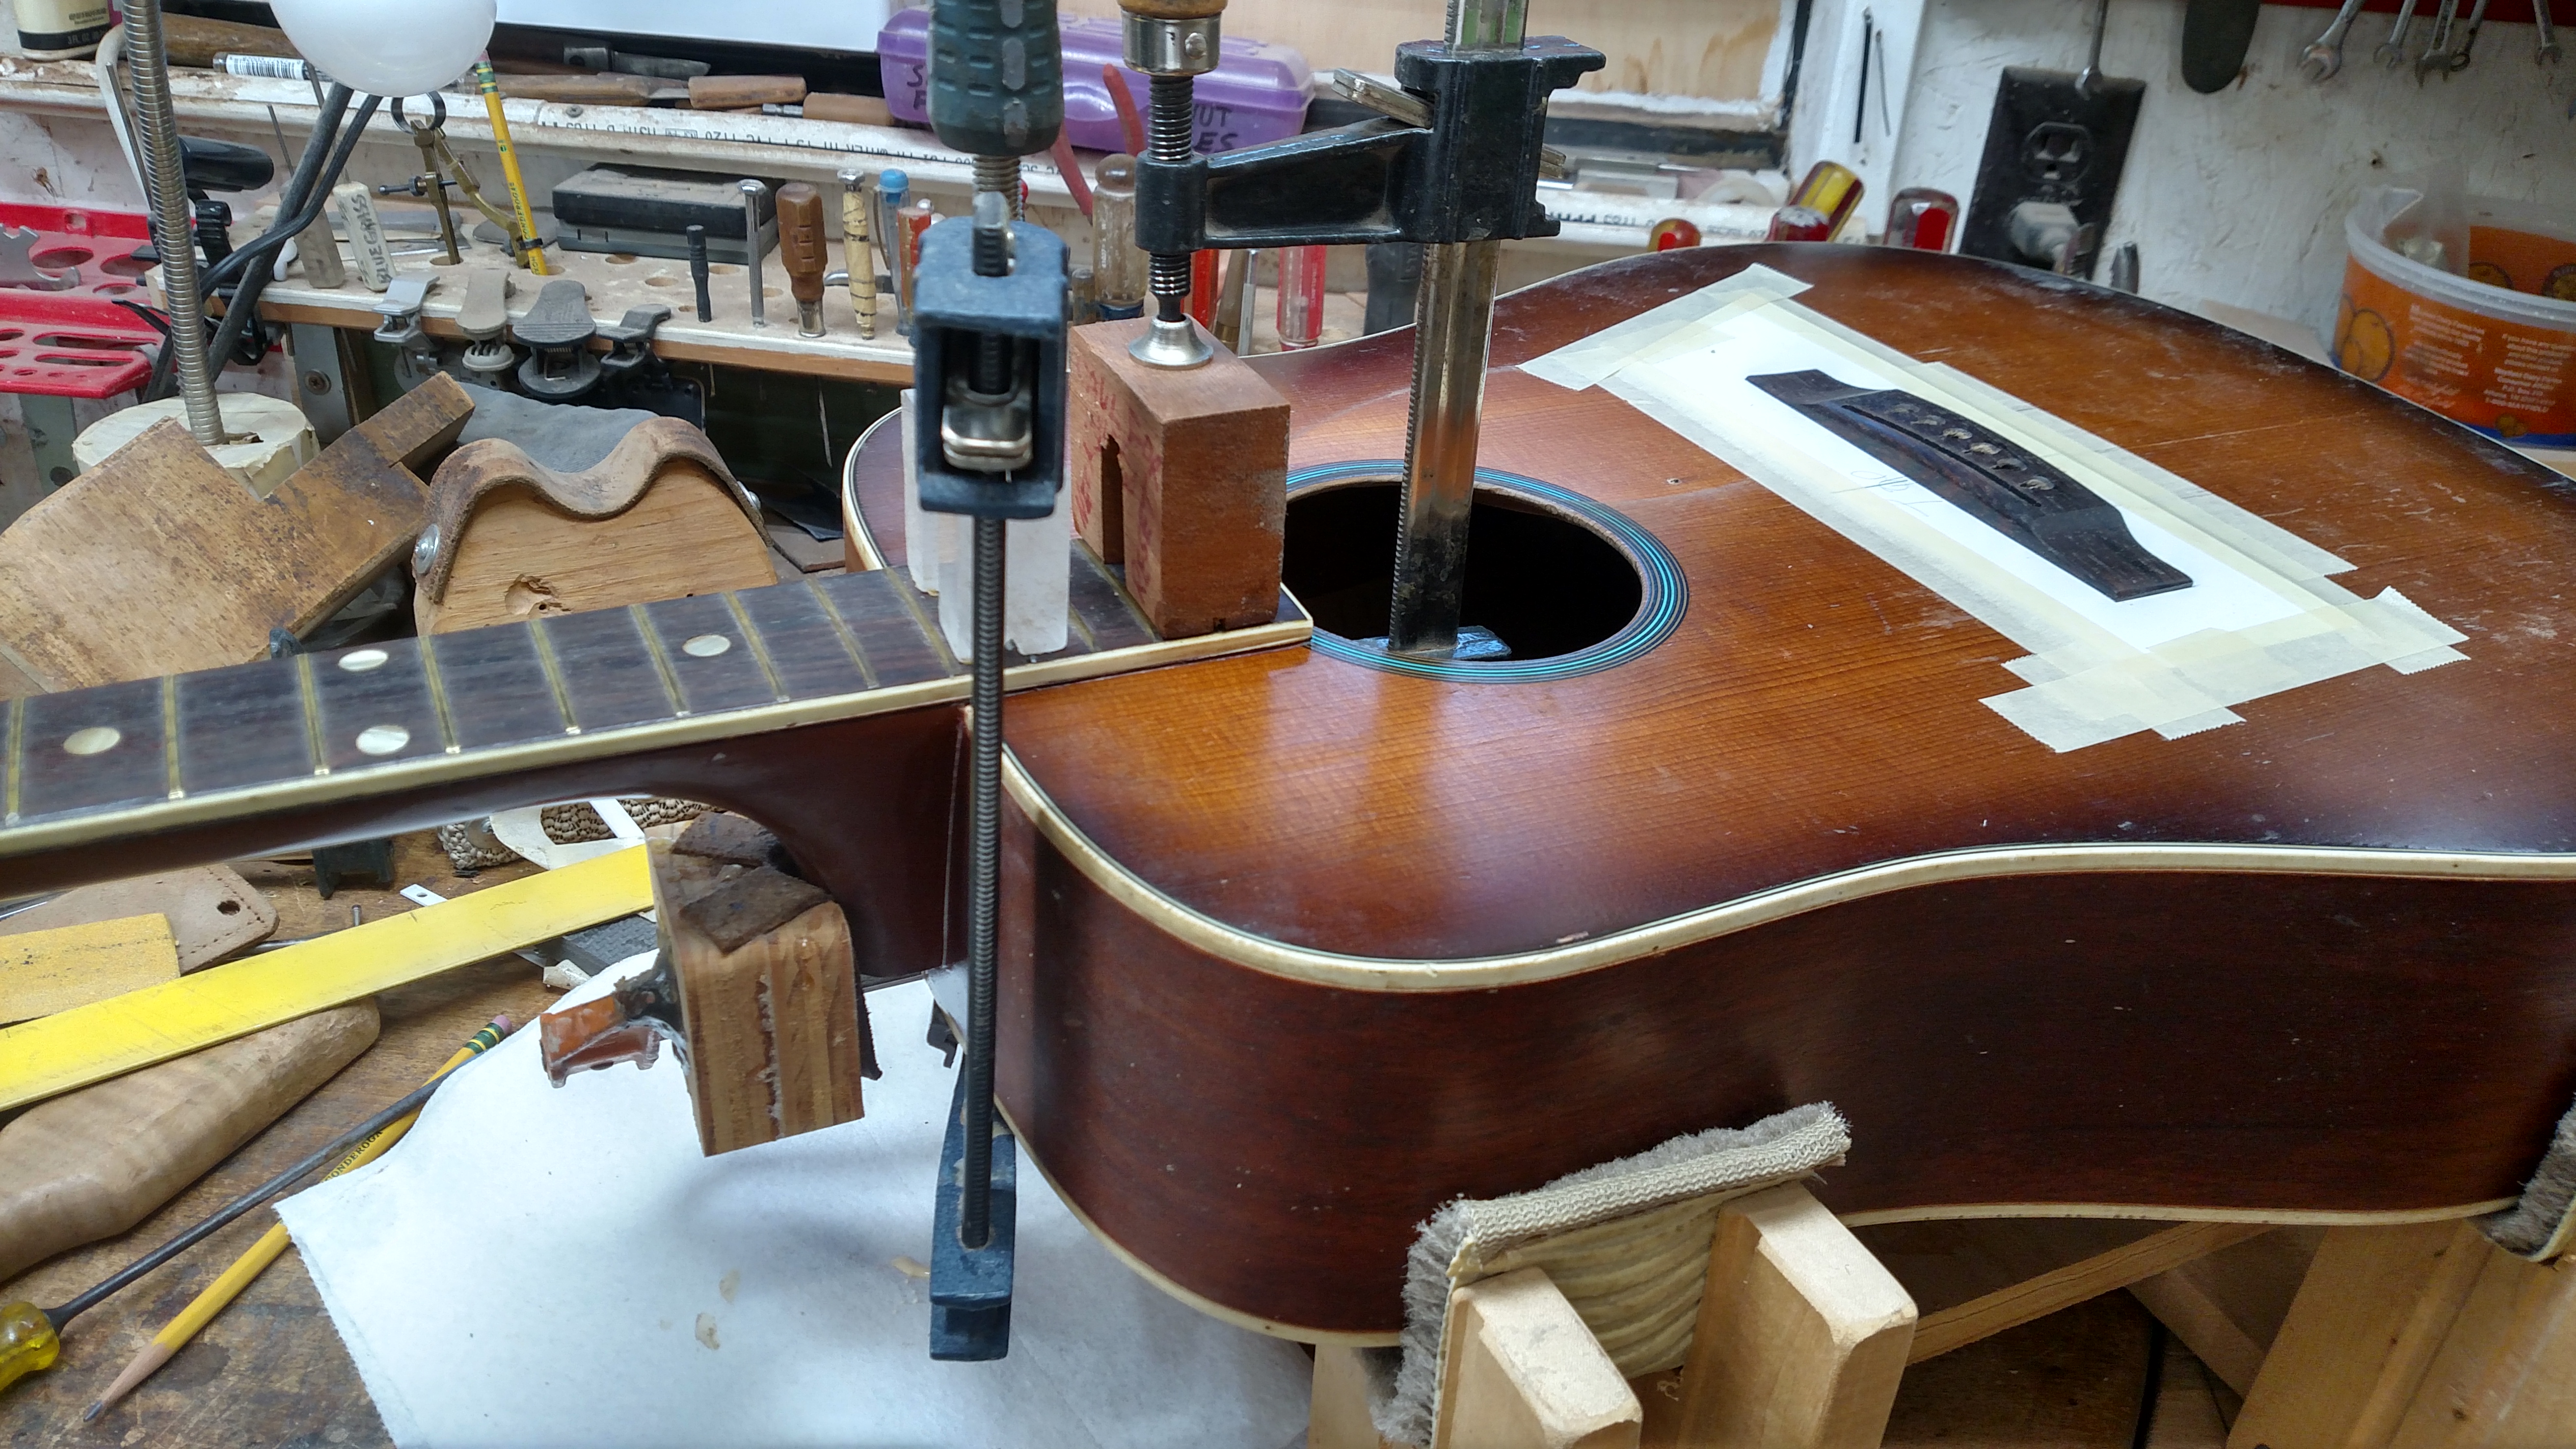
Here is a shot of the neck back in place. The bridge is in position but not glued down. A straight edge laying over the frets should just pass over the top of the bridge when everything is right.
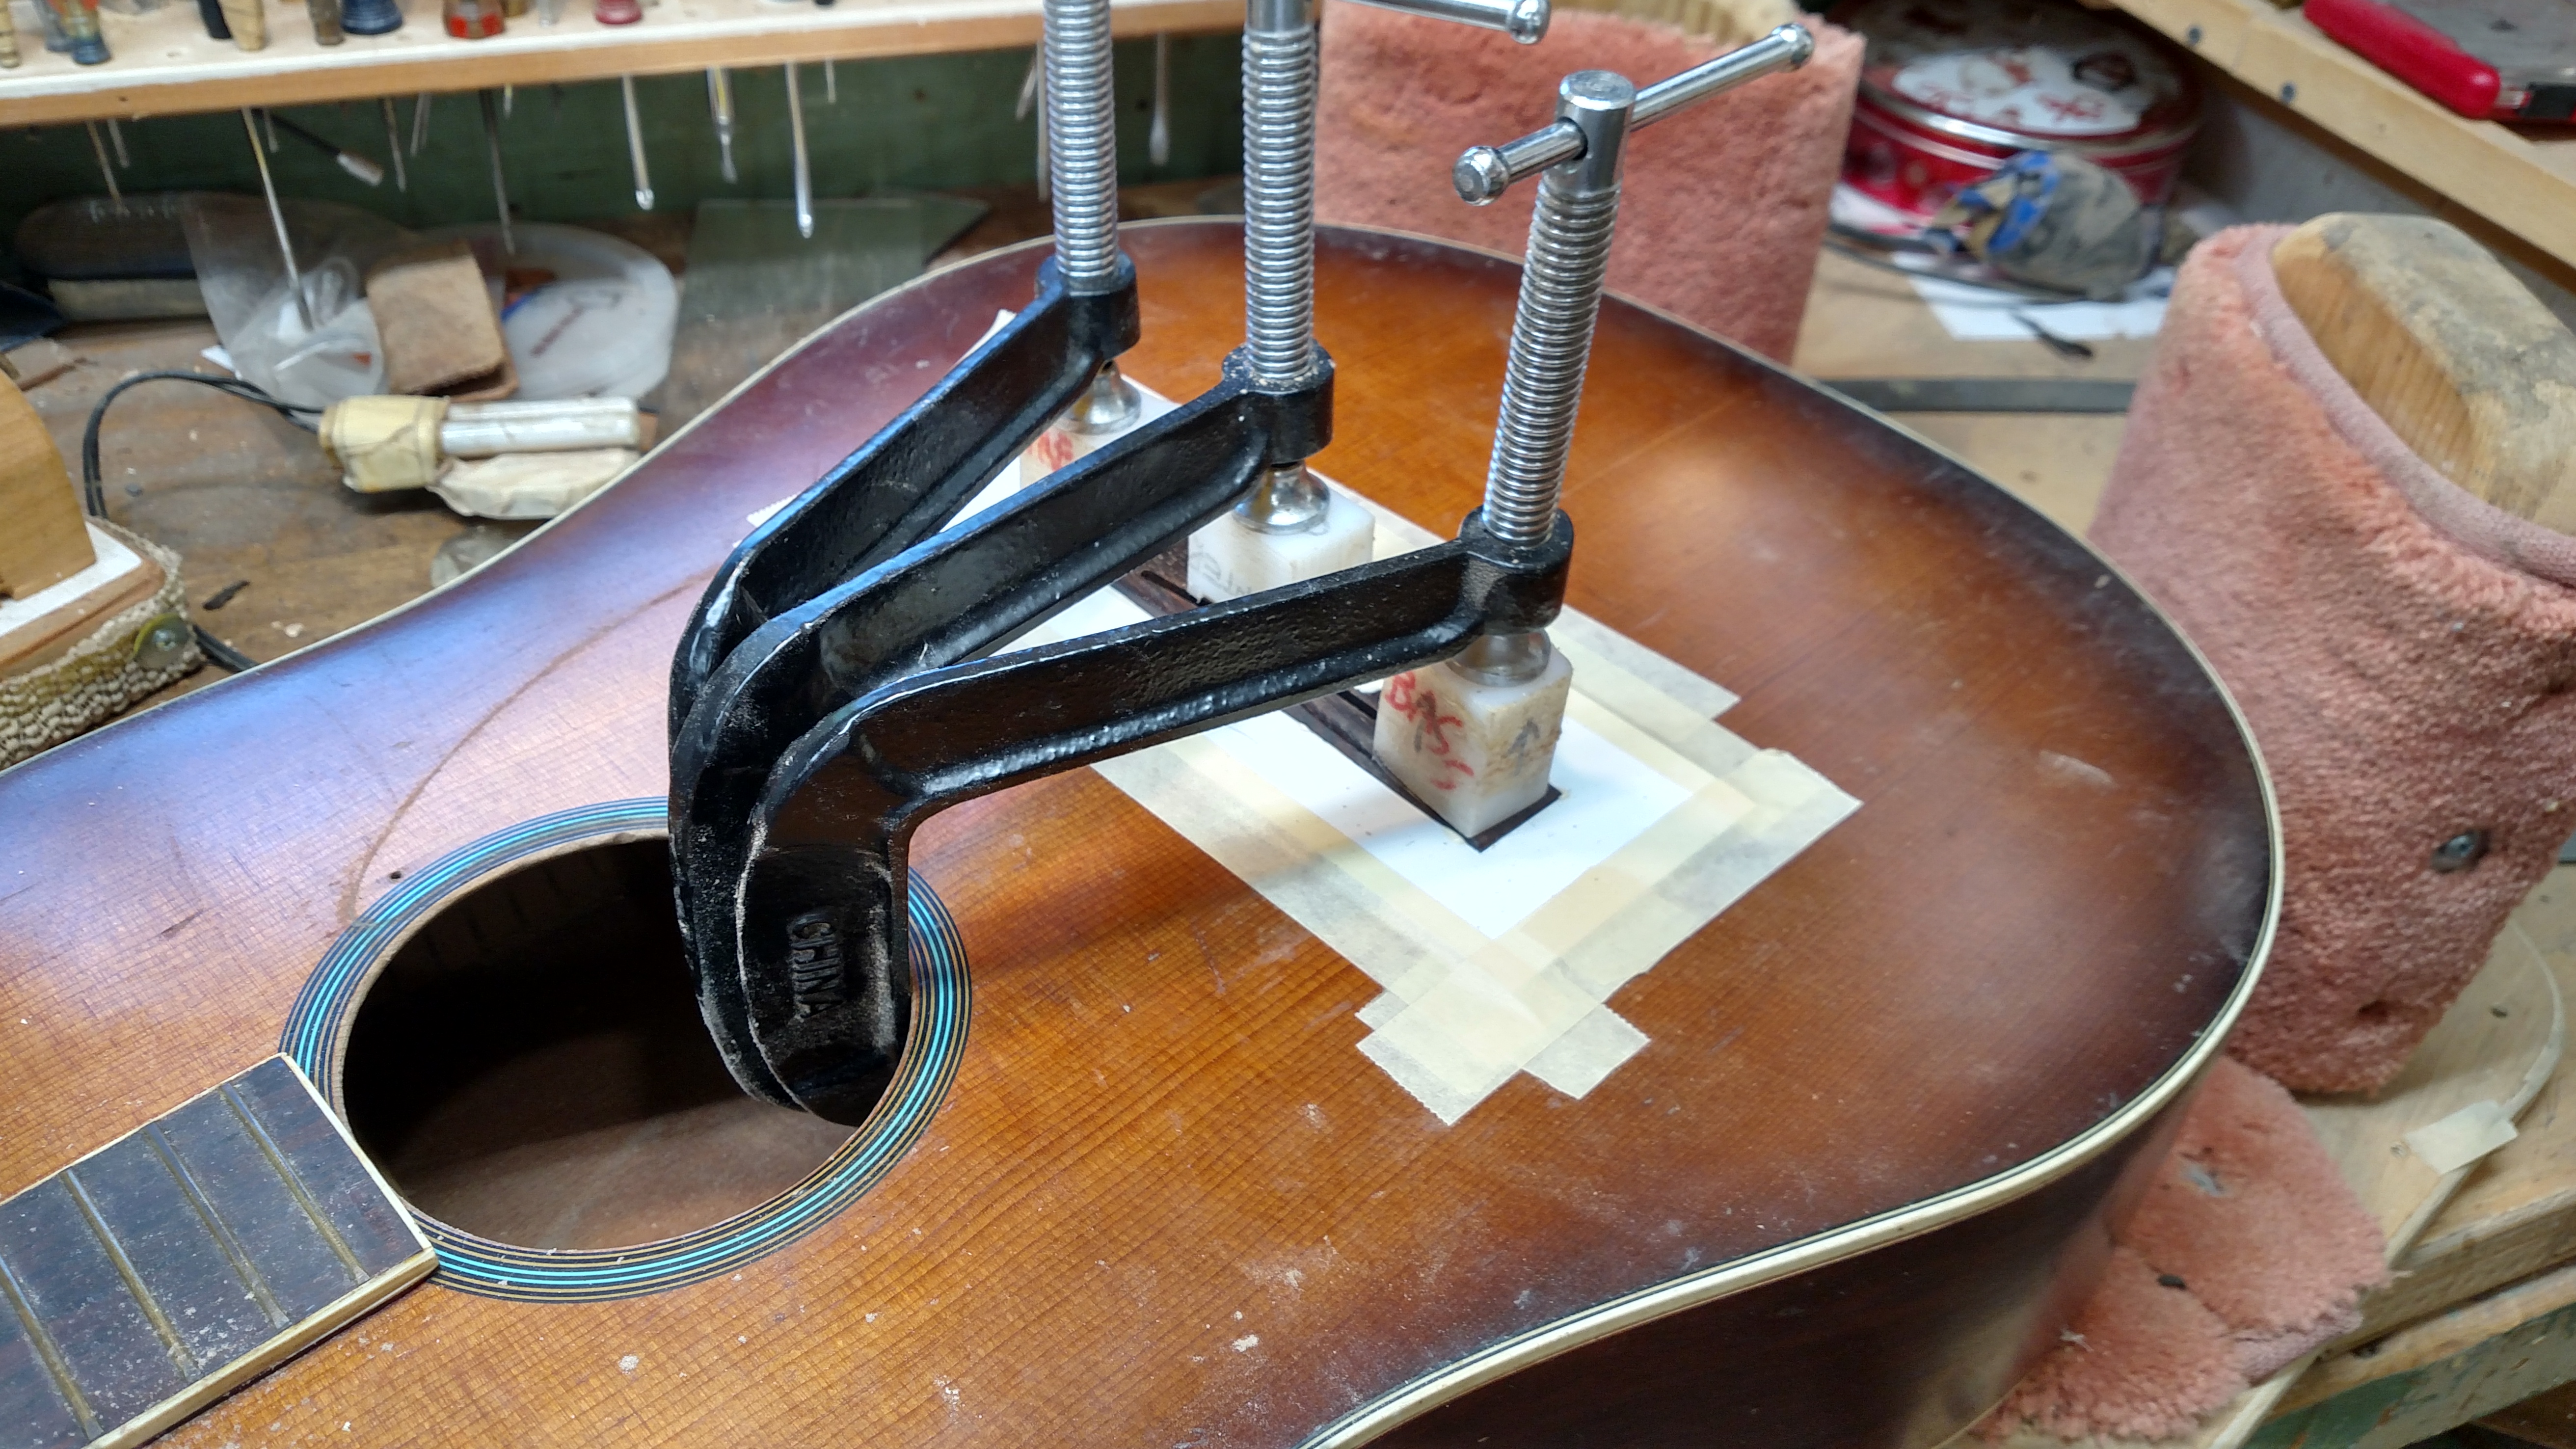
Here is a shot of the bridge being glued.
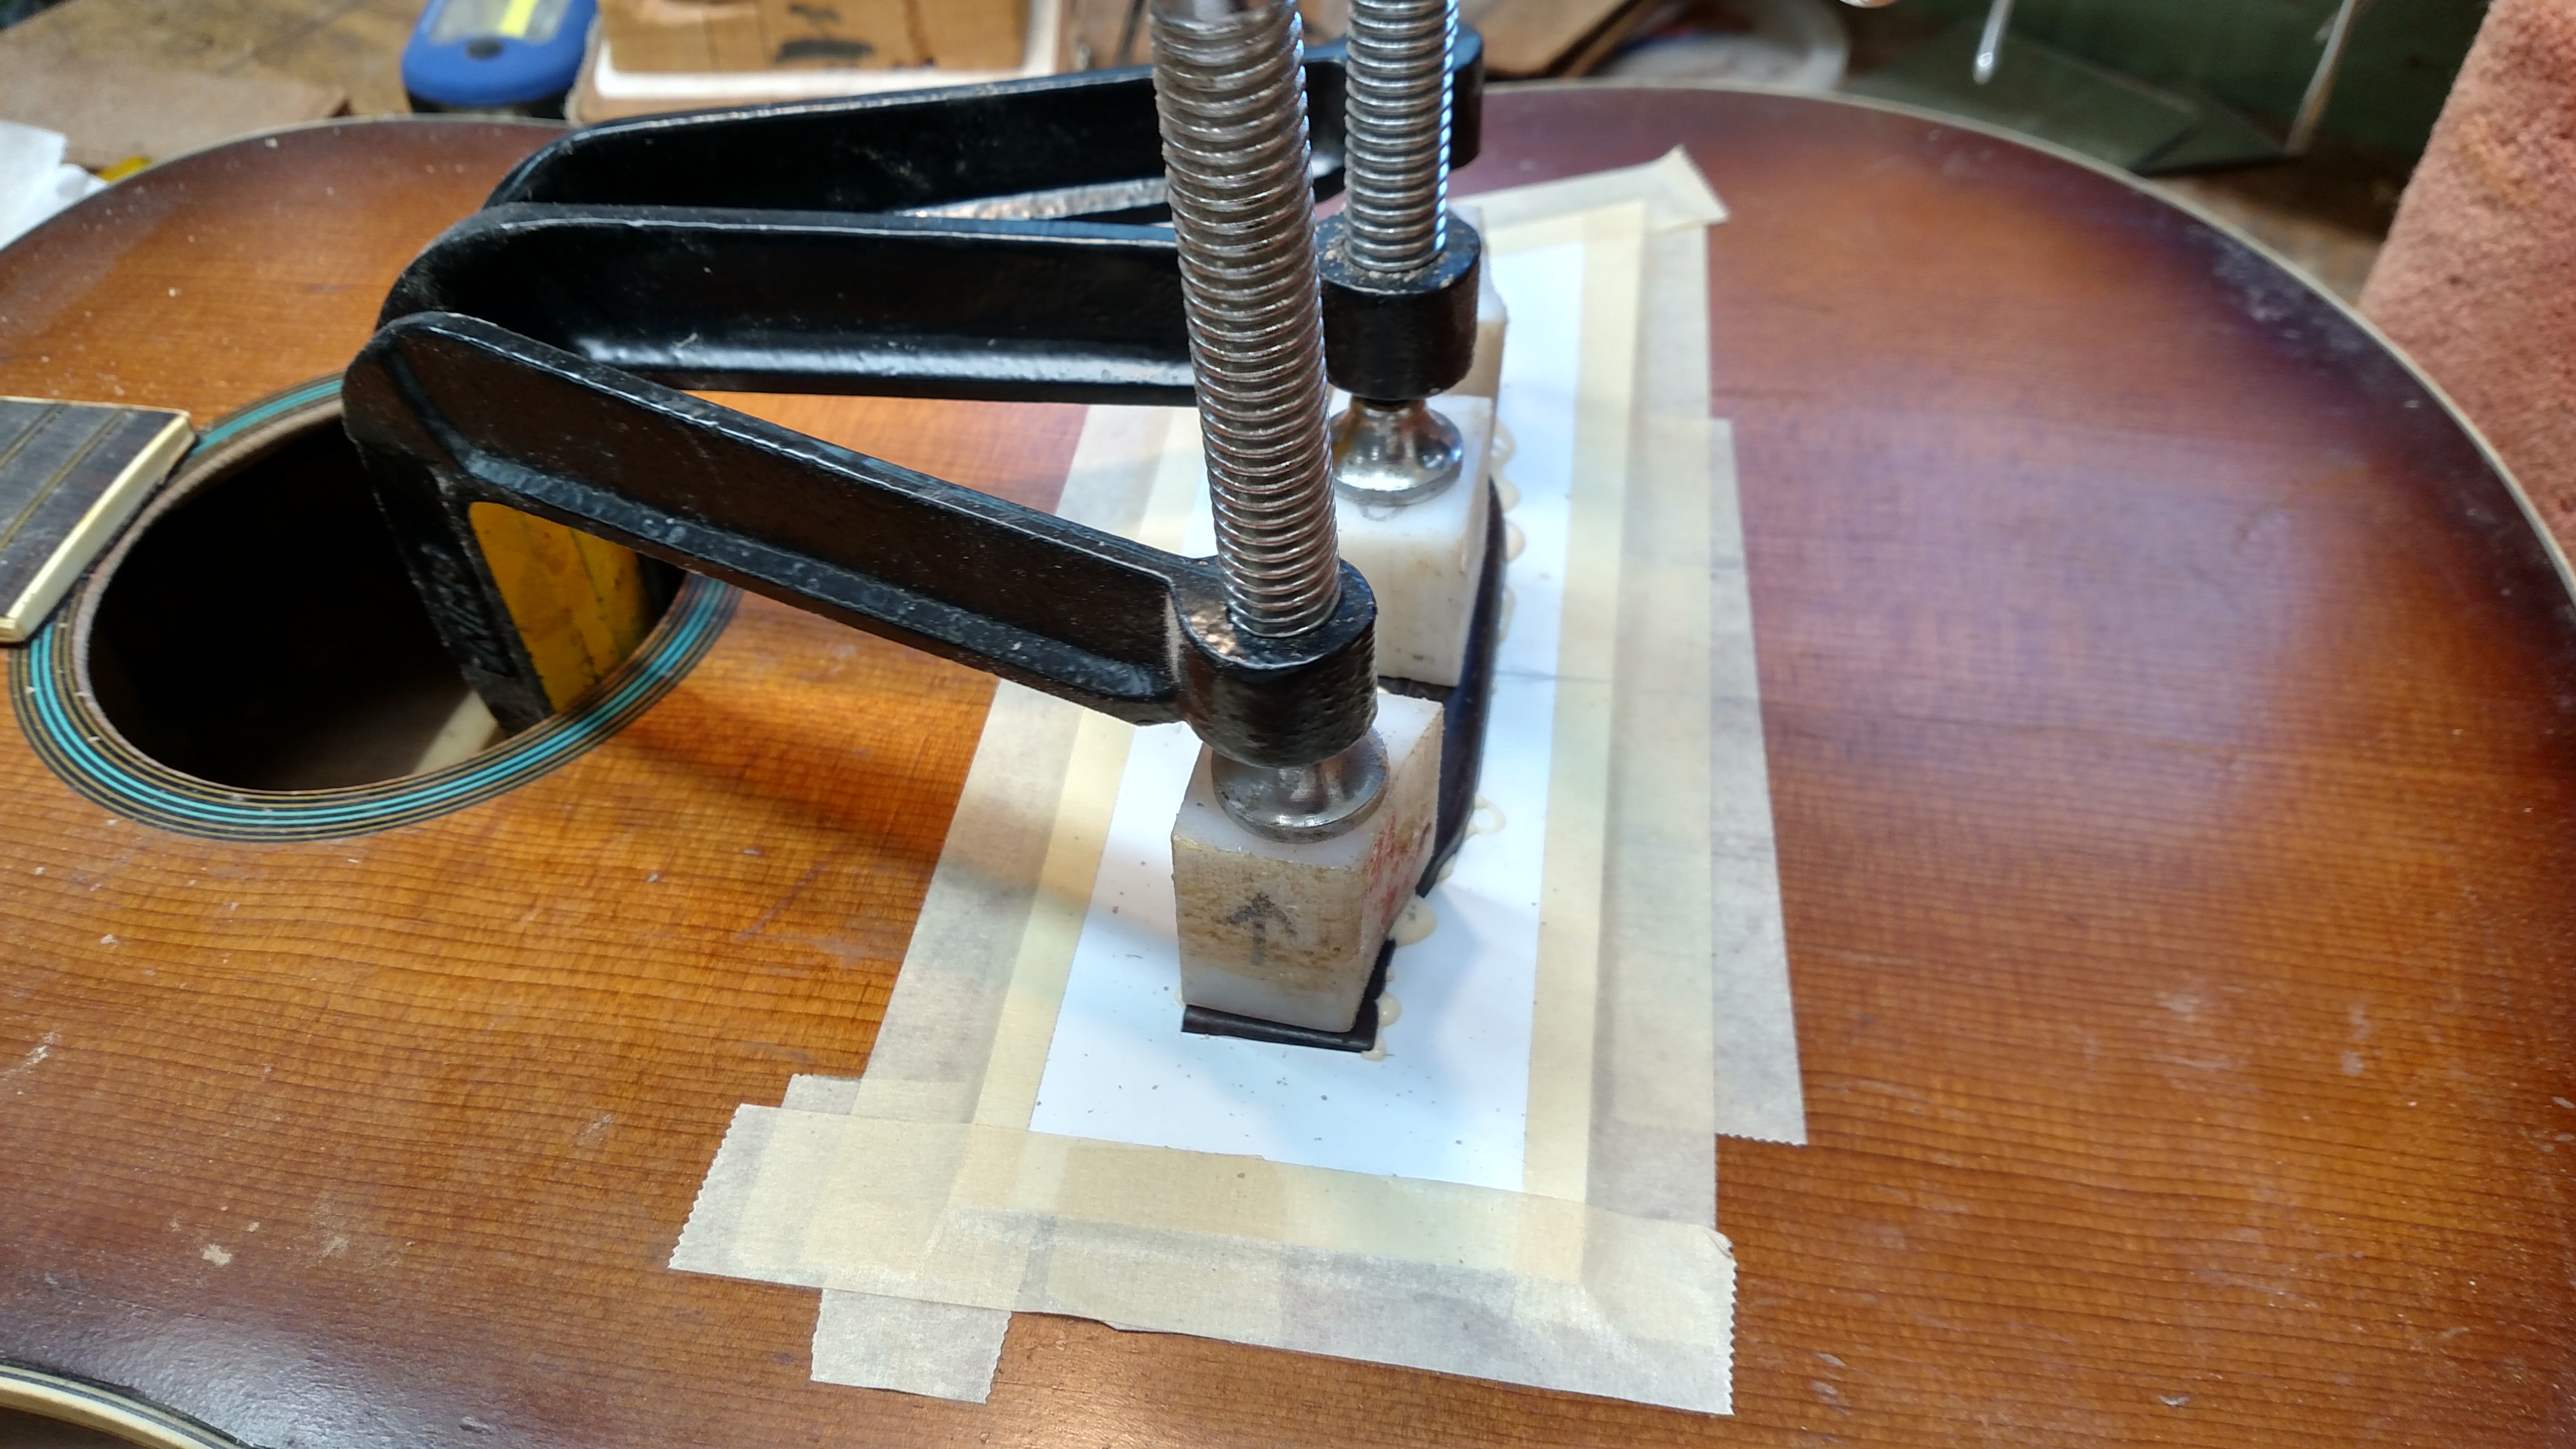
Bridge being glued.
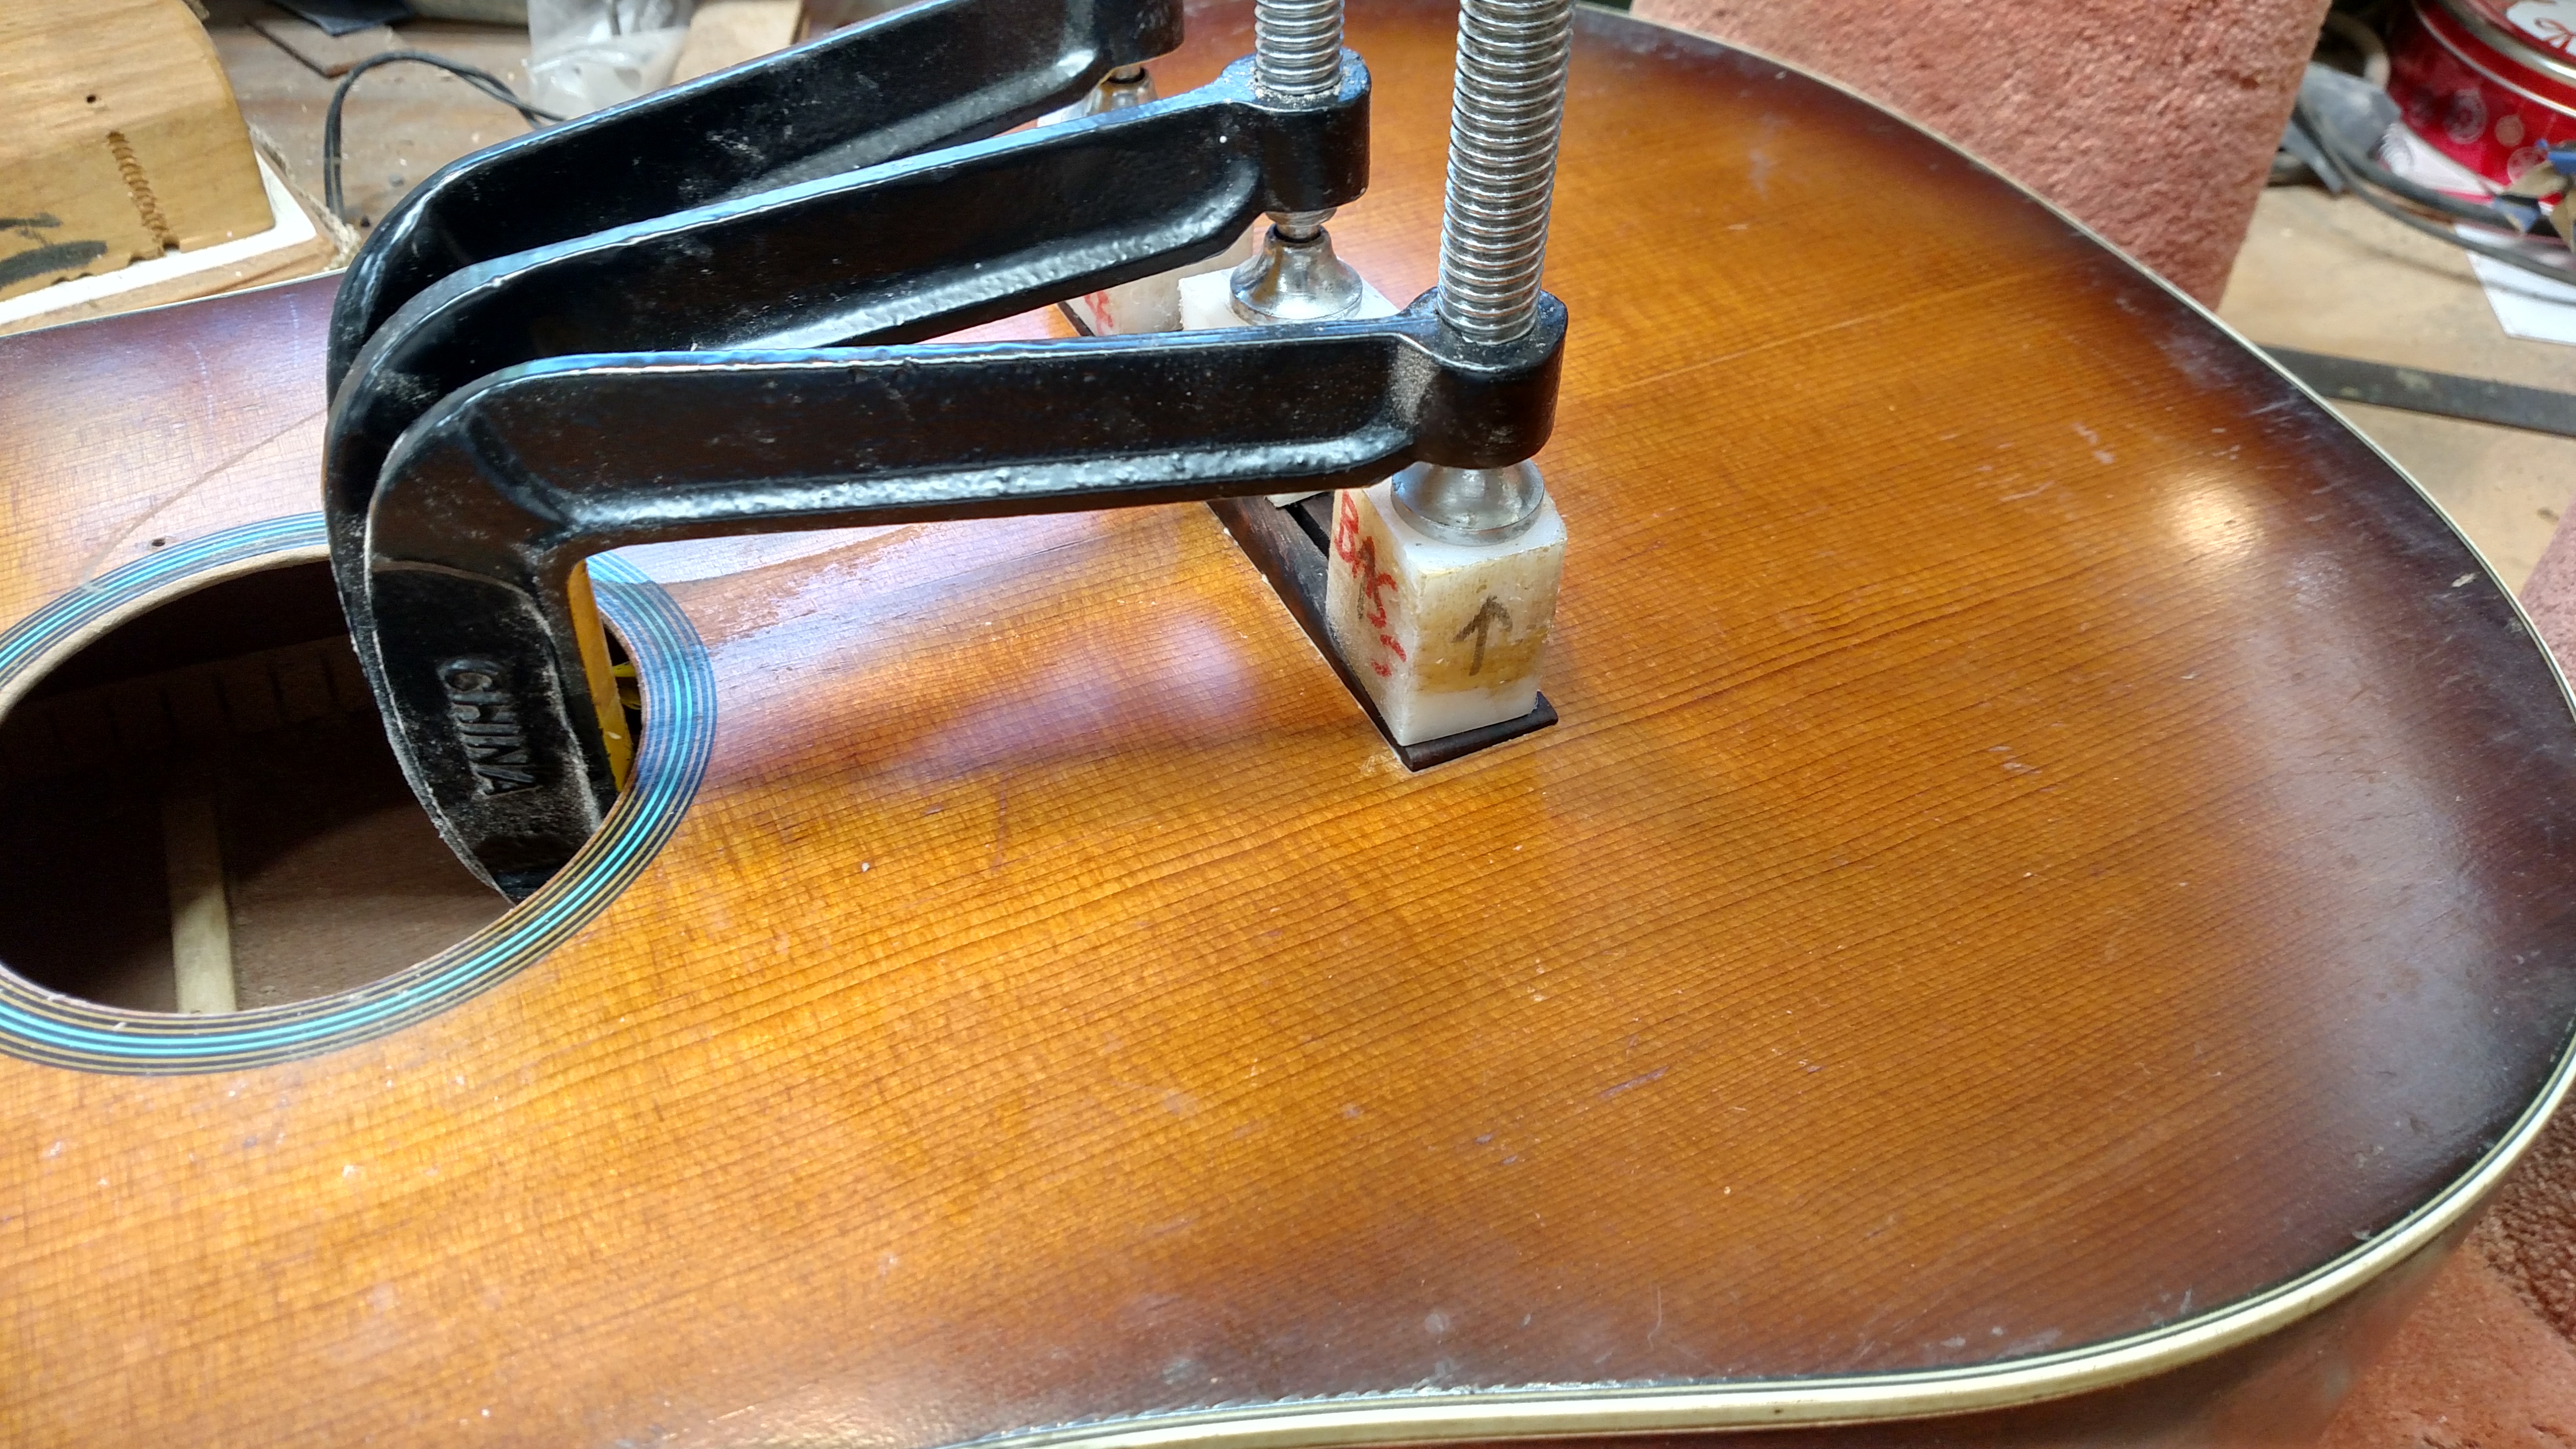
After removing the plastic alignment piece and cleaning the glue off.
Bridge
Above is a shot of the bridge after it was applied. I used some dogwood bridge pins that I had made several years ago and a bone 1/8 inch saddle. I experimented extensively a few years ago with making some custom bridge pins. I made some from different materials including bone, Delrin, different woods, Corian, phenolic resin, and other materials. I found from these experiments that these bridge pins are a factor in the overall tone a guitar produces. A guitar’s tone can be tweaked a little bit with the choice of the material these pins are made from. I chose these dogwood pins because they were what I had in stock. They seemed to match this guitar well (tone wise) and further enhanced the bass tone.
Above is a shot of the Asian made tuners that I used. I had to make the holes larger and these changes left some small holes in the underside where the old 3 on a plate tuners were mounted. I filled these holes with some CA glue and sawdust. I prefer having the filled holes over having to fight with those old Kluson tuners to turn them. I polished the brass frets and rounded the sharp edges on the truss rod cover and the neck binding. I also rounded over the binding on the guitar body. There is nothing I hate more on an instrument than sharp edges that feel like they are digging into your arm or leg.
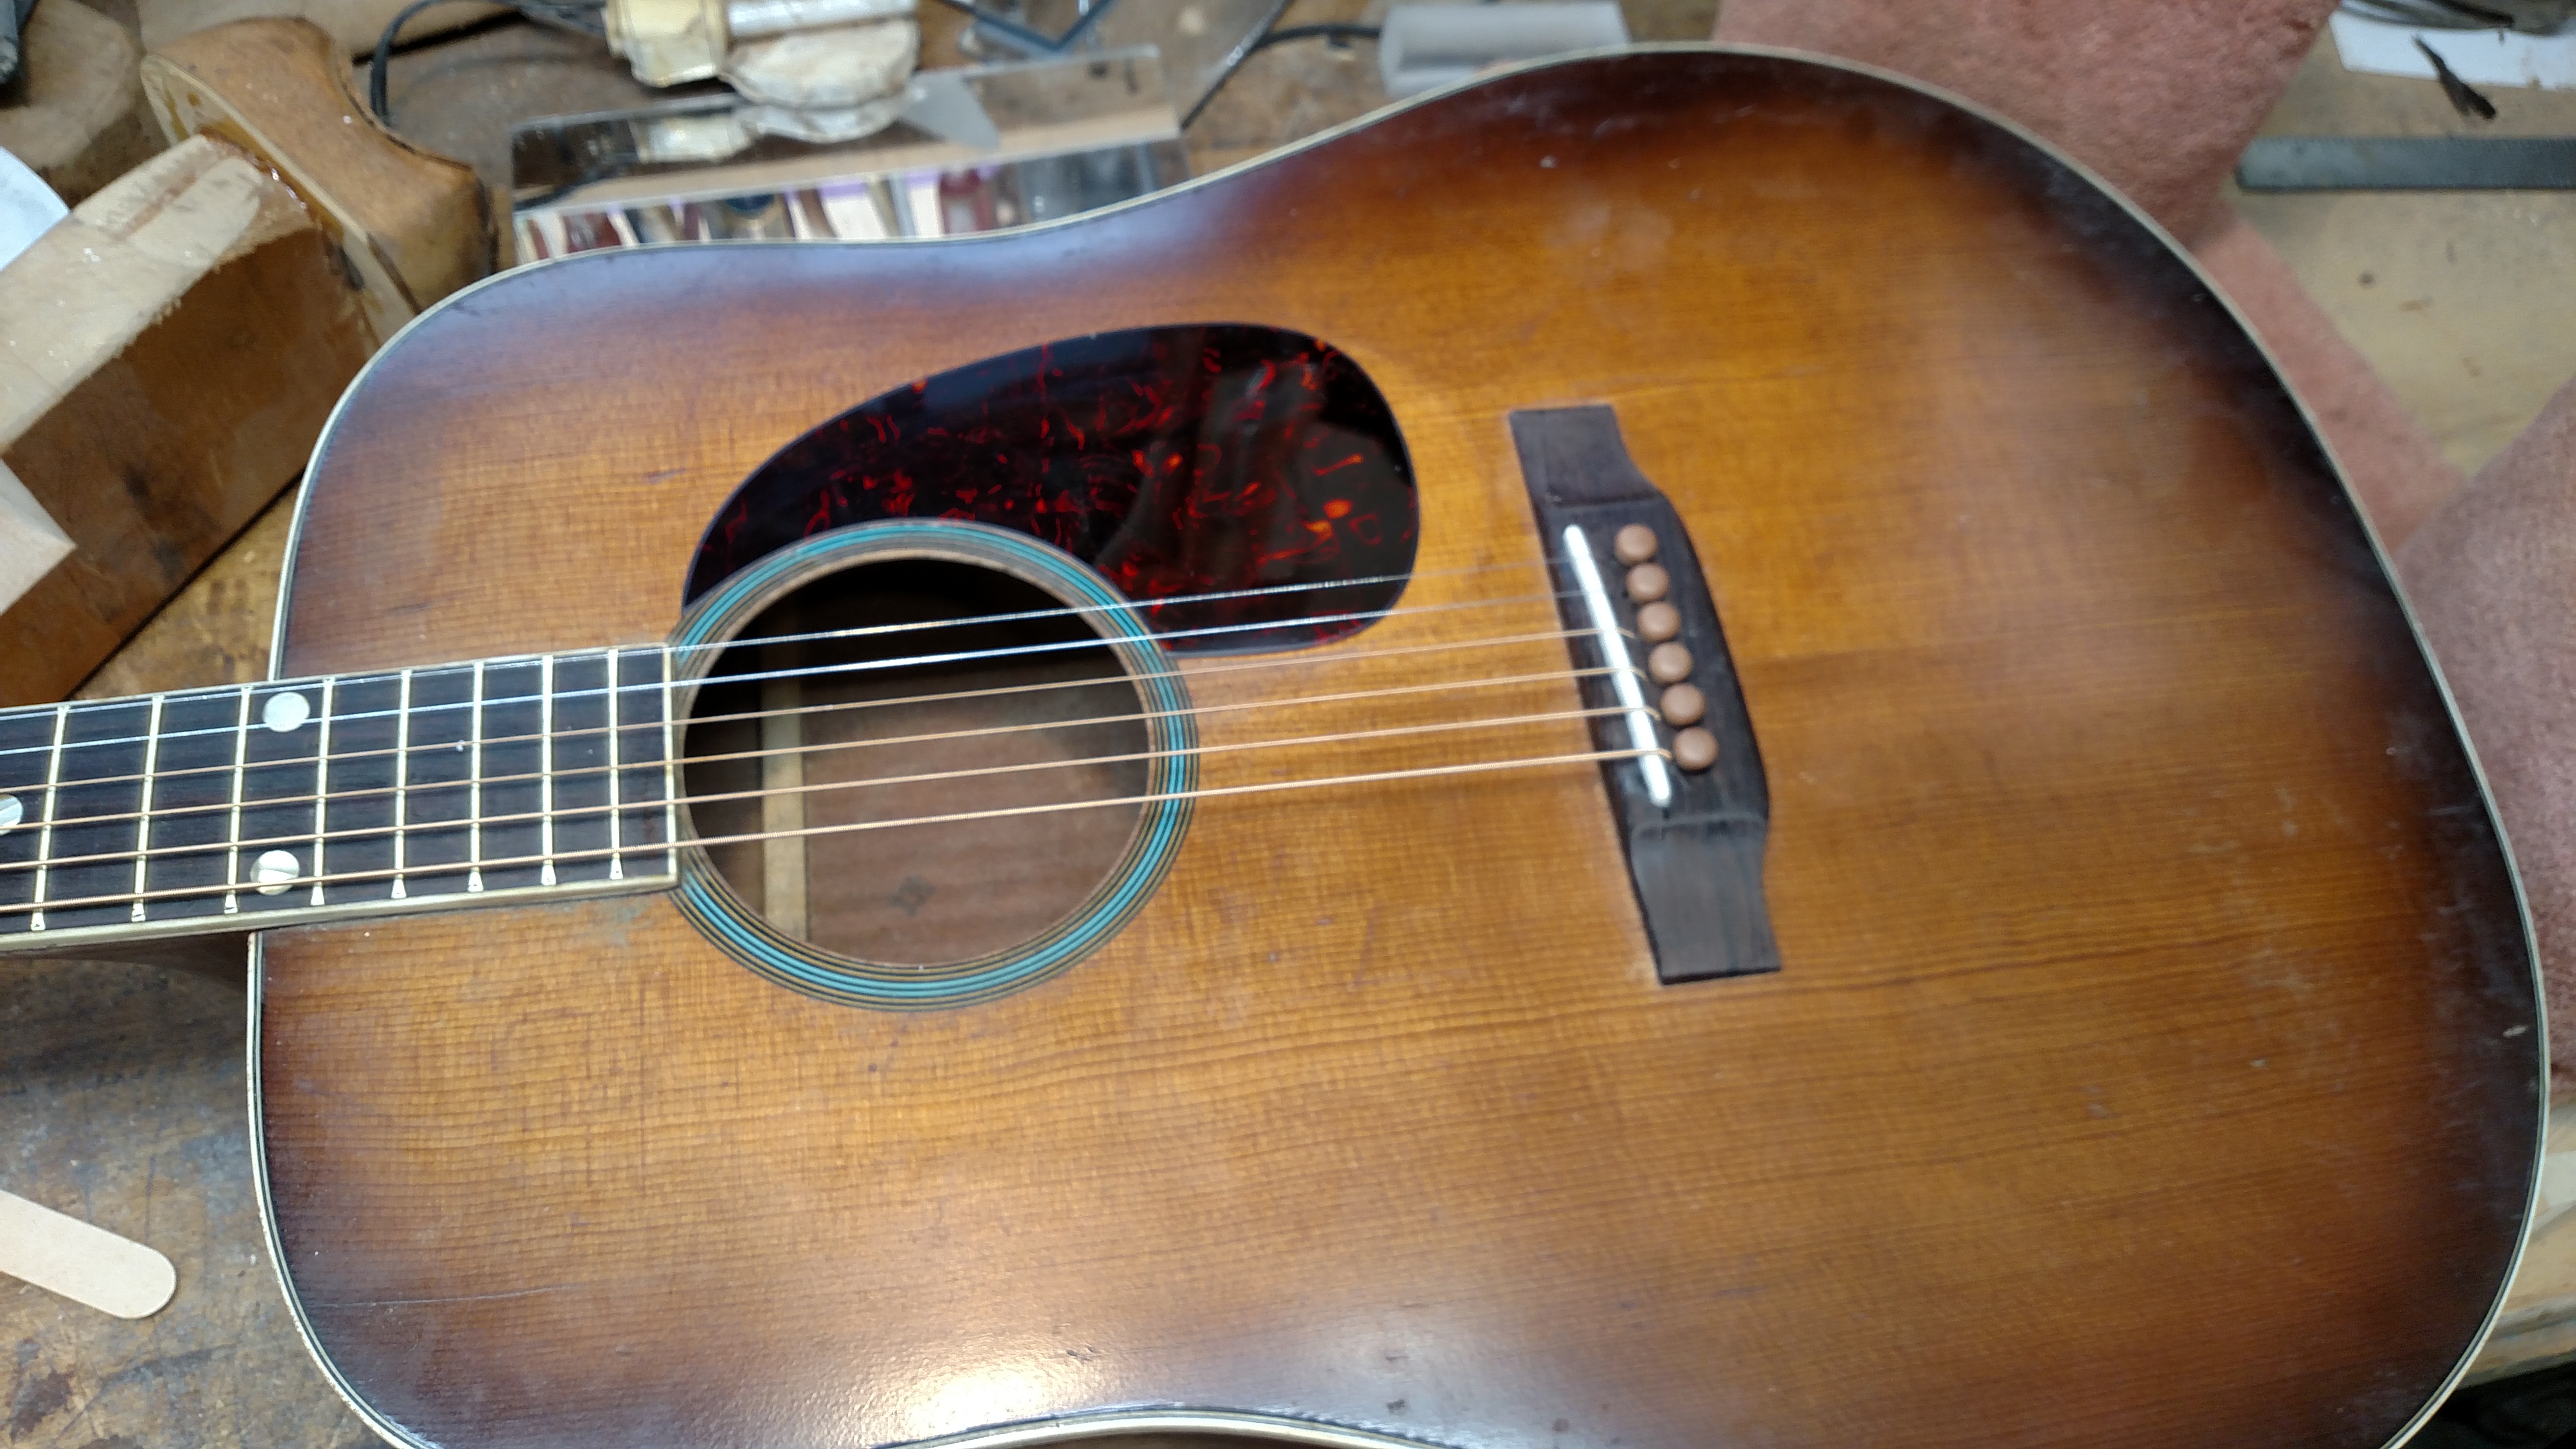
I fitted a Martin tortoise style pickguard to this body. It covered the holes that were left by the old pickguard. It is attached in the modern manner with 2 sided tape and the edges are beveled. I installed a strap button on the neck and put a new end pin in it.
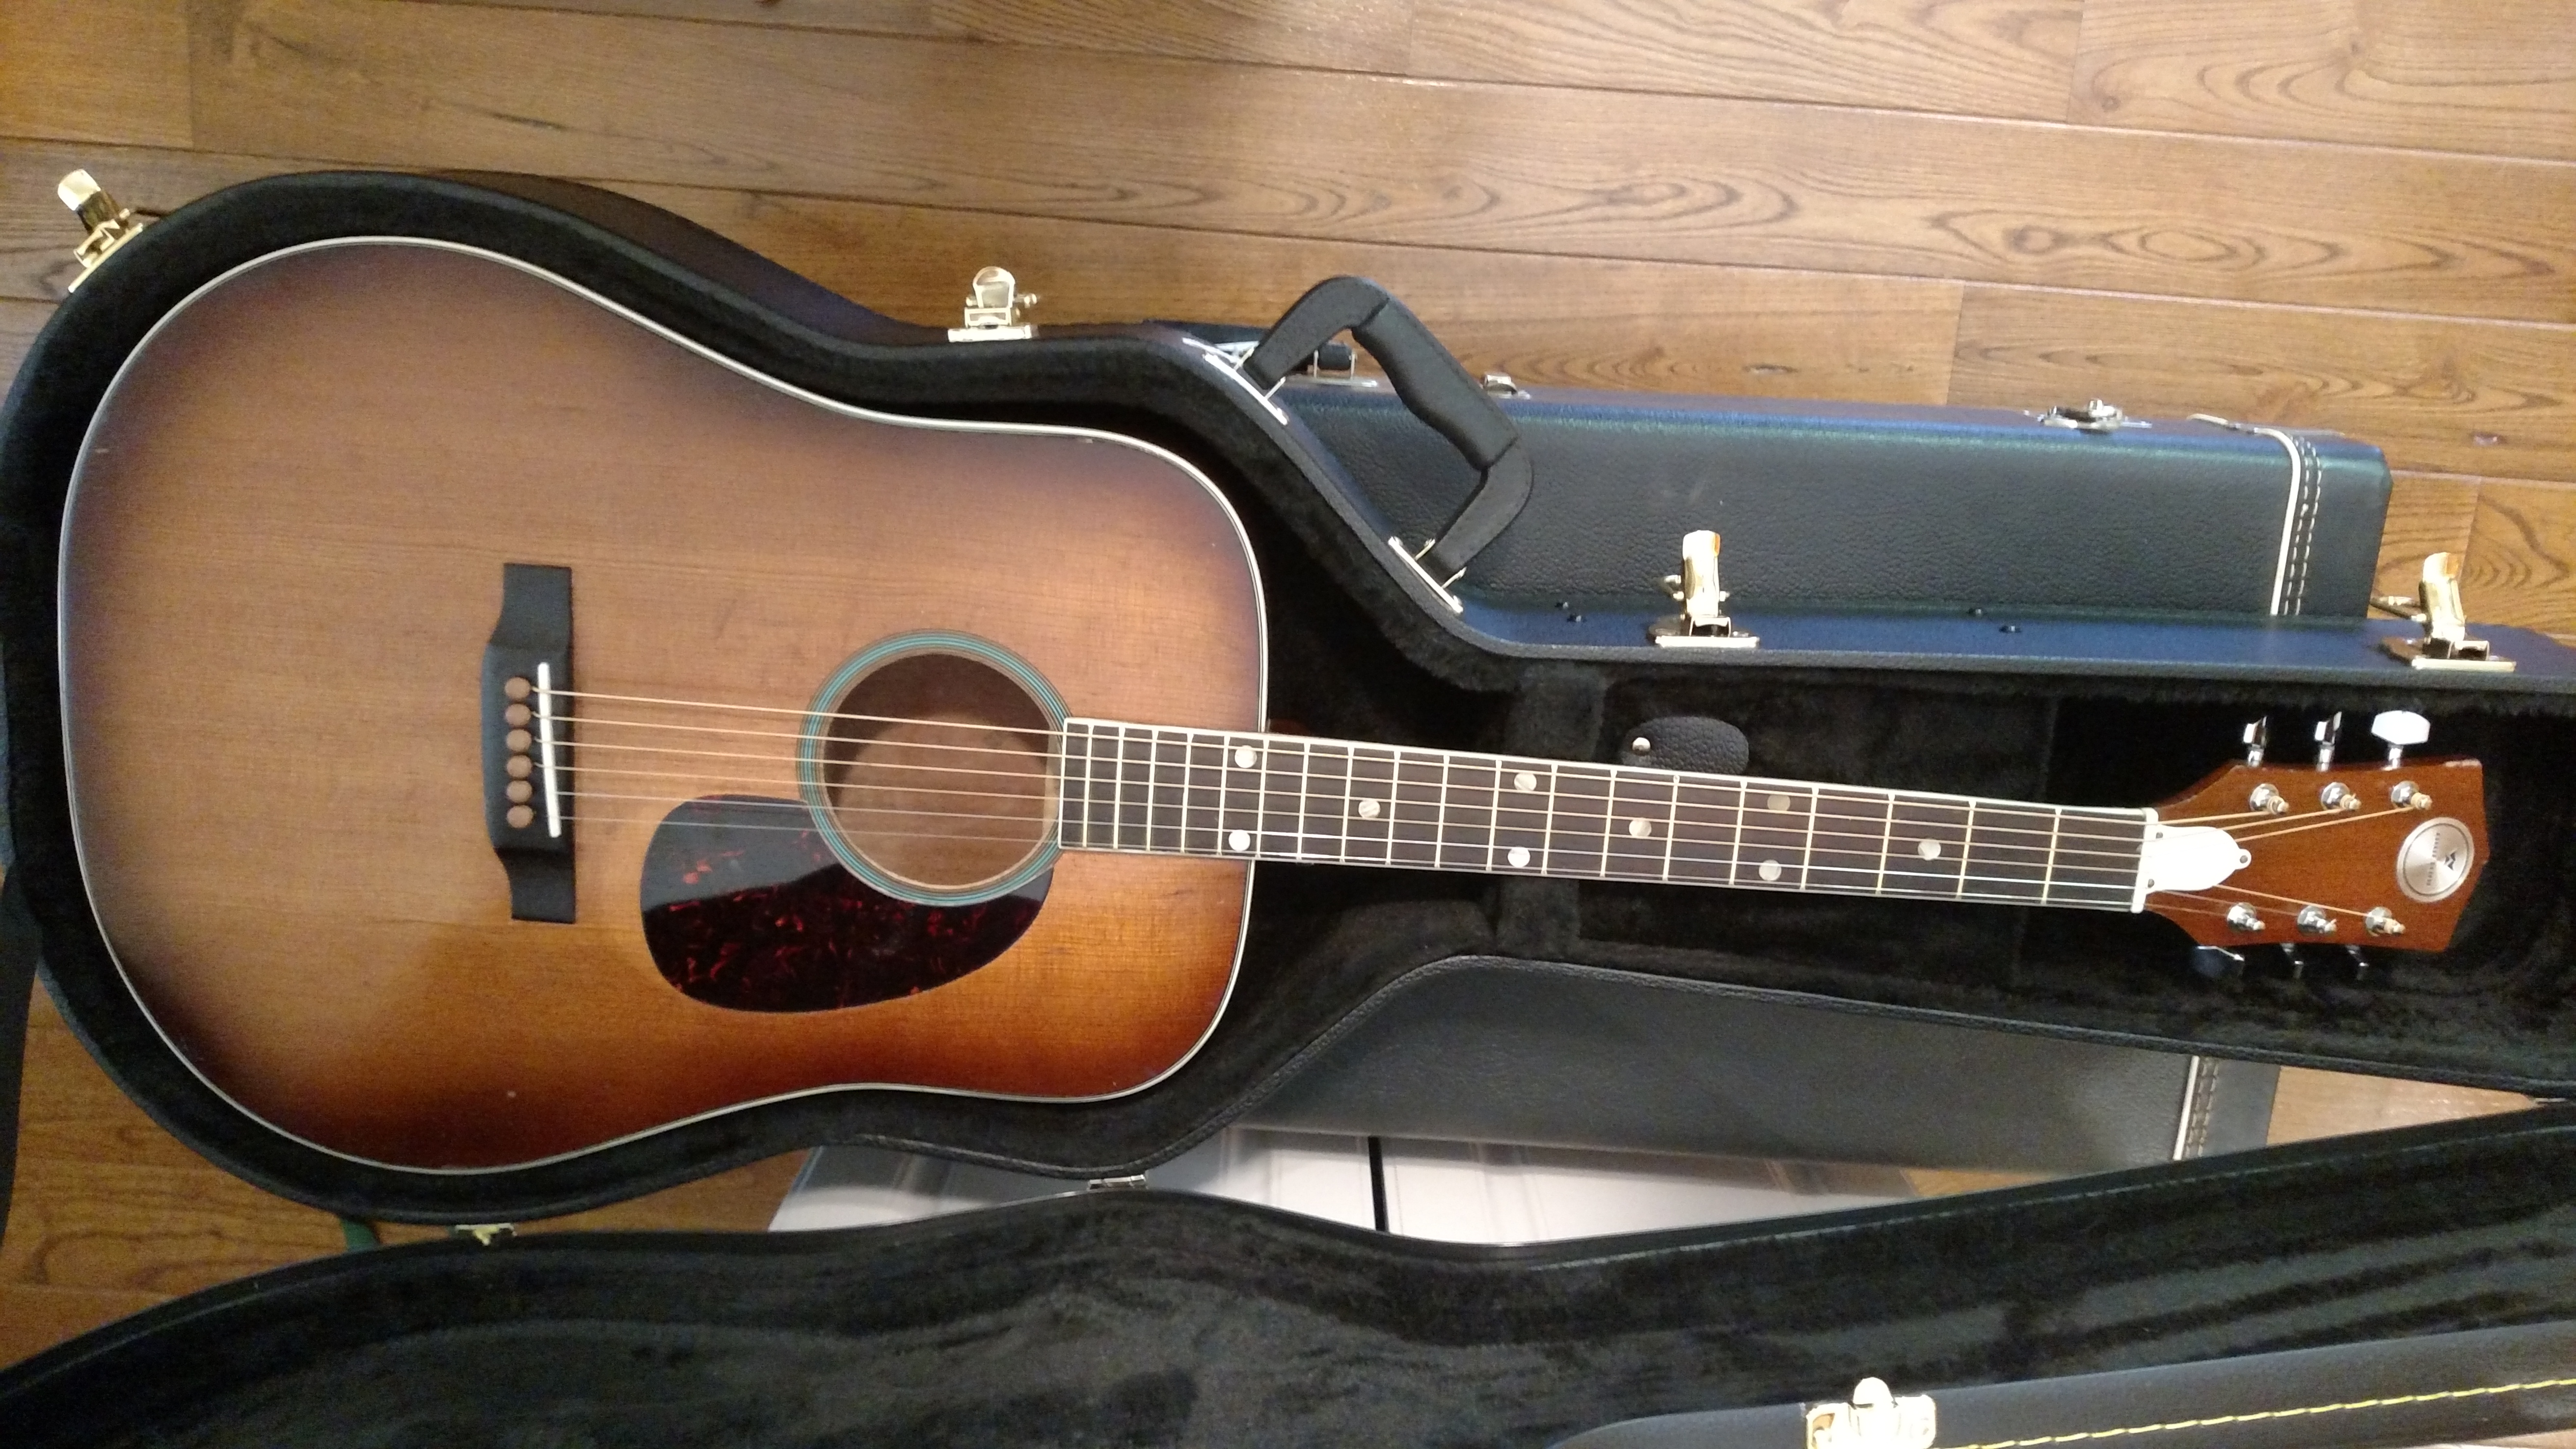
The pictures above show this guitar after I was done with it. I cleaned and polished on it a little bit, but I didn’t try to make it look new. I own several guitars and the sound and tone produced by this guitar as good as any of them, maybe better. I also like the bigger neck. It seems to fit my hand better than some guitars do. Below is a link to a little video I made to further tell this story and demonstrate the sound of this guitar. My picking is just some simple chords strung together but maybe it will show the sound of the guitar. Since I never heard the guitar before I worked on it, I can’t really judge how much my remodel changed it. Based on my previous experiences, I’d say the change in sound was pretty drastic. It’s sound suits my ear with a lot of bass and plenty of volume.
![]()
Ronnie
Magnificent job! I was watching this guitar myself on Ebay. A few times I was going to buy it but I held back because…I already own one of the exact model and….I have the same model in the Kay version…In addition to a cellar full of other guitars…So my good senses, which rarely comes into play with guitars, held me back…So, I was real pleased to find this video and see what you did with this guitar to keep it alive for another 60 years…Well done and it sounds fantastic!….Great website too!
Jack – NY
Jack:
Thanks for your positive comments. I’m extremely pleased with this guitar. I own about 12 guitars (including some Gibsons and Martins) and this is one of the best sounding ones I have. This is only the second x braced Kay I’ve ever seen. The other one belonged to an old man who said he bought it used in a pawn shop right after WW2. Most of the ones I have seen started out with a ladder braced top. I’ve converted quite a few to x bracing through the years. I wish someone would put out a book or a website on these old Kay Guitars. It is hard to identify the year of them.
Thanks again,
Ronnie Nichols
Ronnie
I love the old Kay dreadnoughts (They go by “6100”) and you’d be surprised because most of them were X-braced. Even their old cheap plywood top Western Special that they sold tons of were X-braced. All 4 of my Kay dreads are X-braced…anyway, check out this link….I think you will get a kick out of it…Jake Wildwood does some nice work…the guitar will look familiar….
https://jakewildwood.blogspot.com/2011/12/c1965-kay-made-truetone-dreadnought.html
Regards
Jack
I have this same guitar my brother bought it for me for Xmas from Western auto 1967 he paid a whopping 39.00 for it..lol. I still have it…
These guitars have some good features.Thanks for visiting my website. Ronnie
I bought one and the neck was a little loose but I would like to have it fixed do you still work on them if so what would you charge to reset neck
Ray:
These guitars are not high end models and the cost to reset the neck will usually exceed the value. I still work on them but a neck reset can easily run in the $500.00 to $600.00 range (or more) depending on what has to be done. It’s sort of like putting a $100.00 saddle on a $50.00 horse. Sorry to give you the bad news. My Truetone Guitar has become my favorite one to play. The tone is amazing. Let me know if you wish to invest in this guitar. Ronnie
Would you be interested in it
Ray, I sent you an email about this. Thanks, Ronnie
Ronnie,
I have an Old Kraftsman that looks identical to the Truetone you have featured here. I’m assuming Kay made this very same model for Spiegel around 1965. Mine is all original and I play it occasionally. My father bought this guitar for me from my cousin when I was 13 or 14 years old, back in 1967 or 1968. I’ve had it ever since. It has a thunderous tone that I truly like. Although not an expensive model this guitar is priceless to me. The video of you playing the Truetone sounds fantastic.
Regards,
Dave Anderson
Thanks for the comments. I’m pretty sure they made these guitars for several companies including Spiegel. This is the guitar I play most of the time, now. I have narrowed and reshaped the neck on mine since I wrote this article. It now fits my hand better and I really like the strong bass tone of the guitar. Thanks again, Ronnie