Johnson Guitars in the past have been thought of as cheap and not too desirable. When Greg Rich came out with the Johnson Carolina Dreadnaught Guitar it was a different story. These guitars have a solid spruce top with either a rosewood or mahogany back and sides. Different models either had a solid back and sides or plywood back and sides depending on the model designation. These guitars were made in Asia and were supposed to be copied after the old Martins. It seems that the first batches of them had a problem.
Somehow, the makers took the “forward bracing” idea too far. Apparently a lot of them failed after the bridges rolled up. The music stores had sold them to customers with a warranty and I assume they had to take a lot of them back and replace them with new ones. I purchased several of these guitars from a music store in New England. They were listed on Ebay as “project guitars”. This is one that I repaired.
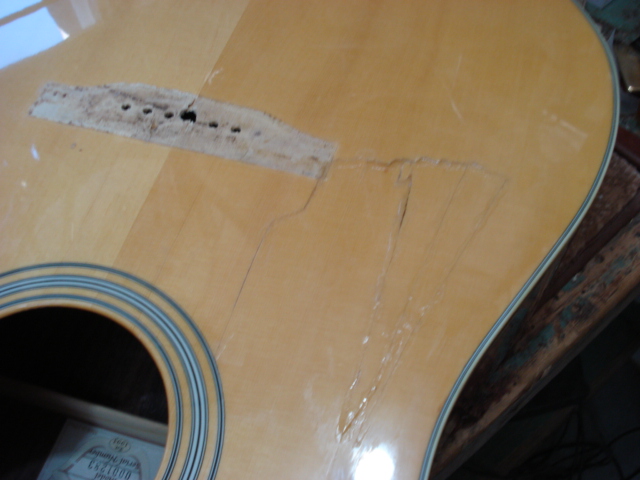
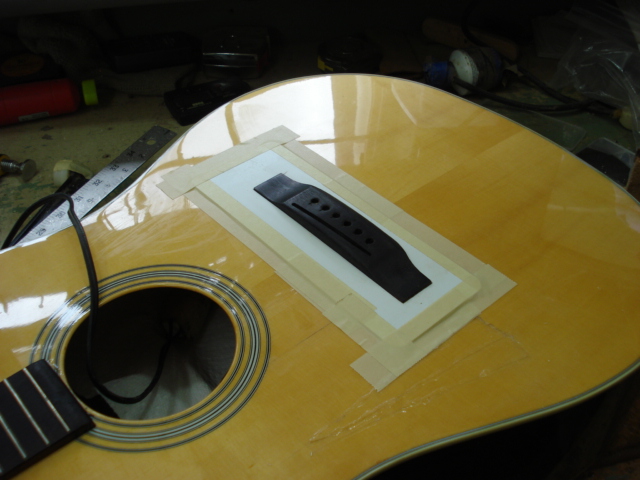
You can see in this picture that the x brace, (which should run diagonally about an inch and a half rearward of this) is definitely in the wrong place. The x brace should pass under the rear corner of the bridge instead of 1/2 inch in front of the front corner. This positioning is critical for the strength of the top.
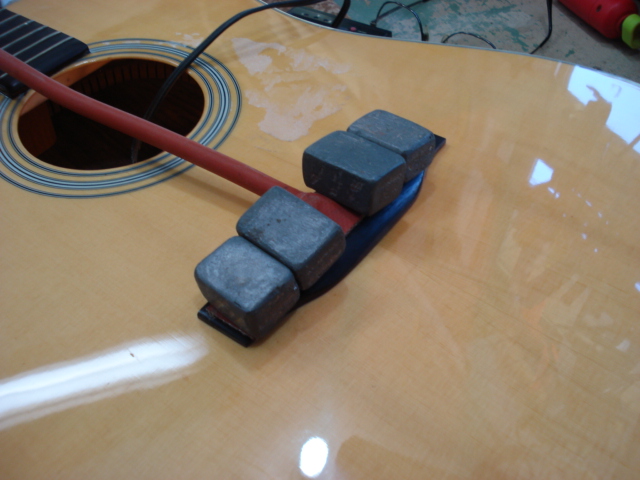
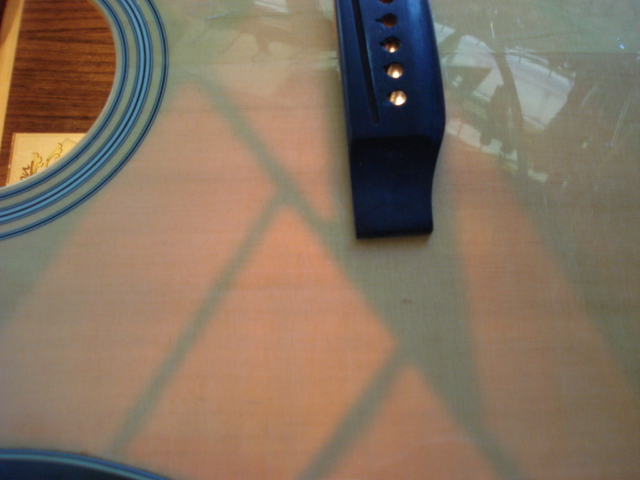
Here is the silicon heater preparing the bridge for removal. The bridge came off pretty cleanly and I then directed my attention to removing the top braces and bridge plate.
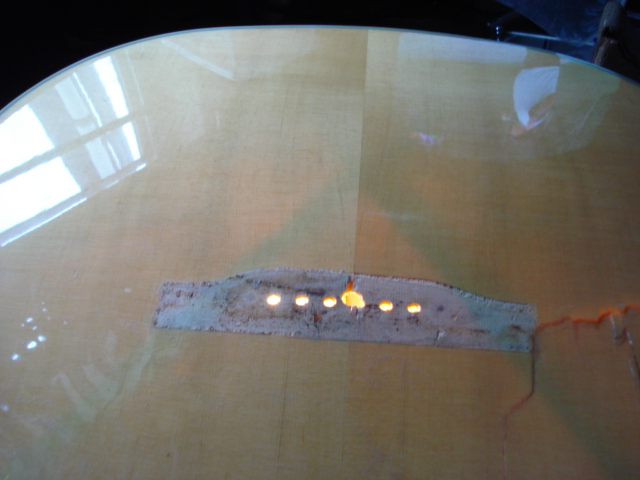
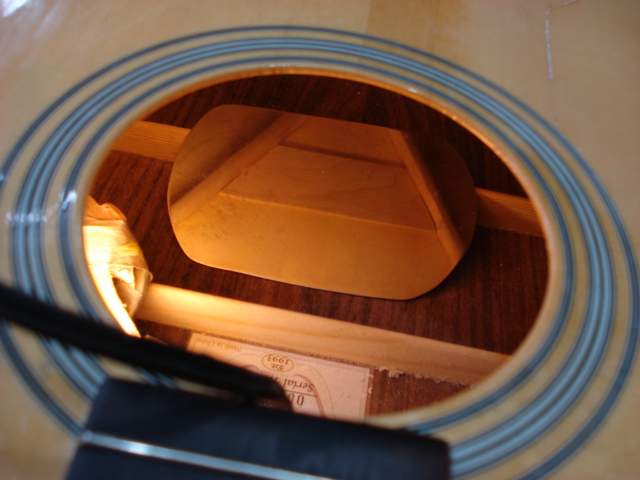
If you are familiar with what this is supposed to look like, you can see the alterations the builder has made. The vertical lines in this picture are the edges of my 3 piece mirror. This bridge plate is considerably wider than a normal one because of where it has to be positioned in relation to the bridge. I used my homemade bridge plate heating tool to heat the bridge plate but it wasn’t nearly as wide as this plate. In the process of removing the bridge plate, I managed to tear a large hole in the top. This top did have a lot of grain runout and the bridge plate was extra wide so my heat didn’t get to all the right places.

This is a nasty looking hole isn’t it? Since I’d pretty much ruined this guitar, this gave me a good excuse to try a different bracing system that I’d had in mind for a while. This is an example of a top with excess “runout”. The grain may be quartersawn, but the wood is not running parallel to the grain in the other direction. I’d guess this top has about 30 degrees of runout. It is my opinion that this takes away from not only the strength, but also the sound quality. I’ve seen this in some Martins, too, through the years. The old wagon wheel makers always split the wooden spokes out instead of sawing them. The straight grain was of utmost importance for strength. I think the same principle applies here.
I repaired the split top with some CA glue and it went back into place pretty well.
I fashioned some braces from some straight grained spruce and braced it with 2 X braces that cross behind the bridge in the area where there is traditionally a big bulge. This flattened the top and seemed to make a decent sounding guitar.
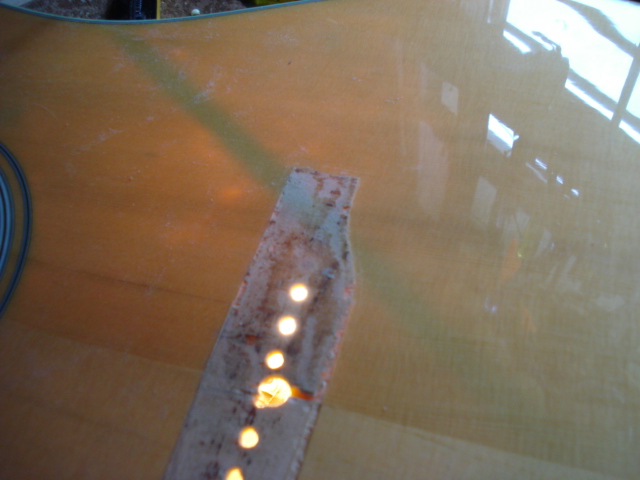
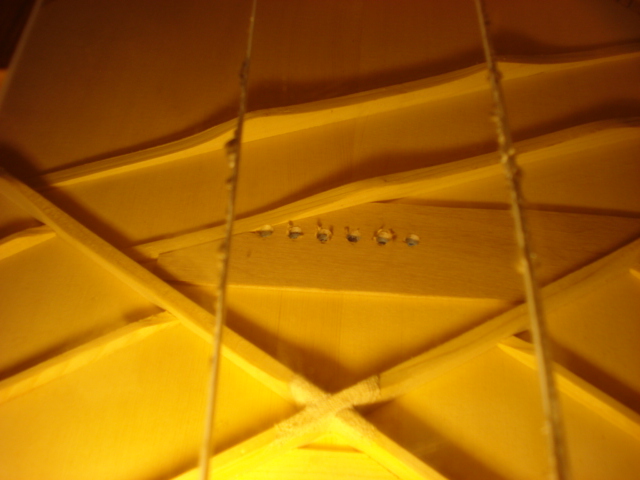
This picture shows the proper place where the x brace should cross under the bridge for the most strength.
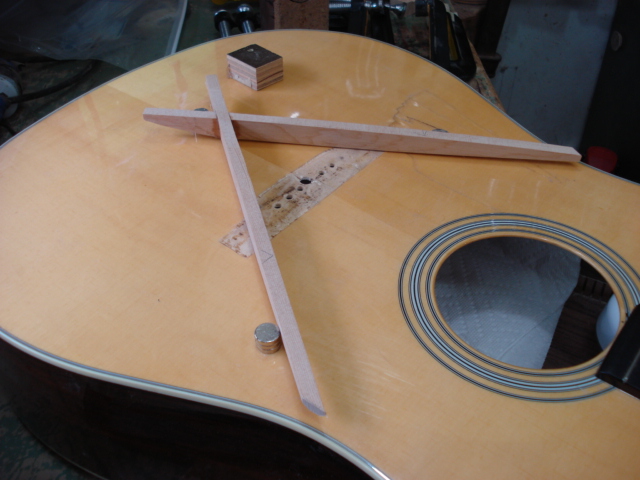
The difference is that the braces are oriented in a different direction than usual. This picture was actually taken before I repaired the split top. but it shows where the braces went.
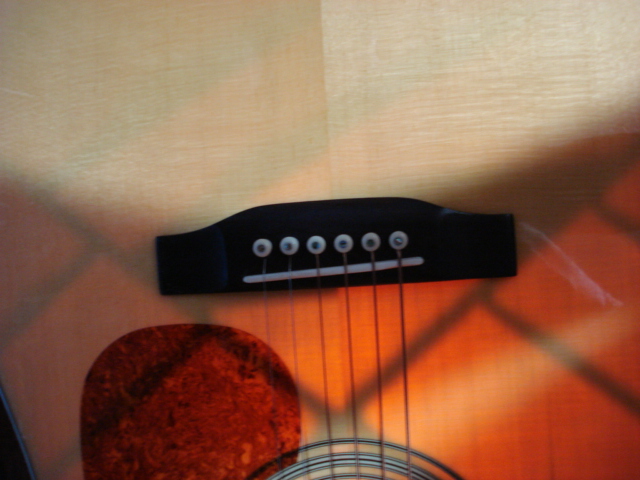
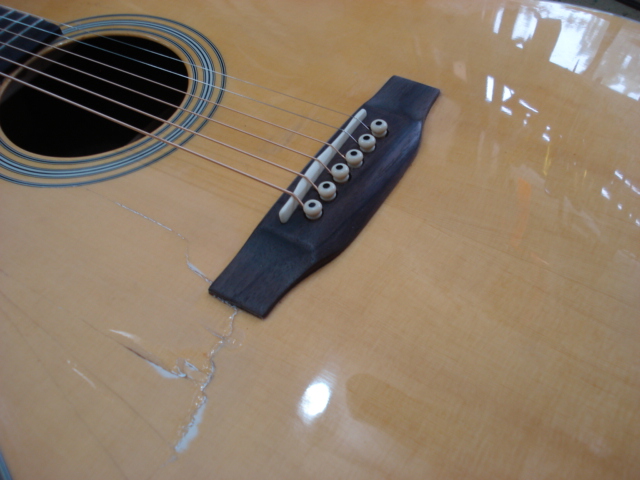
Here is the bridge located where it should be with my little plastic guides. They hold the bridge in place while the glue is wet so the clamps don’t move it around.
Here is the new bridge plate and the braces. I’ve added a cross brace in front of the bridge plate since this was taken. The extra cross brace seemed to stabilize things. I also scalloped these braces.
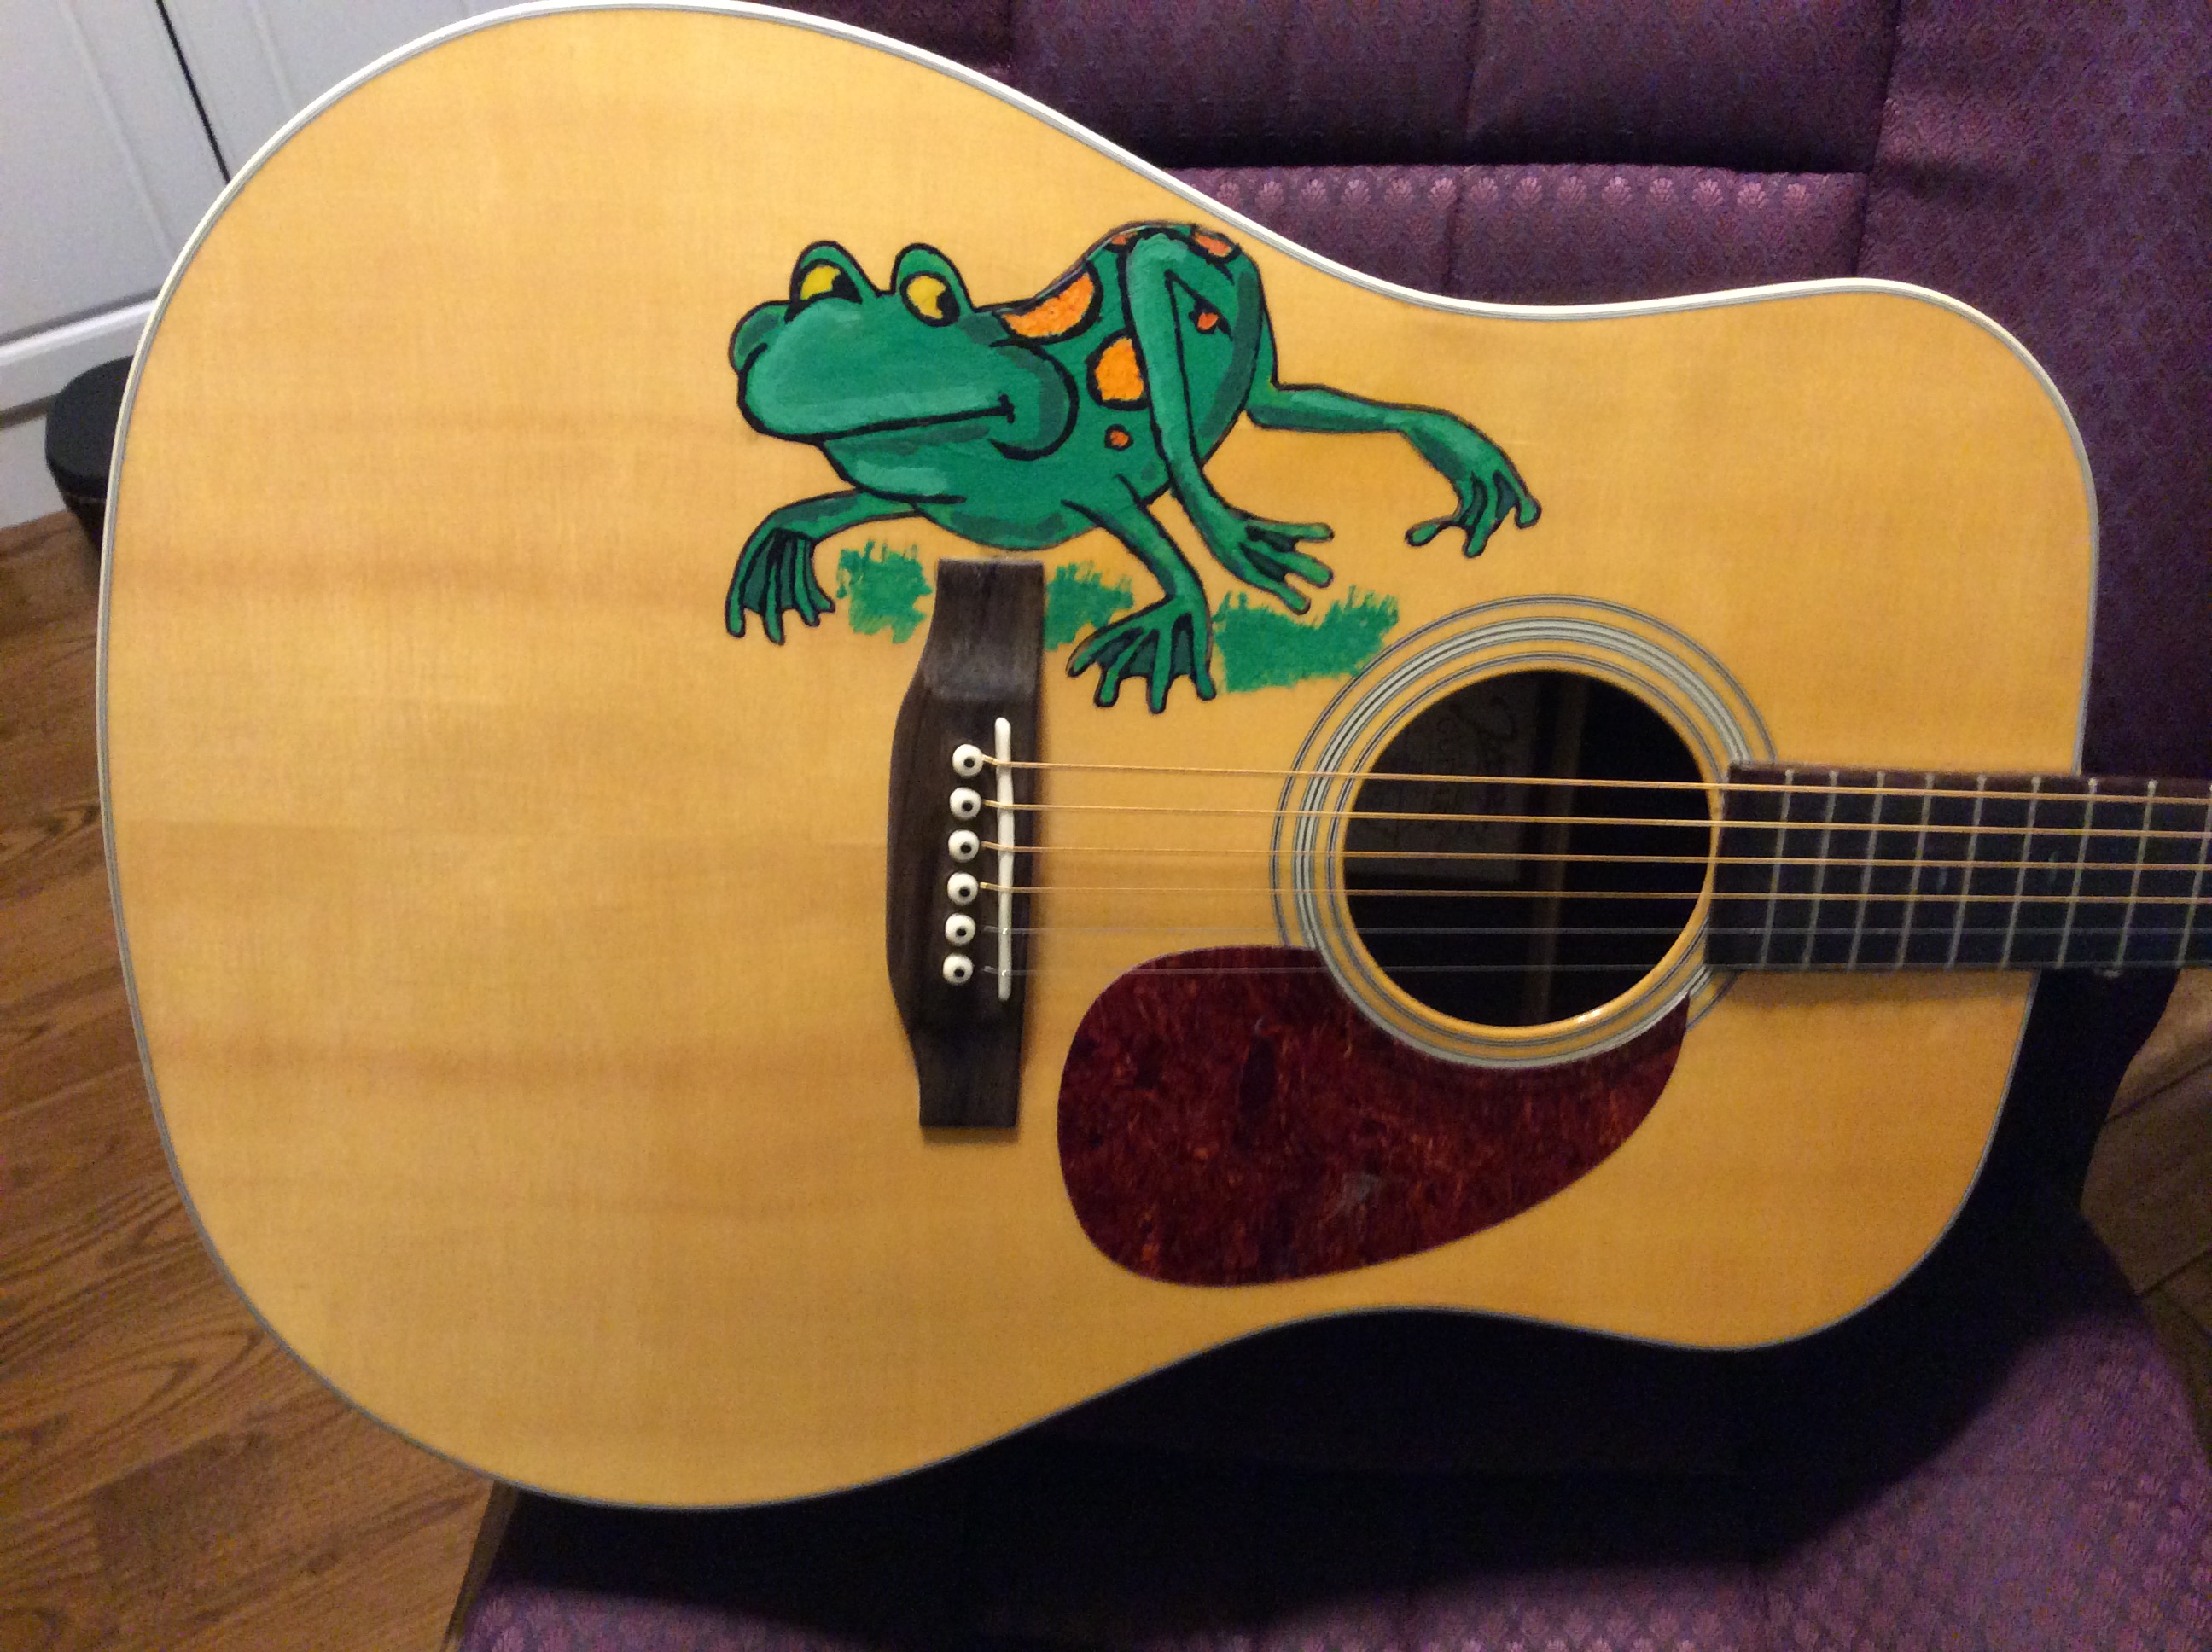
After it was completed, I was left with a guitar that had a large surgical scar on the top. I tried to get some “artist” friends of mine to paint something over it, but nobody wanted to do it. Since I didn’t have an STP Sticker the right size, I did what I could to make it presentable. I painted this frog on it to cover up that nasty scar. This is how it became the Frog Guitar. It turned out to be a nice sounding box. This bracing system has stayed dead flat with no changes that I can detect. It has now been over 5 years.
![]()
I love this. You invented a new bracing pattern (I’ve never seen anything like that in my many years browsing patterns), you saved a guitar and made it funky! HA! Great job.
Thanks for your kind words. I really enjoy trying new things on acoustic instruments.
I browsed all your repair articles today, banjos and guitars, as I am starting my first guitar build and also experimenting on a cheap guitar to make it sound better as well (I wish I’d seen your blog first to know to remove the finish from a guitar with a chemical stripper instead of impatiently scraping it off with a paint scraper! Haha!) I just wanted to say thank you for sharing your work. I learned a lot.
Thank you for looking. The acetone removes lacquer pretty well. On guitars with polyurethane or another type finish, it is not as easy. If you are truly interested in luthiery, I’d highly recommend Frank Ford’s website, Frets.com. Frank has taught me a lot. He knows what he is doing. He is talking from experience and not what he read somewhere. I spent about 2 weeks reading his posts when I first discovered his site. Good luck with your guitar build. It will teach you to have patience. Ronnie