1970’s Gibson Dove Repair
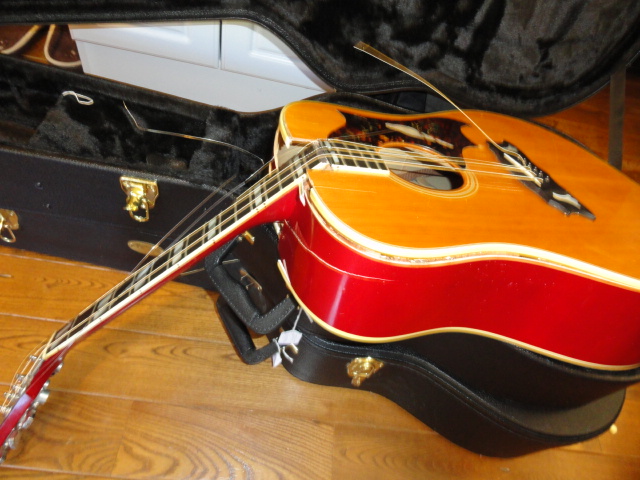
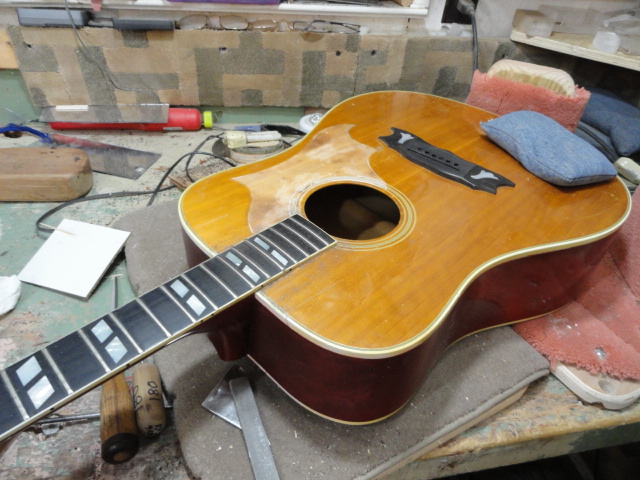
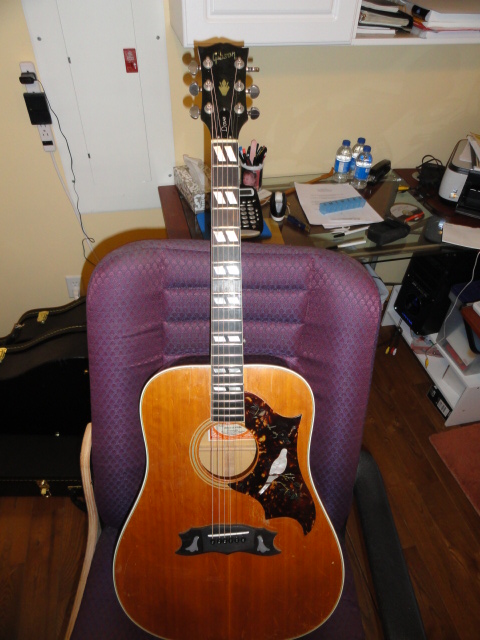
Here is a picture of this guitar when I started. A fellow brought it to me to see if I would repair it for him. I told him that it would be hard to repair it and charge for my time without surpassing the value of the guitar.
He decided to buy another guitar. I offered to buy it for a winter time project. This is how I ended up with it.
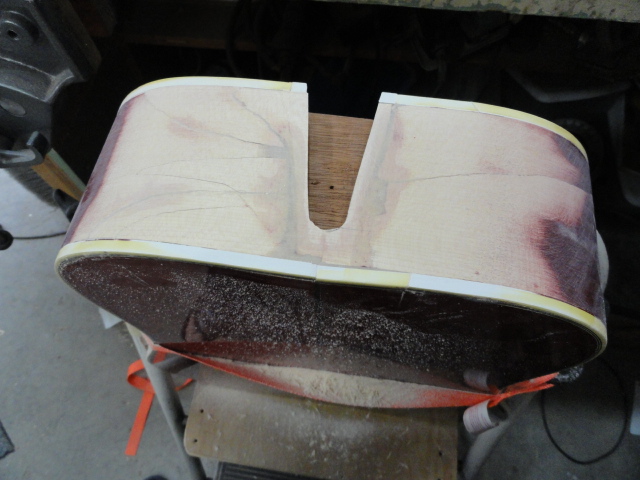
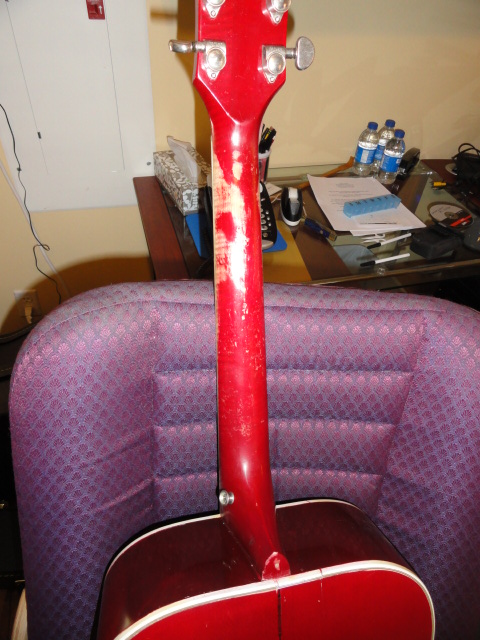
These guitars never did have a really good sound to me. They were over-braced and the bridge plates were plywood and too thick. This is what it looked like when I got it. The fellow fell with it while going on stage.
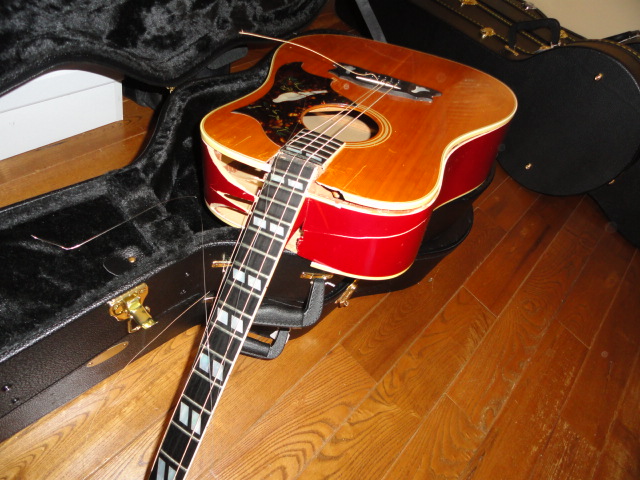
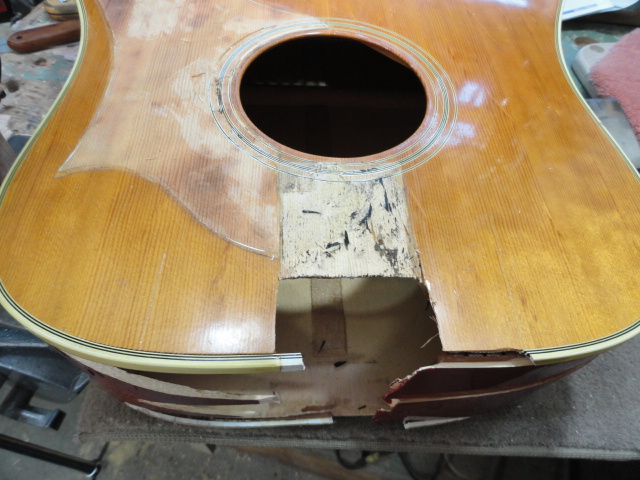
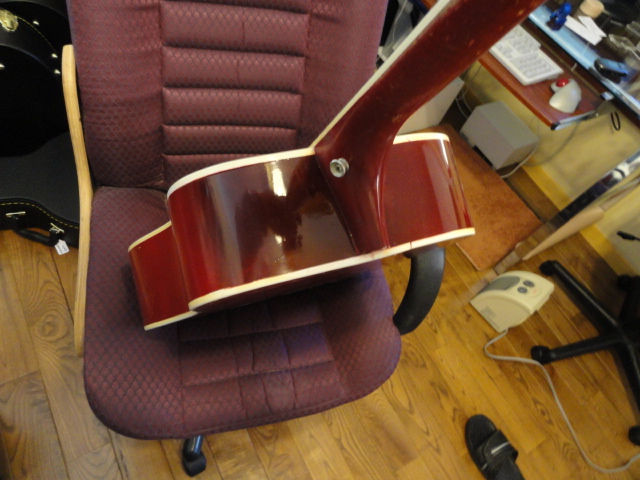
The neck was not hurt except the fingerboard broke in two at the 16th fret. The neck block came out basically intact. I set about putting it back together. Almost all the pieces were there.
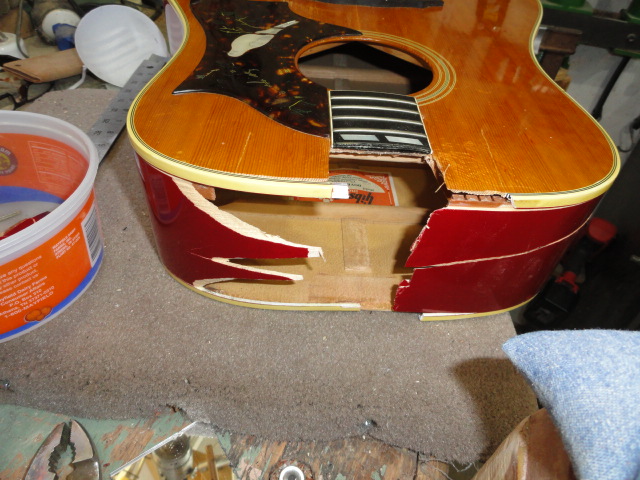
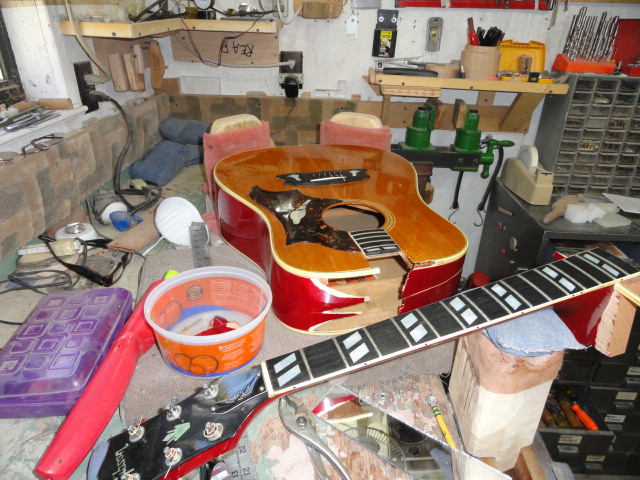
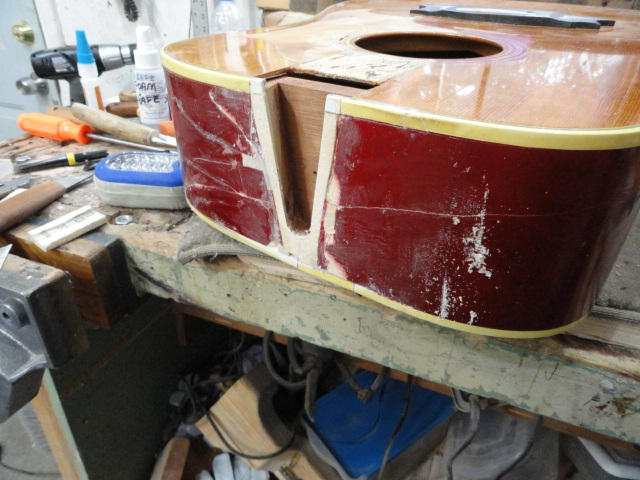
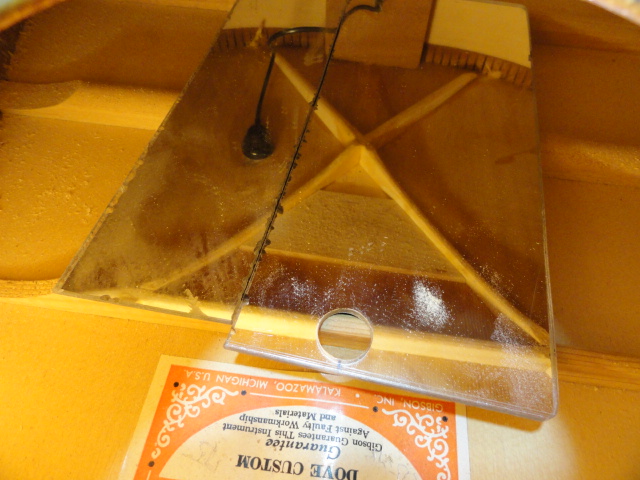
That is a pretty nasty looking hole.
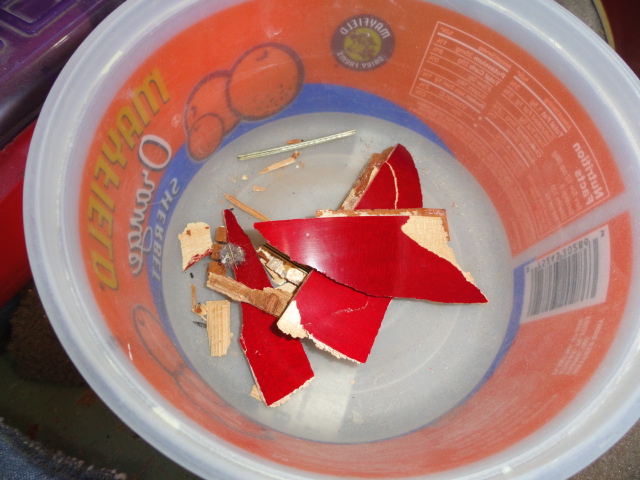
Here are some of the broken pieces. The sides of this guitar are maple. There appeared to be quite a bit of run-out in the sides. This may have been a good thing in this instance.
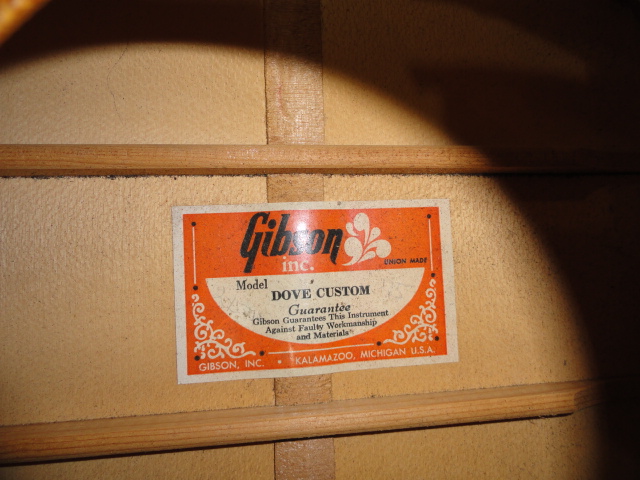
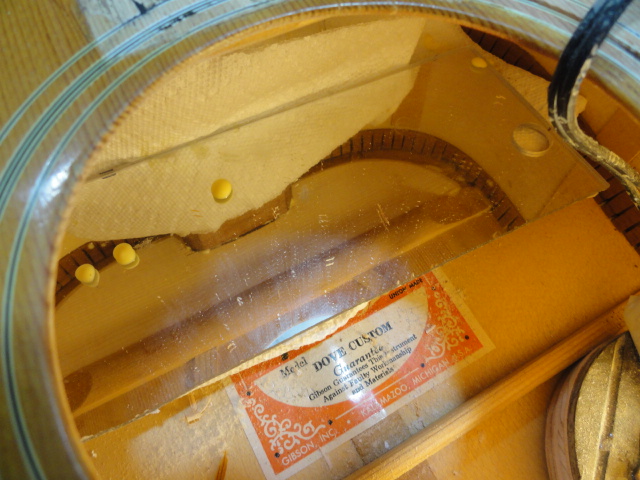
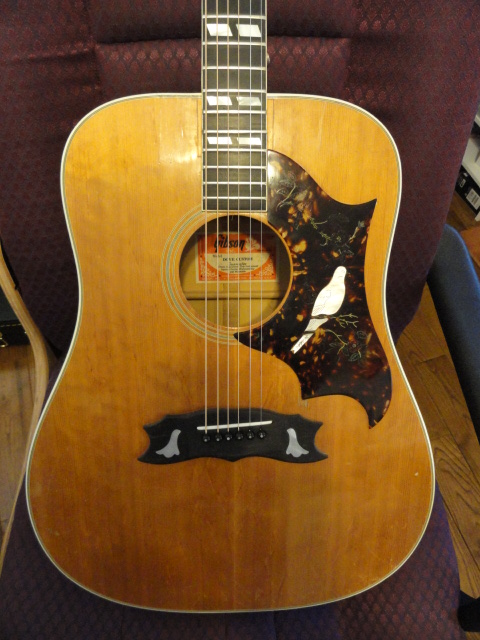
This sticker is typical of the 70’s Gibson Guitars that I have seen.
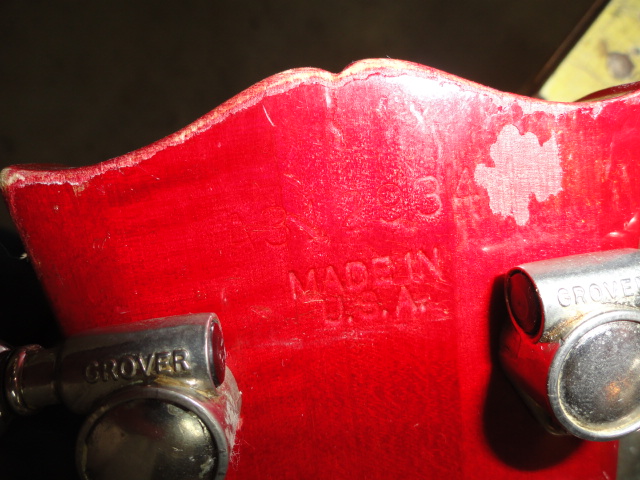
The serial number was A3142934. This is said to date it somewhere between 1973 to 1975. Since this guitar was damaged so badly, I decided to use it as another place to try my Nichols modified x-bracing system. I have used it in several guitars with very good results. Since these model guitars were usually lacking in sound, it seemed reasonable to give it a shot.
I injected some steam into the neck joint and removed the neck block from the neck. Then I removed the side pieces from the neck block.
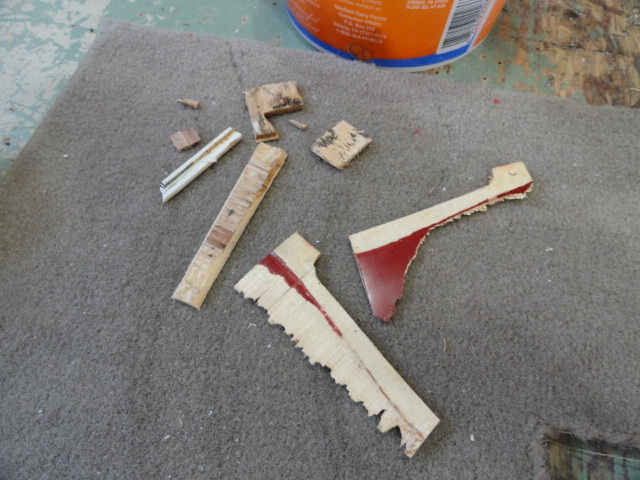
Some of the side pieces from the neck area.
I removed the pick guard and broken fingerboard piece. There were some pieces of the top that broke with the neck but they were a pretty clean break.
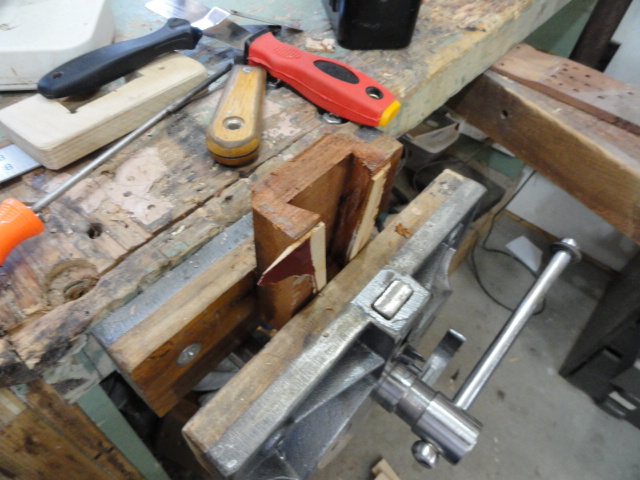
Here is the piece of the fingerboard prior to reattaching it. This repair needed some strong epoxy to fill in the voids . I have found that this super strong epoxy (JB Weld, normally used for metal) does a good job in some places where wood is badly damaged and extra strength is needed.

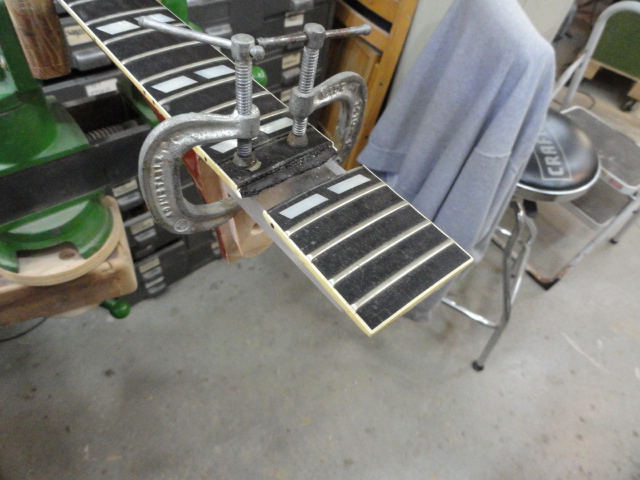
Here is the fingerboard being glued.
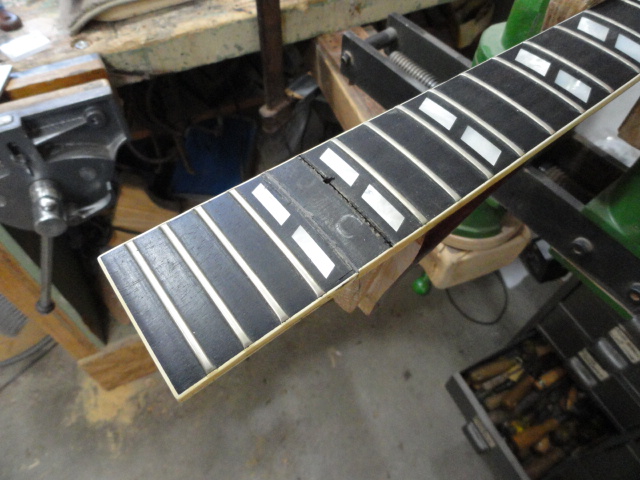
Here is the fingerboard put back together. These 2 frets will be put back after the neck is reattached. The slots will be widened and they will be epoxied into their slots.
After I pieced the broken pieces together with CA glue, I cleaned up the neck block and replaced a small damaged section. I reattached the block with some J.B.Weld product that is apparently pretty new to the market. It is called Wood Weld and it is a strong product about the color of peanut butter. I felt that this would make this joint stronger than it was in the beginning.
Here is a shot of the sides and neck block after the initial gluing. The thin CA glue penetrated the sides pretty well and filled some small voids.
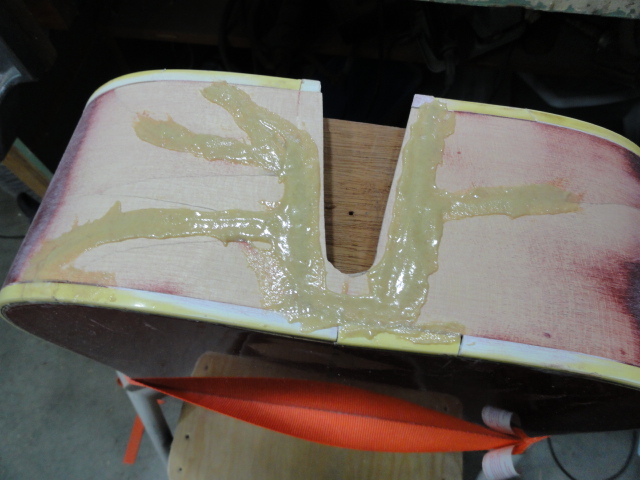
Here is the Wood Weld product applied to the repaired cracks and voids.
After smoothing
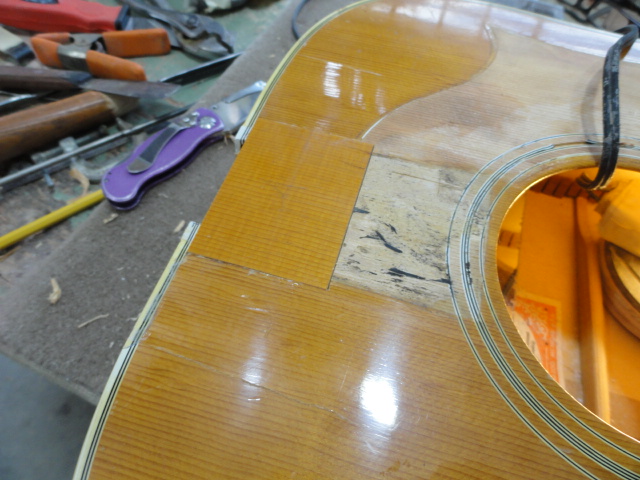
I cut a piece from another old Gibson top and fit it into the damaged area. I also attached this with the Wood Weld. It extended past the neck block and lapped over my extra reinforcement that I attached underneath the top.
For some reason Gibson chose to put 2 different braces in front of the sound hole on these guitars. The front brace was broken and I removed it. I replaced it with a section of spruce that covers the entire area forward of the other brace. I feel this will be a lot stronger that the original configuration. I have seen several of these guitars fail because of the top breaking alongside the fingerboard allowing the neck block to move toward the sound hole by as much as ¼ inch. Most all acoustic guitars I have seen only have 1 brace in front of the sound hole.
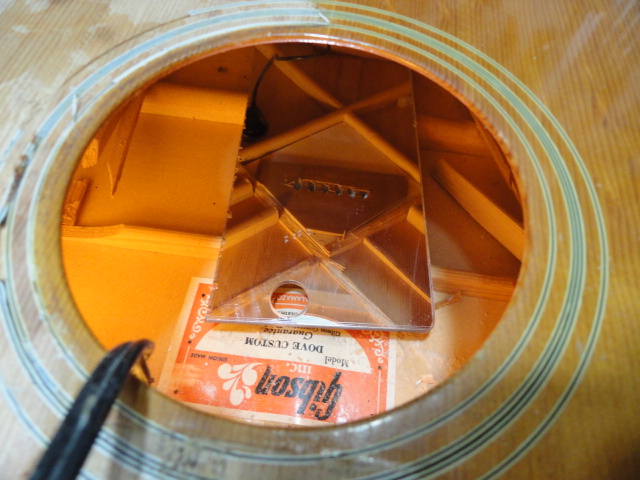
Until now, the repairs were to correct the damage done when the owner fell on this guitar. Since I have observed that these guitars were in need of some help in the sound department, I decided to remove this bridge plate and all the top braces in an attempt to inject some sound into it. I have learned to remove and replace these braces through the sound hole with some specialized tools. This bridge plate was not only the 3/16 thick plywood but someone had added another piece of plywood under the original one.
Removing the top braces and bridge plate.

Here are the old braces and bridge plate after I removed them.
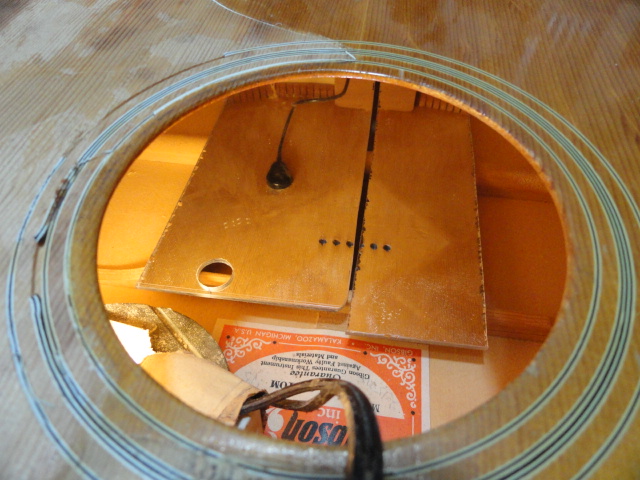
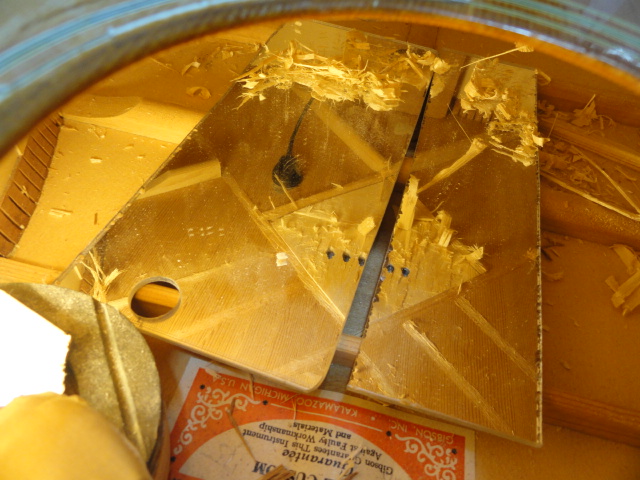
Inside the top after brace removal. I left the pickup that was attached to the underside of the top.
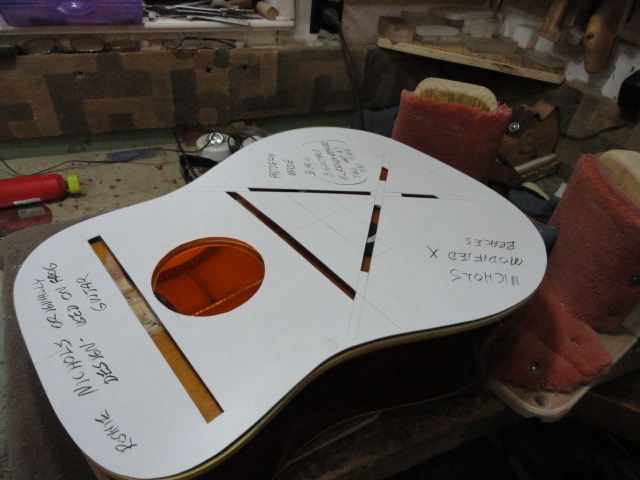
Here is the template for the Nichols Modified X bracing system. These braces cross behind the bridge instead of in front of the bridge. I have observed that the weak point on most x bracing was behind the bridge. I put the strong part of our braces in the weak point on the guitar. Am I saying that C.F.Martin put his braces in wrong? No, I’m not, but, I feel this bracing has some merit. This is about my 6th guitar to put this bracing system into and they are all holding up real well. The top stays a lot flatter than the traditional ones do and the sound is good.
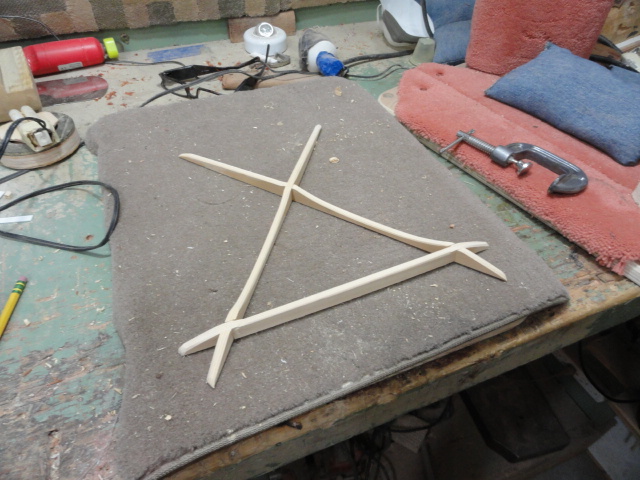
Here are the braces shaped and notched. They must be put through the sound hole before they are glued together. Getting them inside the guitar and attached is a real challenge.
Here are the new braces and new bridge plate.
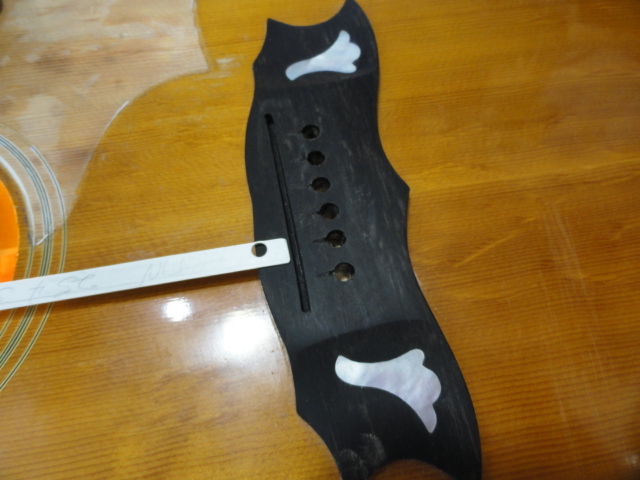
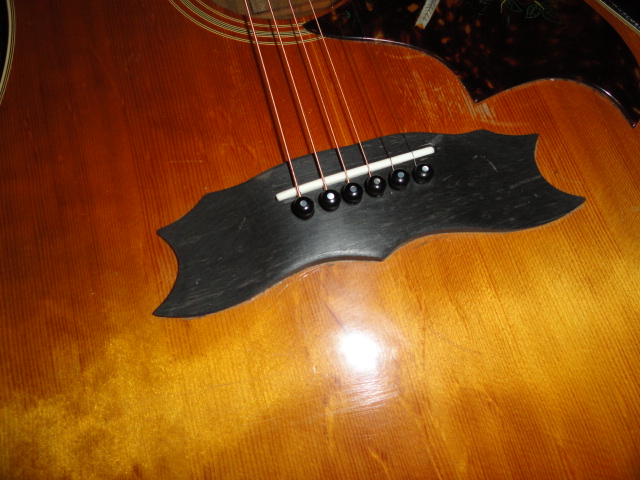
The Gibson bridge appeared to be nearly straight across. Most guitars have the saddle sloped to compensate for the pull of the heavier strings.
I filled the saddle slot and cut a new one with the proper compensation. I like a wider saddle than this one originally had.

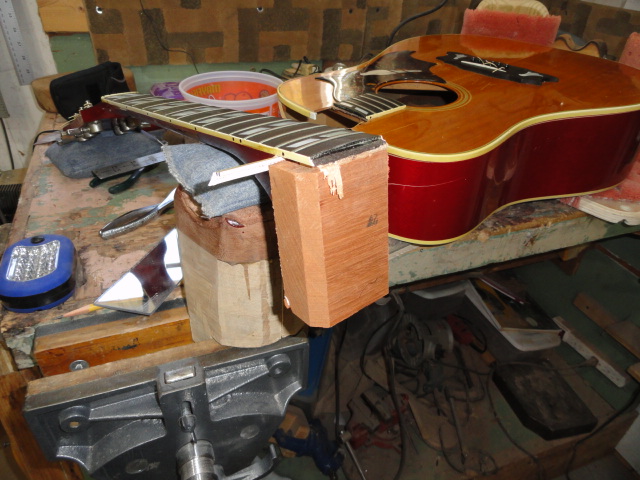
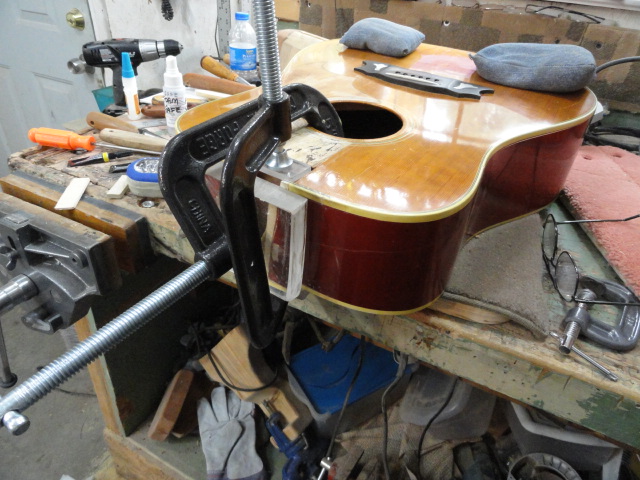
Here is the body in my jig to hold it while I set the neck angle.
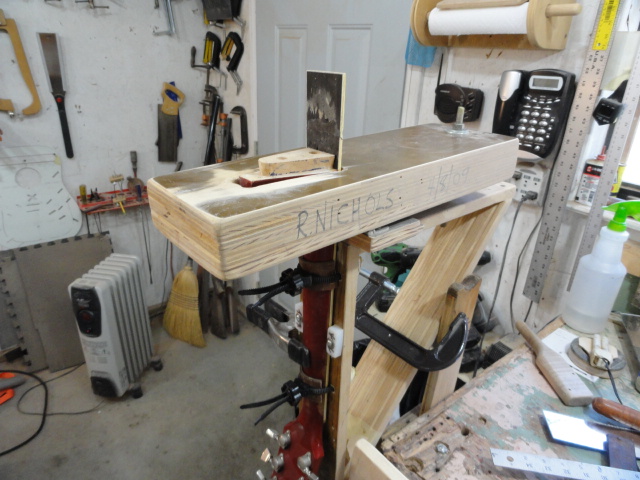
This is my jig to hold the neck for re-cutting the angle. It is adjustable for different angles.
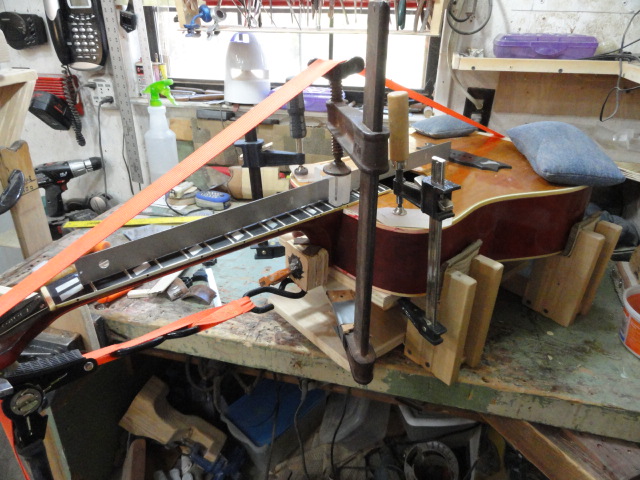
In the process of resetting the neck angle. A straight edge should just slide over the top of the bridge when laid on top of the frets.
The neck after reattachment.
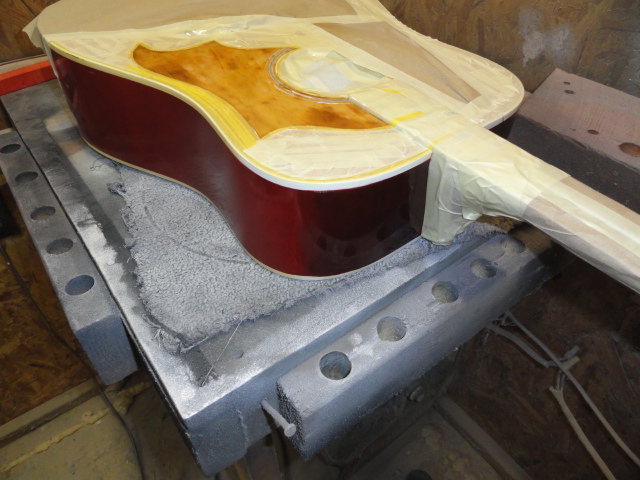
I attempted to camouflage the damaged areas as well as I could. I would not try to pass this guitar off to someone without them knowing the history of it. I only finished the front areas of the sides. The match is far from perfect but it looks a lot better than the repaired cracks. I also finished underneath the pick guard. Gibson and Martin had the bright idea of attaching the pick guard to the bare wood of the top. This practice did not work too well for either manufacturer. This repair is not done with the intention of misrepresenting this guitar or to hide what was done.
The finish looks “tolerable”. It is far from a seamless repair.
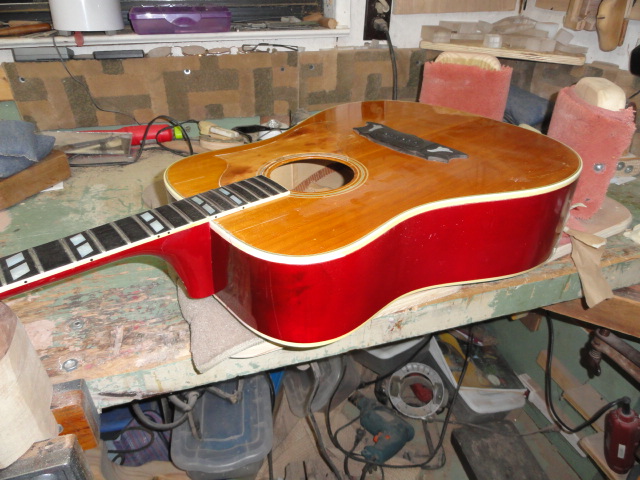
The finished product.
This is the kind of guitar that Elvis played at one time. At least is is back in playing condition. It has a sweet tone. I didn’t hear it prior to doing this work but I’m satisfied that it never sounded this good before. I feel this guitar may be just what someone is looking for. You wouldn’t have to worry about scratching it up.
Finished
Tolerable
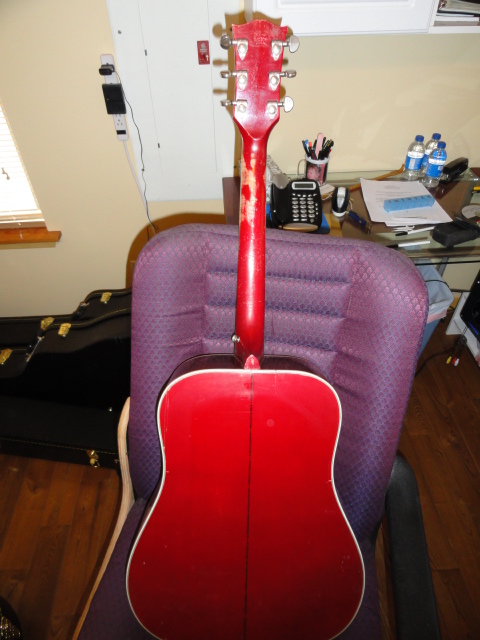
Neck
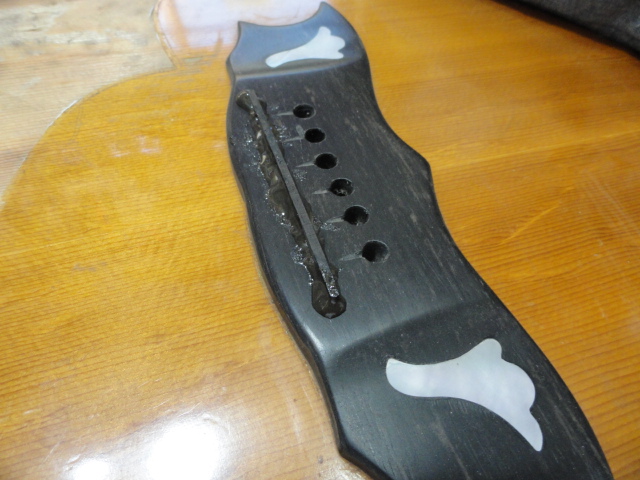
We went back and thinned the bridge down after after a few days. The extra mass on the ebony bridge seemed to be hindering the sound. We thinned the bridge quite a lot. This thinning process actually went through the pearl inlays that were on each side of the bridge. The thinner bridge seemed to enhance the volume and tone considerably. What we lost in decoration on the bridge was rewarded by a better sound. We wanted this guitar to have a good sound even if we had to sacrifice some of the fancy inlays.
Here’s an added note: The previous owner contacted me after I’d finished the repair. He wanted the guitar back and now it belongs to him again,(an odd turn of events that my wife says was not too bright on my part). I ended up giving the guitar back to the original owner. My wife said I at least should have gotten my original investment back. My business plan isn’t always dollar oriented. I hope it gives him several years of service.
![]()
Beautiful repair. Amazing actually.
Where are you guys located?
I’m in Harrison, TN near Chattanooga.
Hi how are i have this guitar .it is a dove .but not shure of the year or anything sound whole sticker is gone .I will send a pic if you can please give me a ideal of what it is it would be so nice thank you .Jerry williams
Jerry: I don’t claim to be an expert on identifying these guitars, but I’ll tell you what I can. The pictures you sent appear to be a Dove but this guitar looks like a copy of a Gibson Dove to me. It doesn’t have the Gibson logo on the headstock or the paper label inside the body. Most of these Gibsons from this era would have a serial number stamped on the back of the peghead. I also noticed that there appears to be an extra fret just below the nut on the fingerboard. This is unusual. Although there are a lot of features on this guitar that appear to be copied after a Gibson, I would guess that it is a copy. That doesn’t mean it sounds bad. Some of the copies have a good sound. Since Gibson and Martin Guitars are so popular, a lot of folks try to make copies. I hope this information helps you. Thanks for your posting. Ronnie Nichols
you are a great luthier, and a man with a good heart, well done, and thanks for an interesting post.
Thank you for your kind comments!
loved reading this report
reminds me that I thought several times that I should have chosen this profession when I was young…
Thanks. I’m glad you enjoyed reading it.
Incredible work. I live in Tennessee about 3 hours from you. I have a chance to buy a Dove the owner claims is 1956. It needs some work. I was wondering if you could take a look at some pics and give an idea of cost of repairs. The headstock is cracked for sure. I would love to own it but dont want to invest more than the value in repairs.Thank you, great work.
I’d be glad to help you if I can. Email the pictures to my email address. ronnienichols48@gmail.com
We are working on a 1978 Dove Gibson that was broken in the same area that yours was, and was wondering what kind of stain/dye you used on your guitar and where to get it. We fixed the break but need to match the same kind of red that yours has.
Stewart Macdonald has some Colortone liquid stain that works real well. It comes in different colors. The red they sell will probably match it pretty well.It can be mixed with water or alcohol or mixed in with your lacquer. I hope your project goes well. thanks for your interest. Ronnie
great read and pictures.
Thanks!!!!!!!!!!