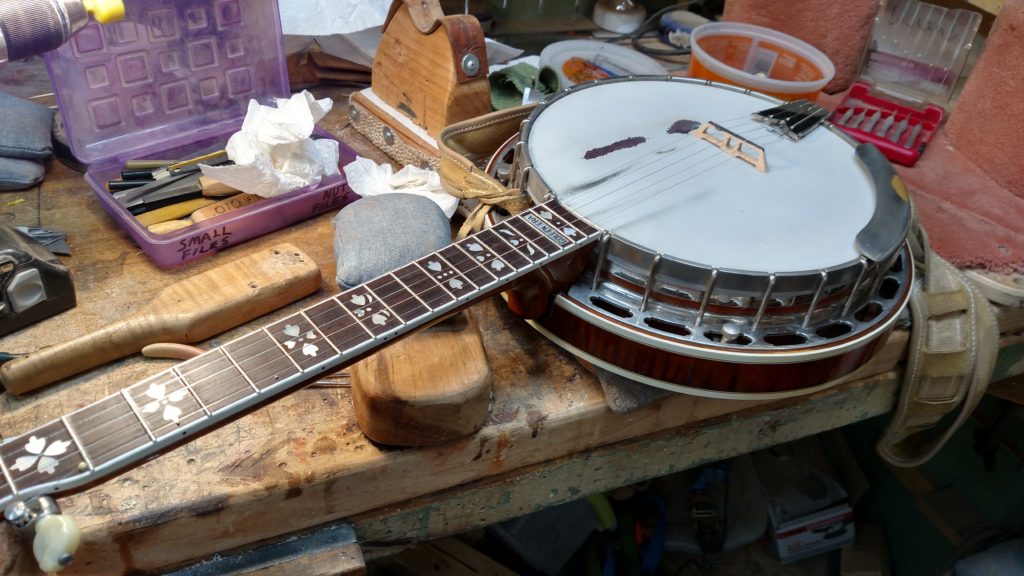
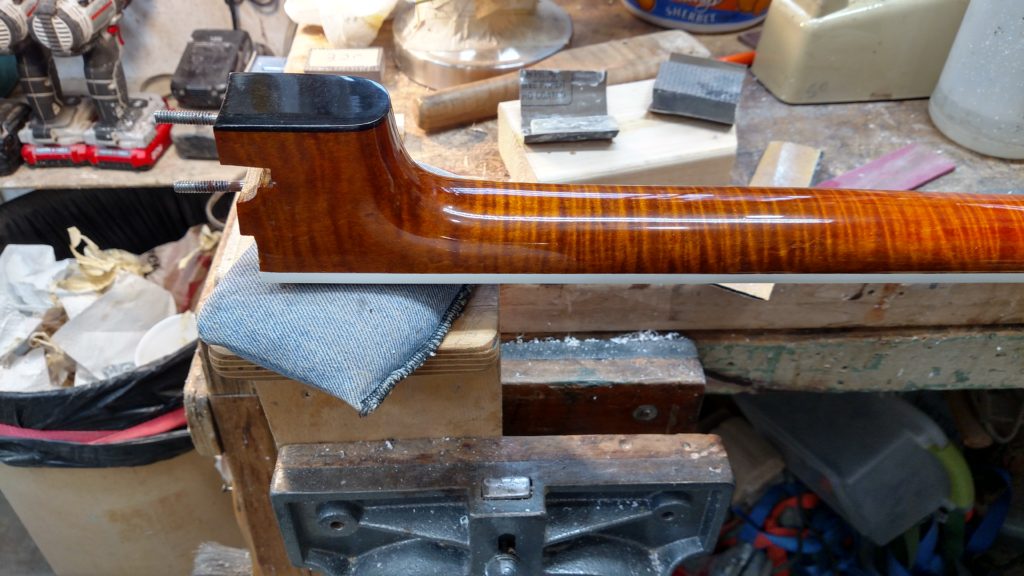
 Here is the patient.
This banjo belongs to a friend of mine. He has owned it for about 20 years. He first brought it to me a few months ago when it developed a buzz. We took it to my shop and my inspection revealed that the neck had an excessive amount of relief. This is not that uncommon for a banjo to develop excessive relief and it can usually be corrected with tightening the neck truss rod. When I tightened the truss rod (the old compression type rod) the neck developed a high spot around the 5th fret and the lower part still had excessive relief. This is a problem when there is this much variation. The problem was too severe to be corrected with fret filing or leveling. I told him that we needed to think about it and see if I could think of a simple repair. After several months, he brought it back to me and I determined that the only way I knew to repair it was to remove the fingerboard and truss rod, true up the top surface of the neck, and replace the truss rod with a modern style 2 way truss rod. This is a major repair.
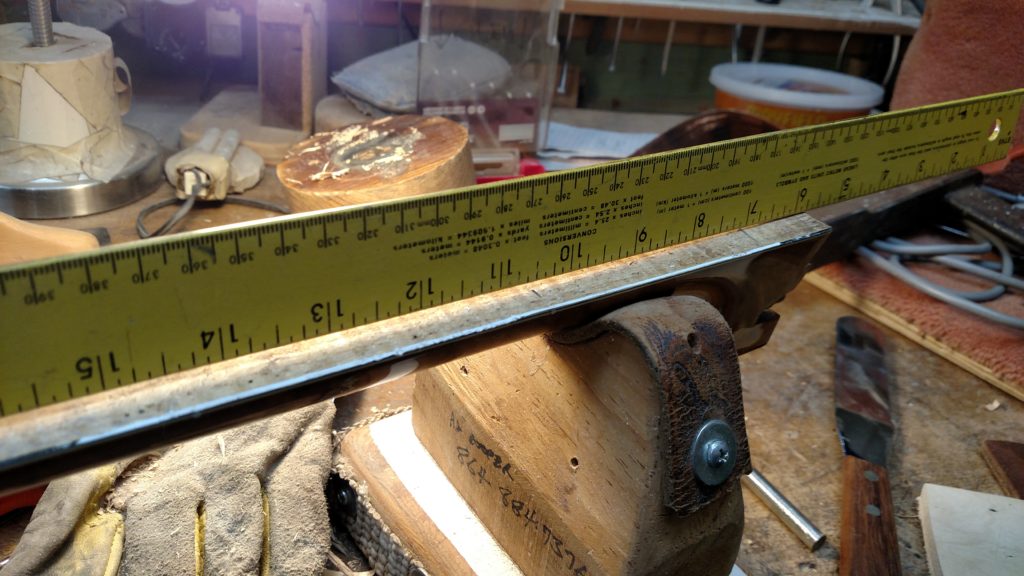
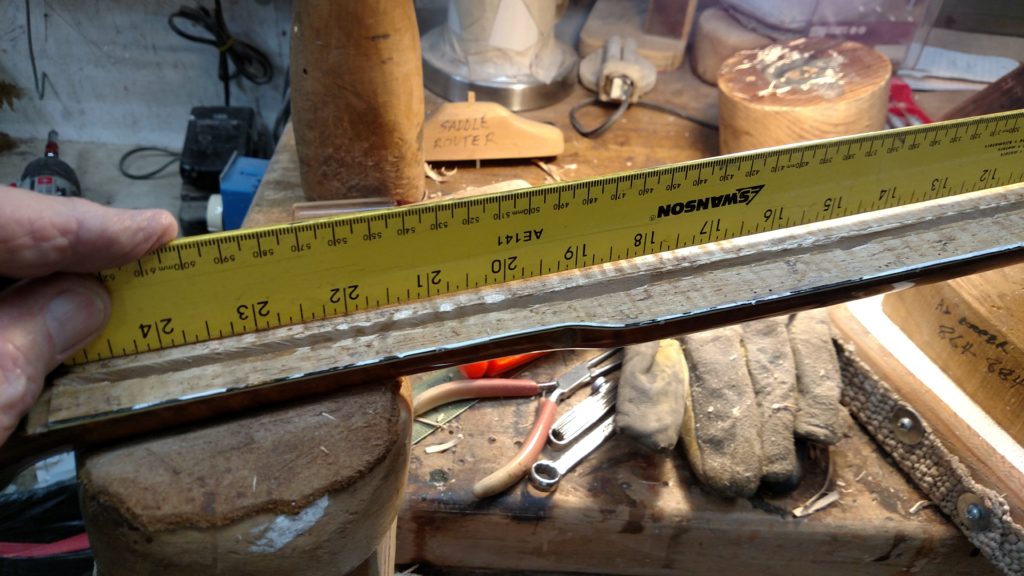
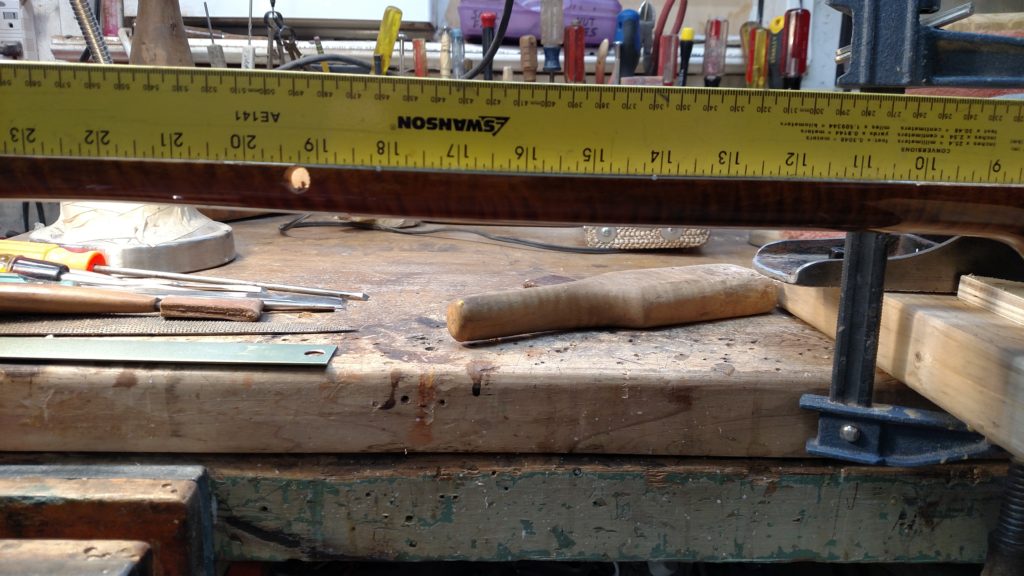
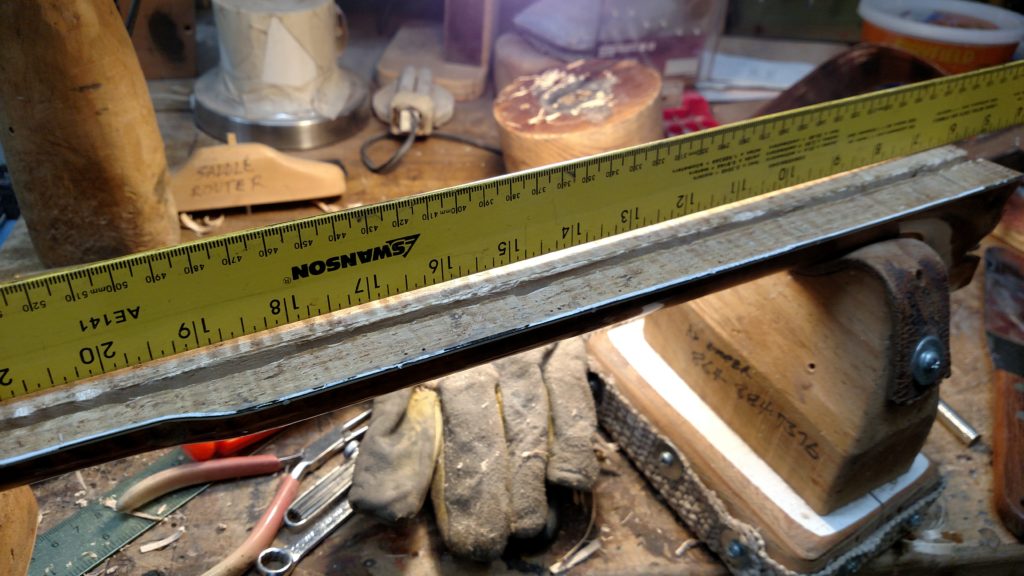 This is what .050 inch relief looks like
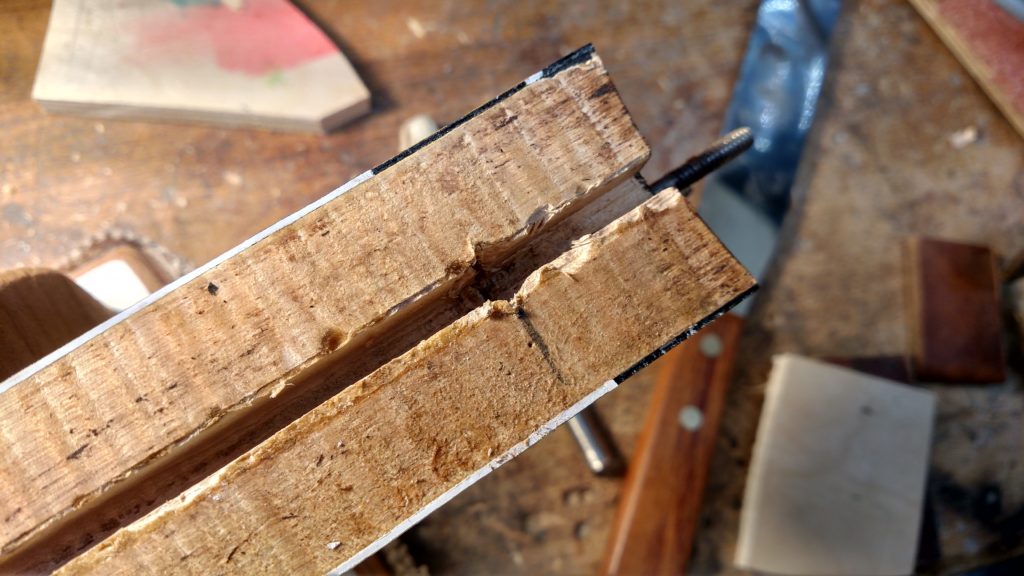
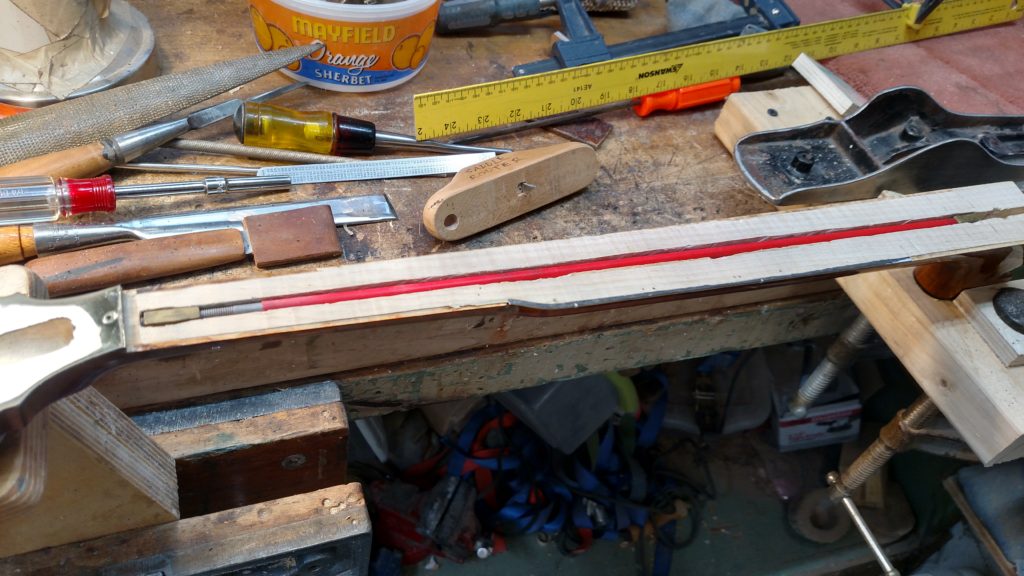
I used some heat from my heating blanket to carefully remove the fingerboard. I was able to get it off cleanly only damaging the binding. The binding on this neck protruded below the fingerboard with a decorative stripe. I carefully removed the filler stick that was glued in over the truss rod. Pictured above is an image of the top of the top surface of the neck after the fingerboard, filler stick, and truss rod were removed. I measured the relief and it measured around .050 inch. This is basically unplayable down the neck. The following pictures are of the neck and truss rod after I got it disassembled.
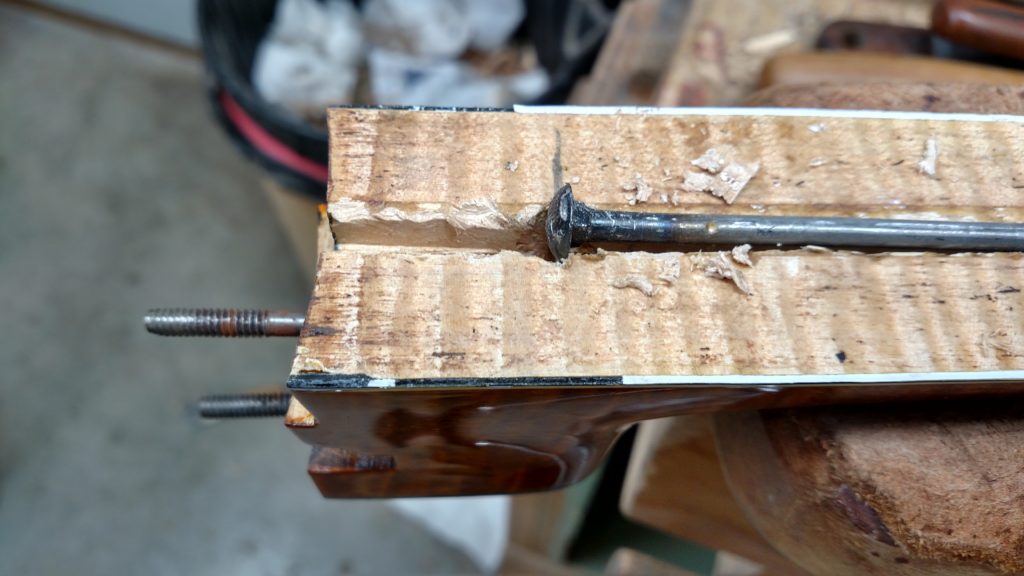
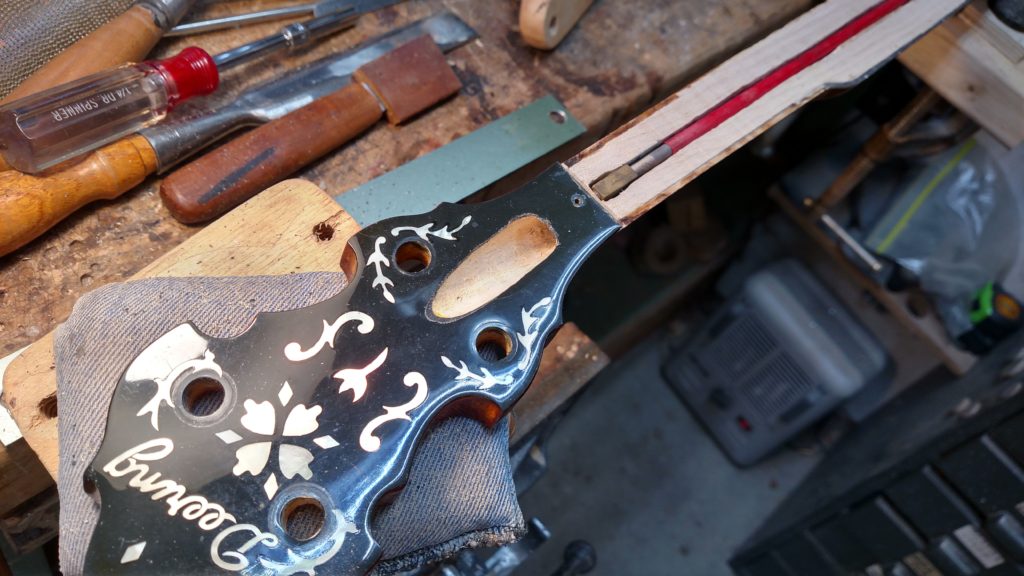
 Deering’s truss rod
I’ve worked on quite a few necks over the past 40 or so years, but I’ve never seen a manufacturer use a thin headed carriage bolt for a truss rod. It looked like the slot was routed and then this thin headed truss rod was driven into the slot creating it’s own path in the wood. There is a lot of pressure on this area especially when the neck is bowed and the truss rod needs some extra strength to counter the pressure. In my opinion, this rod was insufficient to do the job regardless of the neck condition. Gibson used this type compression truss rod for years but they usually attached a cylindrical piece about 3/8 inch in diameter to the end of the rod which fit into a pre-cut round space. This neck is made from some really beautiful curly maple. Sometimes these spectacular grained woods end up not being as stable in the long term as a straight grained piece of wood. As they say, “You can’t have everything.”
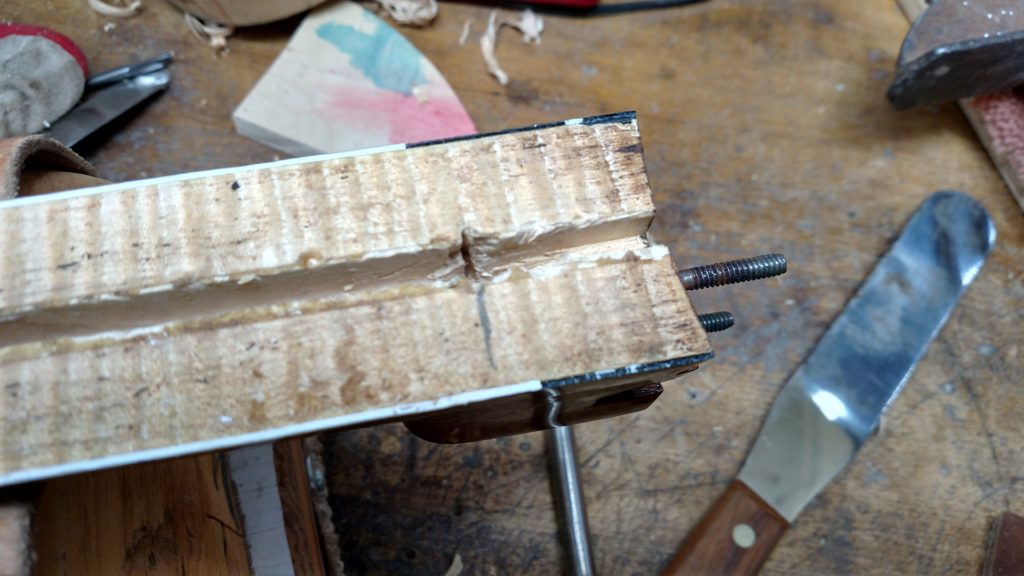
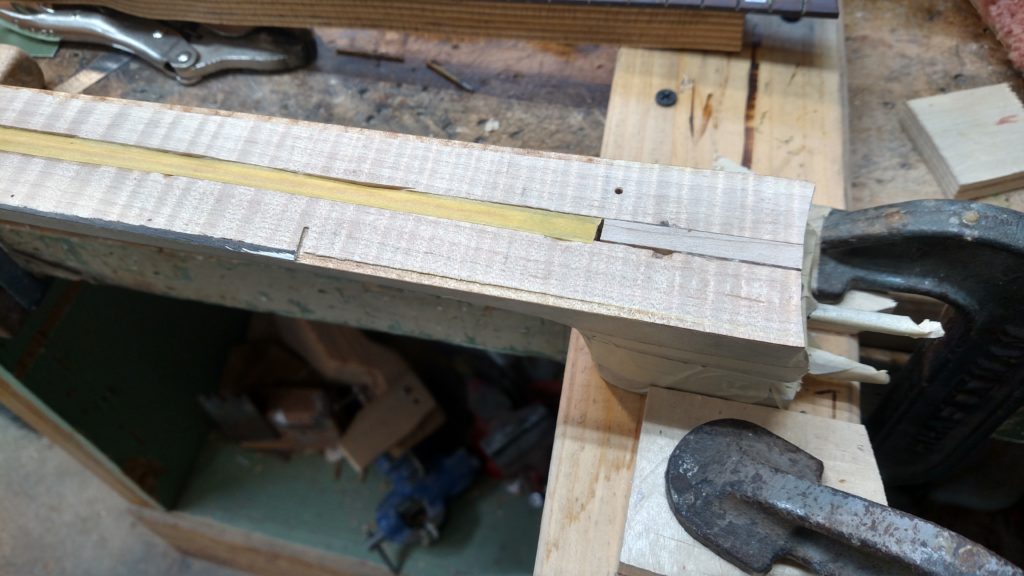
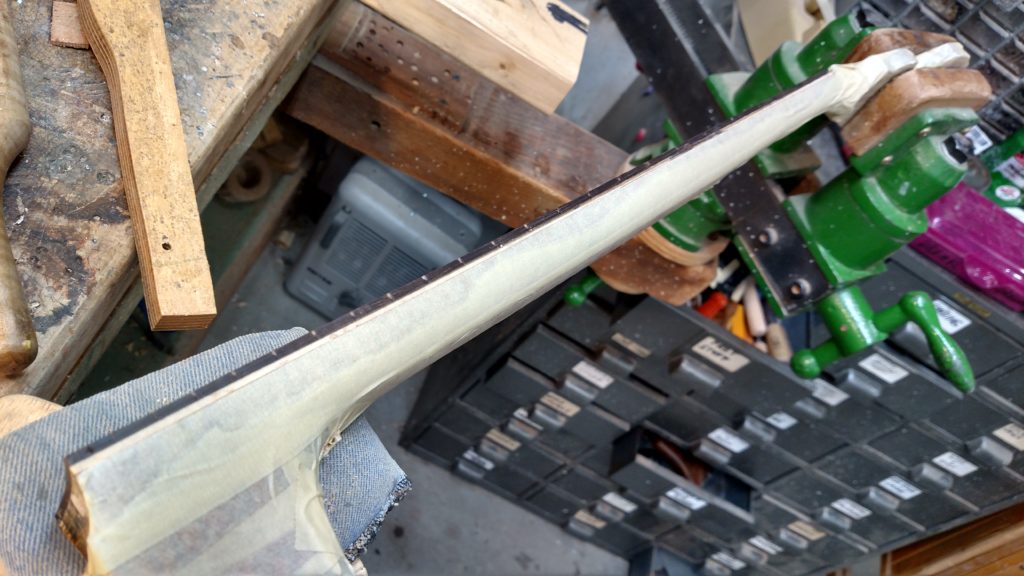
 After the neck was planed
Above is an image showing the top surface of the neck after we worked on it. As you can see, the neck is now almost dead flat with no truss rod or pressure on it. We used a small toothed plane, some rasps, scrapers, and finished up with our long plane body fitted with 80 grit stickit sandpaper to bring the top surface back to normal tolerances.
After truing up the top surface of the neck, we widened the slot in it to accommodate the 2 way truss rod. This type rod requires a wider slot than a compression rod normally does. The 2 way rod exerts pressure in a more consistent way than the compression rods and it has the added benefit of being able to correct a back bow, too. I resisted these type rods for a lot of years but now I’m a believer in them.
We had to enlarge the area where the rod is adjusted. The rod I had in stock uses a hex nut for adjustment. A rod with an Allen head would have been better, but this one is what I had in stock to work with. It caused me to have to enlarge the access hole for a socket to fit in it. I had to fabricate a longer truss rod cover but that was not a major problem. We put some strips of 1/4 inch masking tape over the slot to minimize the glue from getting into the slot. I prefer to use epoxy to glue a fingerboard to the neck because it does not introduce moisture into the joint. I have had necks to develop a back bow when using a water based glue in the past. We removed the frets from the fingerboard and dry fitted it to the neck. We drilled 2 small holes (3/32) through the fret slots at the first and about the 20th frets. We used some alignment pins that help to keep the fingerboard from sliding around when gluing it. We covered the entire painted portion of the neck with masking tape to keep the epoxy from getting on the finish. We wanted to retain the original finish on this neck if possible. We also glued a piece of maple in the end of the truss rod slot to fill in this space.
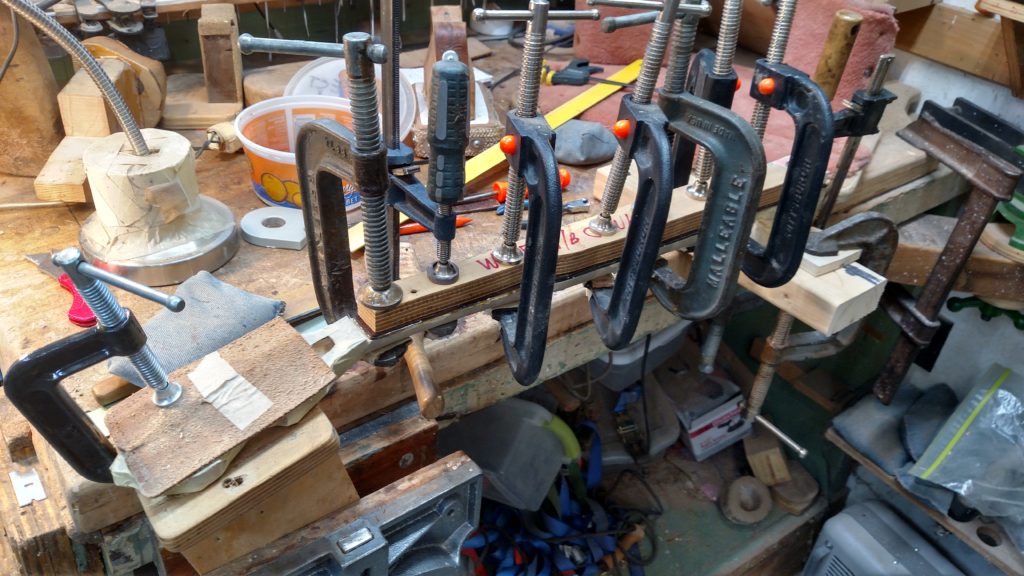 Gluing fingerboard
Now is was time to create a new ledge for the binding. We chose to use a scratch stock to cut this ledge. It is a home made tool that is simple but effective. I chose this over a router because the highly figured wood is prone to chipping and this method will be my best chance at not tearing the wood.
 Home made scratch stocks
 Ledge for neck binding
 Binding
Pictured above is the binding being applied. Notice the strapping tape in the recess. Masking tape holds in all the other places. I used CA Gel glue on this binding. Duco cement works well, but in this instance I had to be really careful to try and preserve the original finish on this neck. This gel did a great job and didn’t wick too much into places where I didn’t want it. I used some white binding about .060 inch thick. I didn’t try to duplicate the stripe in the lower portion of this binding. I carefully scraped and sanded the binding down to the original finish. The masking tape helped preserve the finish but there were a couple of spots where the finish got thin enough to tell that it was missing. All in all, I was happy to be able to preserve it as well as I did.
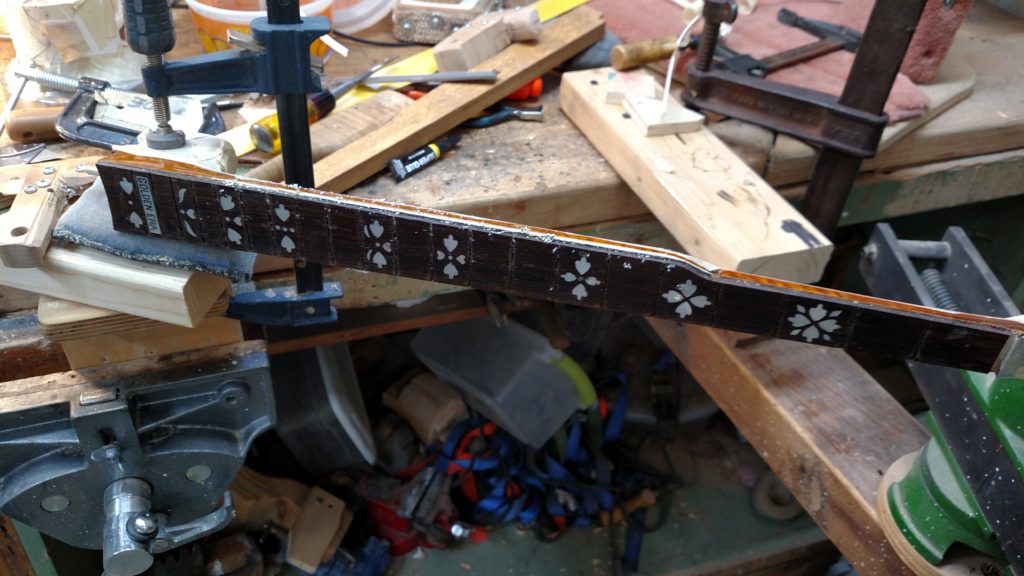
 Position dots
We drilled small holes and inserted the position dots made from black plastic material. Then we started work on the fret slots. This fingerboard was extremely thin. The old frets weren’t in there too tightly and we had removed them with our modified soldering iron that we learned about from Frank Ford. We were left with some slots that had some sort of glue in the bottom of them. We spent a LOT of time cleaning these slots and preparing them for the new frets. We used Stewart Macdonald #147 fret wire. After the frets were seated, we applied thin CA glue to the edges of them and allowed it to wick down into the slots between the fingerboard and the fret tang. This helps the frets stay where they are without them popping up later. Cleaning this CA glue from the fingerboard takes a lot of time, too.
 Frets seated and sealed with CA glue
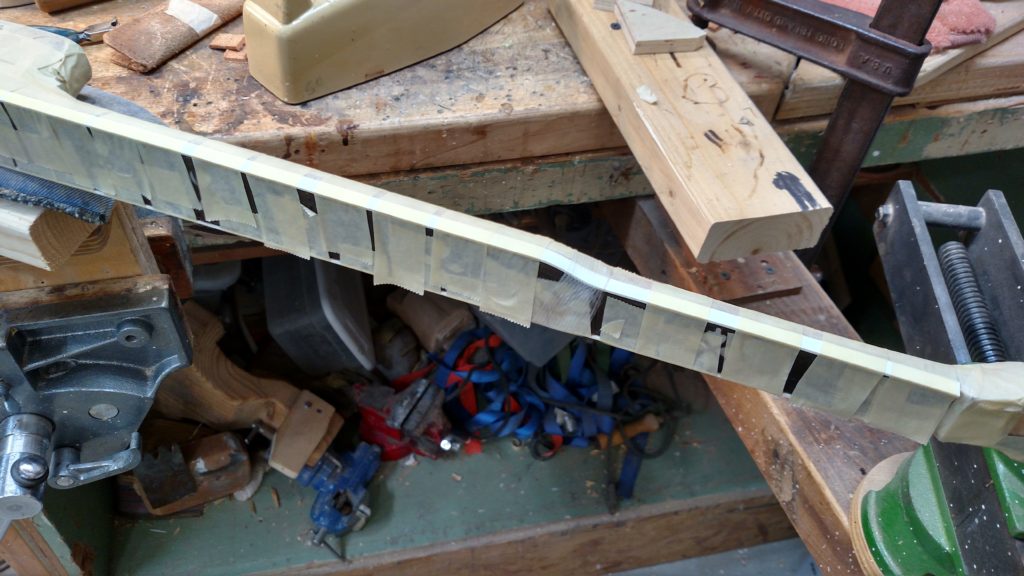
After seating and gluing the frets and cleaning the fingerboard, we taped the fingerboard to level and polish the new frets.We like to use electrical tape for this because it is stronger than masking tape for this purpose. We used masking tape when the fret spaces got too narrow for the electrical tape.
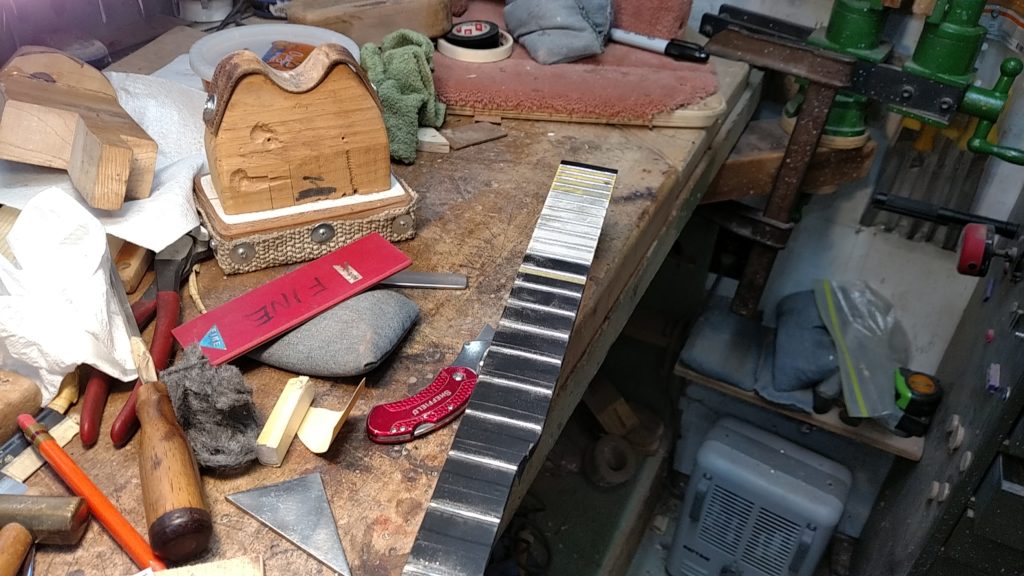
 Filing fret tops
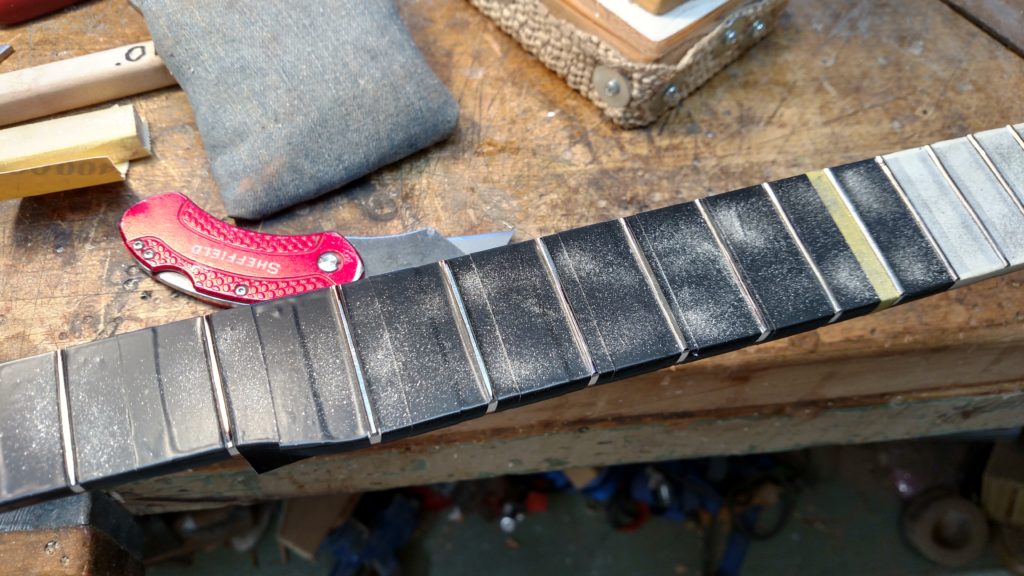
We blackened the fret tops with a magic marker. This allows us to see when we have them all level. When the black magic marker is all gone, the frets are true.
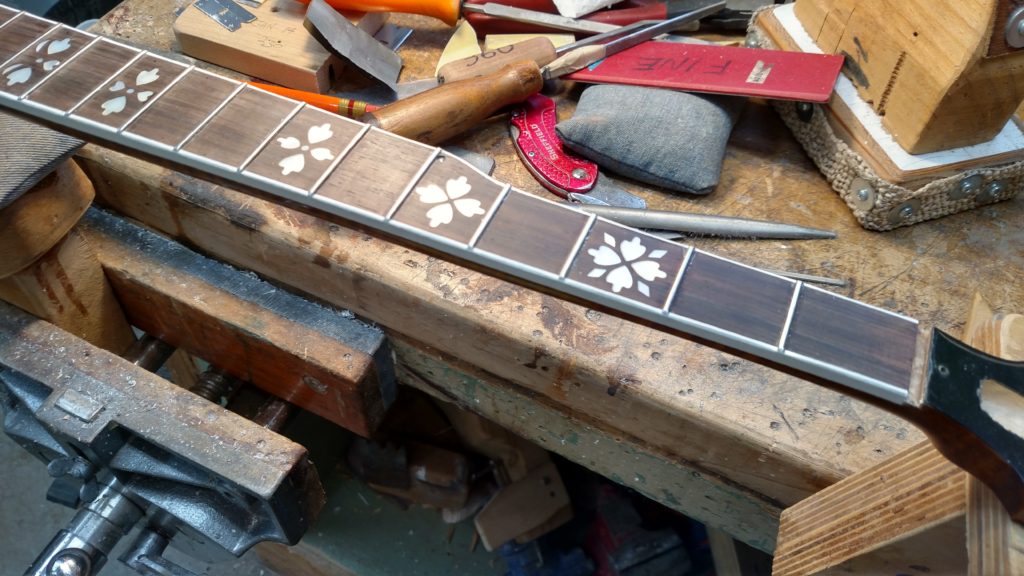
 Trued and polished
We go through several steps on rounding over and polishing the frets. We like to use an eraser and progress through 400, 600, and 1500 grit sandpaper wrapped around this eraser. We usually finish with 0000 steel wool. We like to apply a coat of mineral oil to the fingerboard when we are finished. We spend a lot of time on the fret ends in an attempt to make them feel smooth. We also rounded over the sharp edge of the binding between the frets to make it smoother.
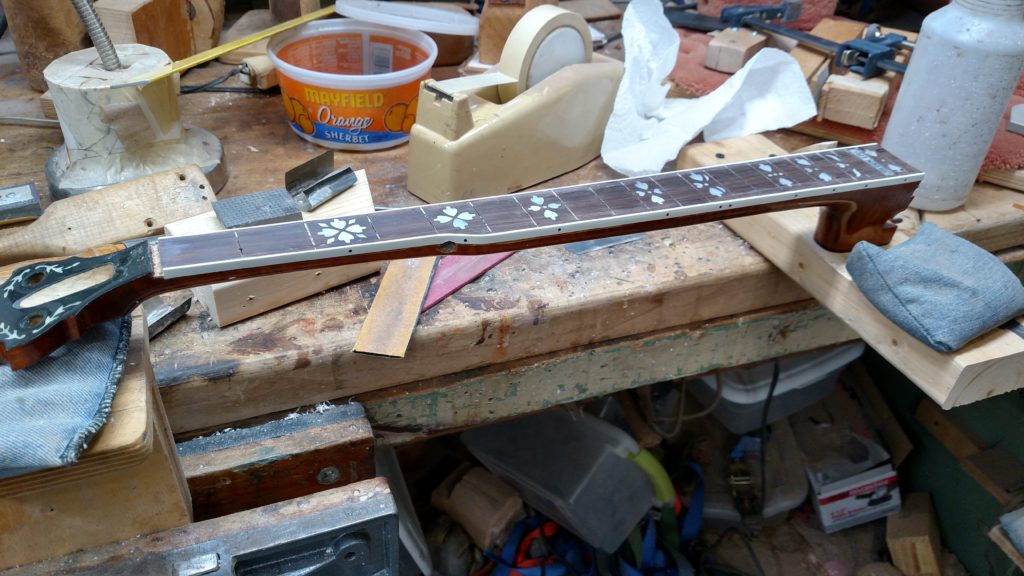
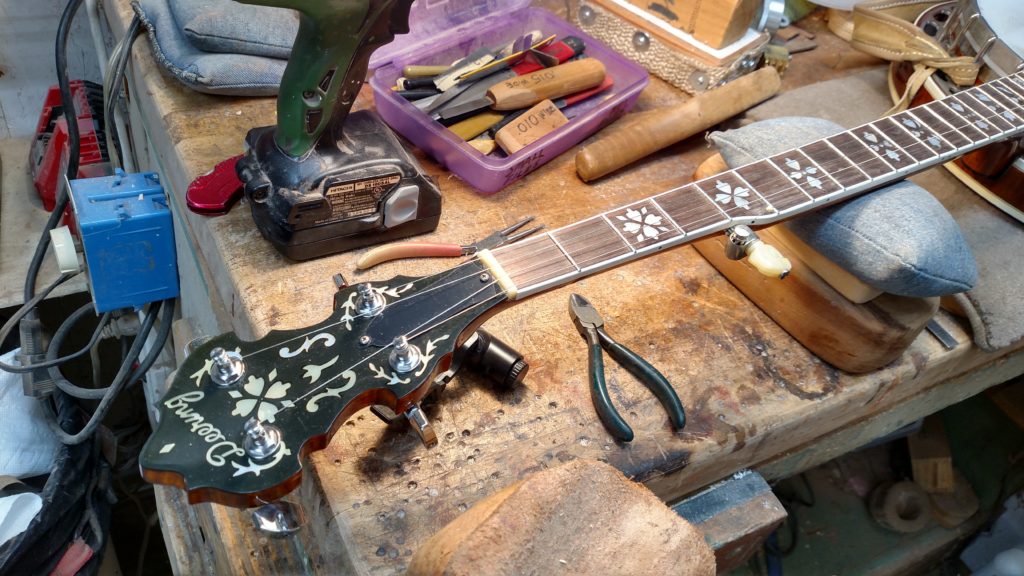
 Another shot of the finished fingerboard
We fabricated a polished bone nut and made a new truss rod cover.
 All strung up
This job involved a lot of time. This neck was unplayable before. We felt like this effort preserved a lot of the original features of this banjo. It still looks mostly original. If we had to refinish it, I felt it would take away from it’s value more. This neck stayed straight and I believe it will give several more years of service. I also have a video on YouTube about this repair. Click on the arrow below to watch this video.
![]()
Be the first to comment on "001- Deering Golden Era Neck Repair- new-December, 2018"