1986 Martin HD-35 Top Repair
I met this guy named Dewey at Foggy Hollow Bluegrass Festival in the Fall on 2012. He said someone had recommended me to him for a guitar repair. He told me he was from North Carolina and and he had a Martin Guitar that needed some work. I gave him one of my business cards and had almost forgotten about out conversation until a few months later when he called on the phone. He told me the story about how he received this Martin Guitar as a gift from a friend of his. This friend had died and the wife and children decided to give Dewey this guitar. I could tell this guitar meant a lot to him because of his friend. I remembered jamming with Dewey and his singing at Foggy Hollow. I advised him to send the guitar to me by UPS and have it carefully packaged. He agreed to do that and I received the guitar around the first of February, 2013.
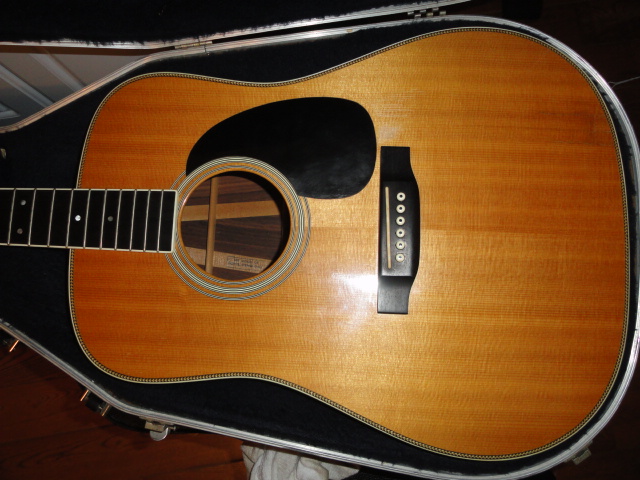
The guitar was a 1986 HD-35. The HD-35’s had the narrower 1/4 inch x braces as compared to a D-28 with 5/16 wide x braces. On top of that, these 1/4 inch x braces in a HD (herringbone) were scalloped. Here is the way it came to me.
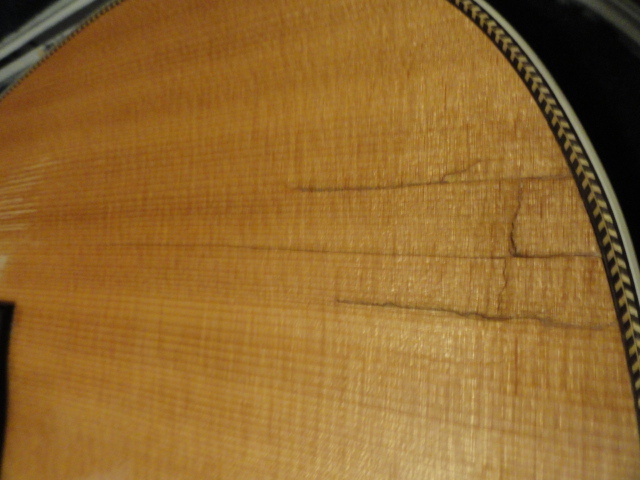
I took the guitar to my shop and laid it on my workbench. The guitar came to me without any strings on it. There was some damage apparent on the top. There were several cracks in the rear portion of the top.
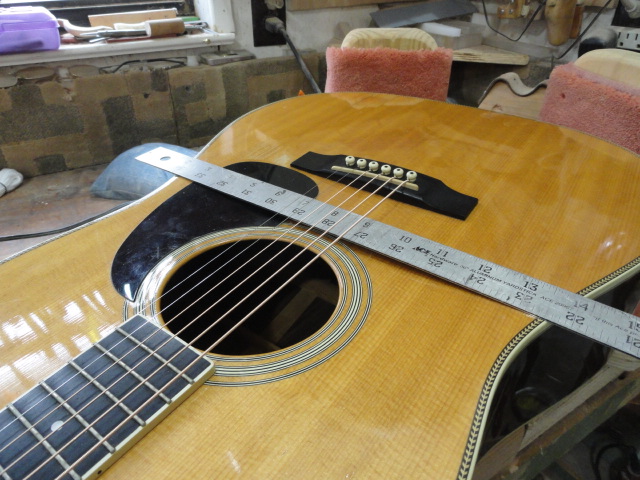
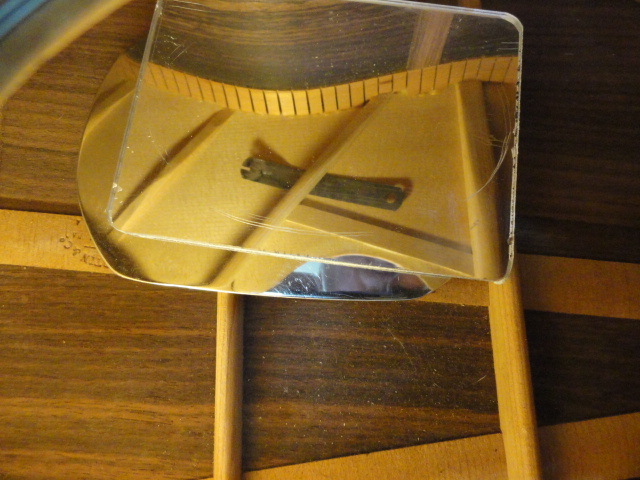
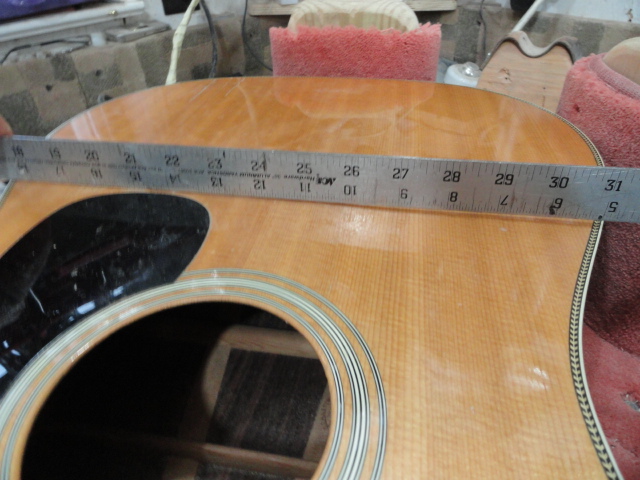
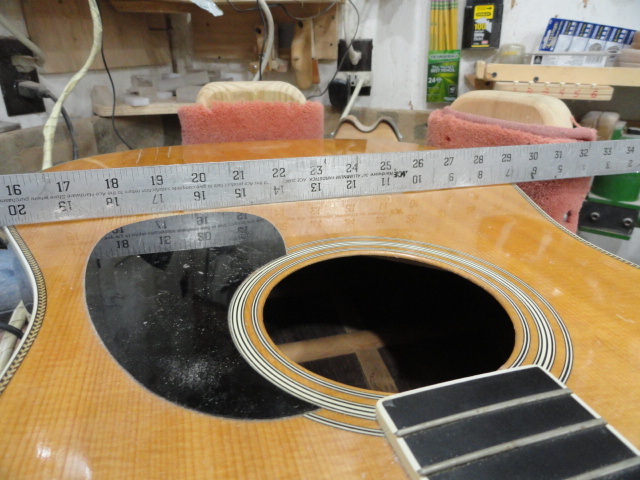
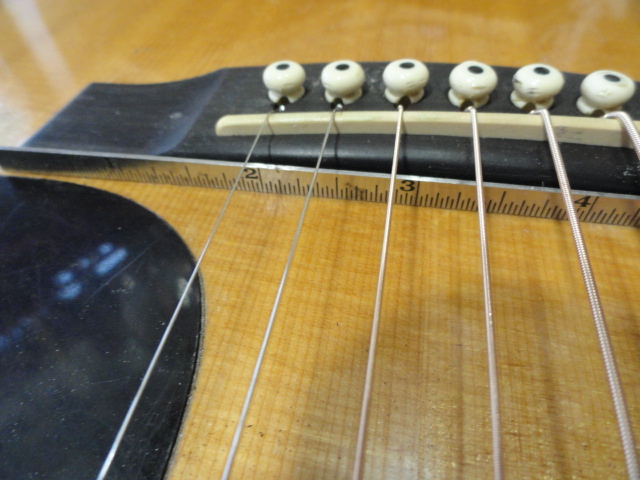
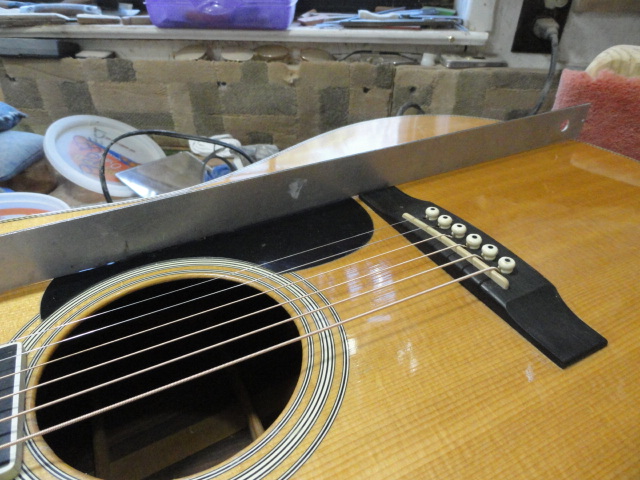
I put a set of strings on it and tuned it to standard tuning. This was when I discovered why the owner had put it up and quit playing it. The top was badly sunken in the bridge area. Although this impact to the rear of the top was pretty severe, it was contained to a small area. This did not appear to be the cause of the playability problem. This straight edge shows the way the top was deformed. The bridge area should actually be a little higher than the sides. The top was sunk down about 1/8 inch in the bridge-soundhole area.

This is unusual.
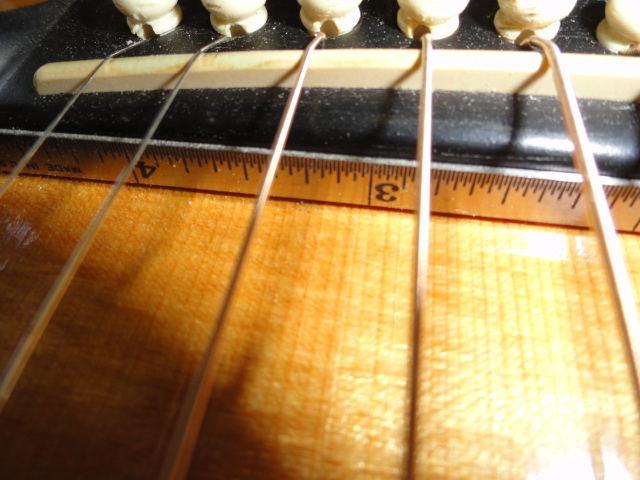
A little 6 inch straightedge shows how bad it was. The owner plays medium gauge strings and these are light gauge. It probably would be more distorted with the increased tension of medium gauge strings.
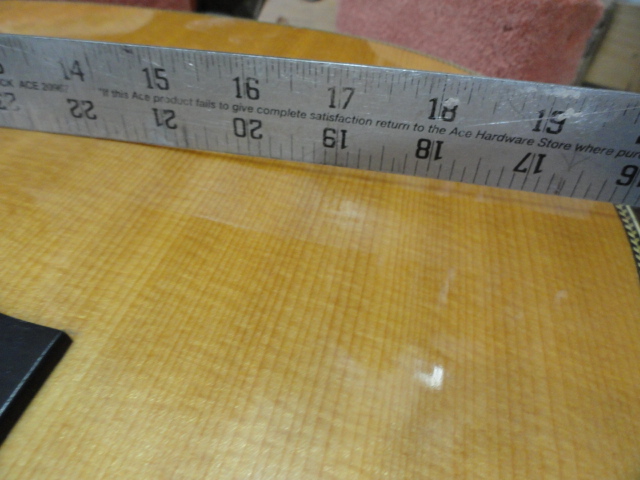
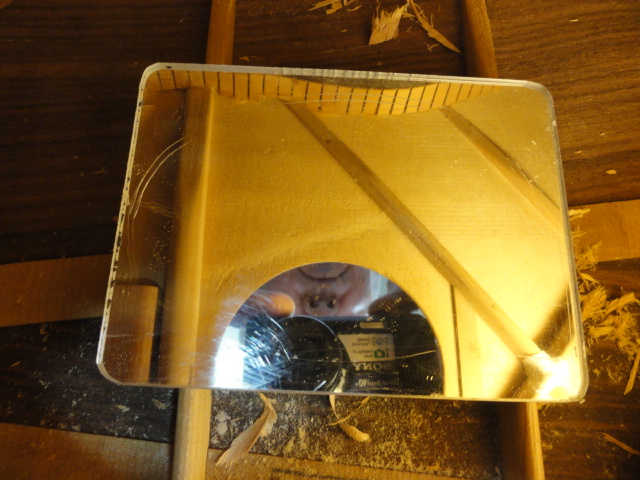
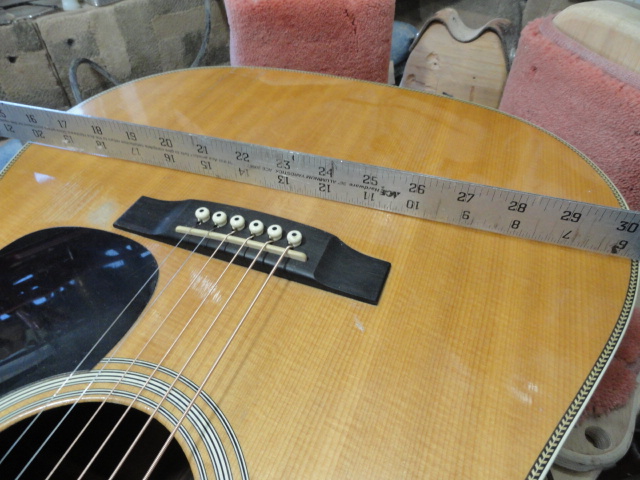
The top was also distorted in the area behind the bridge. It is not uncommon for a dreadnought body to have a little bulge behind the bridge at full string tension, but this is excessive. This gives the bridge a look of being rolled forward.
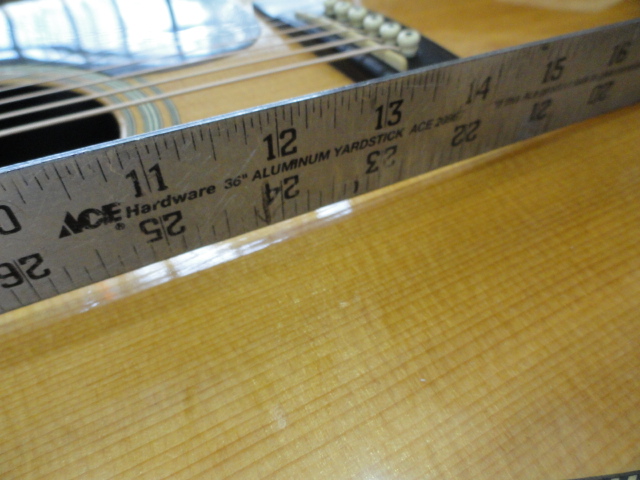
Here is more evidence of the problem.
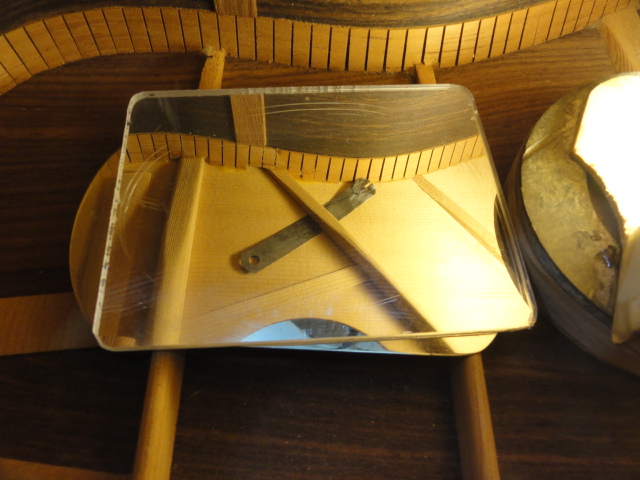
I put my light and mirror inside the body and continued the inspection. This brace is loose at the front extending back about 2 inches.
The other one was the same way. The x braces around the bridge plate appeared relatively normal from what I could see. Now I was faced with the decision of whether to take on this job or not. There were several ways to approach this repair. The severity of the distortion concerned me. I could re-glue the front of the x braces but I didn’t think this would correct all the problems. The bridge was mis-shapen. I could put a new top on the guitar with new braces. This requires either removing or loosening the fingerboard where it overlaps the top and removing the binding. This is a major undertaking which would devalue the guitar and alter the sound. I could remove the back and do these repairs. This brings on a whole new set of challenges. Both of these options would require a lot of refinishing. I’ve sprayed a lot of lacquer in my time and I’m not inclined to get into a major refinishing project at this point in my life. I called Dewey and discussed the repairs with him.
Dewey said he wanted the guitar to play. He wasn’t too concerned about the visual aspects. I agreed to stabilize these cracks in the top without doing any refinishing. I told him that we could remove the bridge and bridge plate and try to get the x braces back into position. I also mentioned a product that I’d seen advertised called the JLD Bridge Doctor. I have never used one but I told him that we could install one of these devices if the final product wasn’t up to par. We agreed on a price and a time frame for these repairs. Dewey pretty much told me to repair the guitar as if it were mine.
Removing the old bridge was the first thing I did. I used my silicon heater and the bridge came off pretty cleanly.
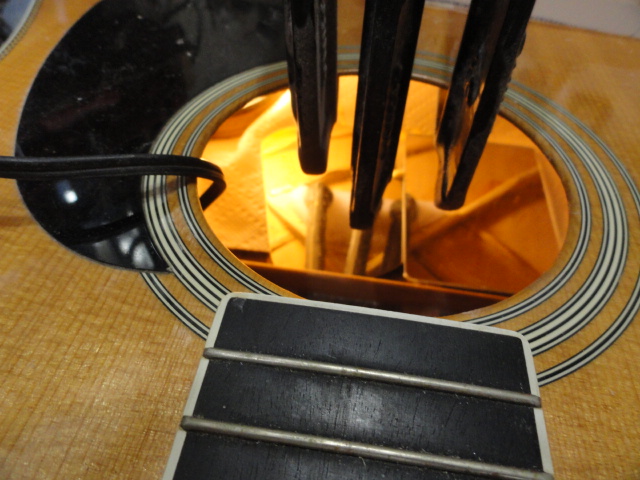
I wasn’t very far along with this brace repair process, when I decided it would be necessary to remove the x braces through the sound hole and make some new ones. Note the piece of cloth over the joint. Martin uses this on their guitars. I think its purpose is to add a little extra strength in this area. I have learned through experience that the best way to remove these braces is to start at the sound hole and work your way back with some special chisels that will go through the sound hole. I started by removing the 3 Popsicle braces around the sound hole. Then I worked my way back toward the bridge plate. With these small braces removed, I could get a thin chisel in there to loosen the x braces hopefully without damaging the top.
I used my homemade bridge plate heating tool to remove the maple bridge plate. It came out cleanly in 2 pieces. With the popsicle braces and bridge plate removed, I could more easily remove the x braces.
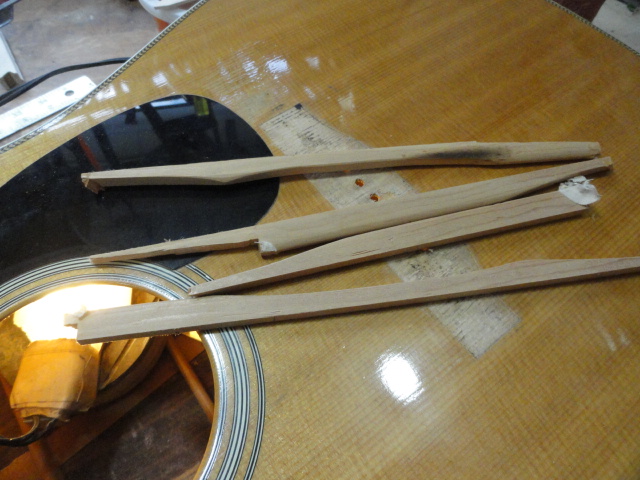
They came out rather easily. By getting them out relatively unharmed, I discovered what I think was the main cause of this failure. Note the top and second piece of brace in the above picture. Do you see how the grain was running in this brace? Instead of running straight down the brace, the grain appeared to run an about a 20 or 30 degree angle. This is called runout. The old wagon wheel makers always split out the wooden spokes for a wagon wheel . This allowed the grain to be their friend instead of their enemy. I think the same thing applies to guitar wood.
I carefully glued these braces back together and was in for a shock.
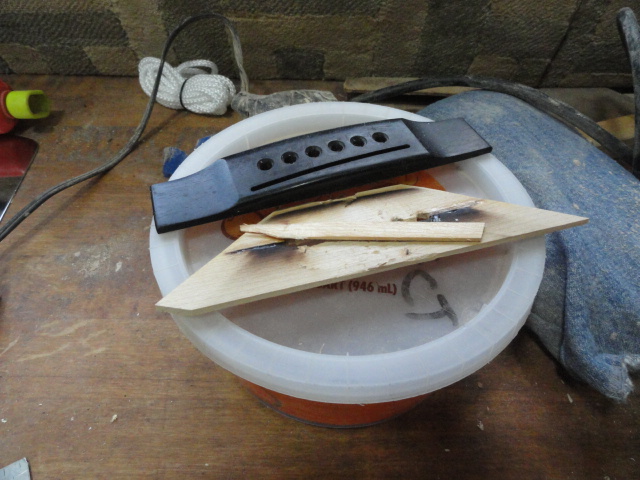
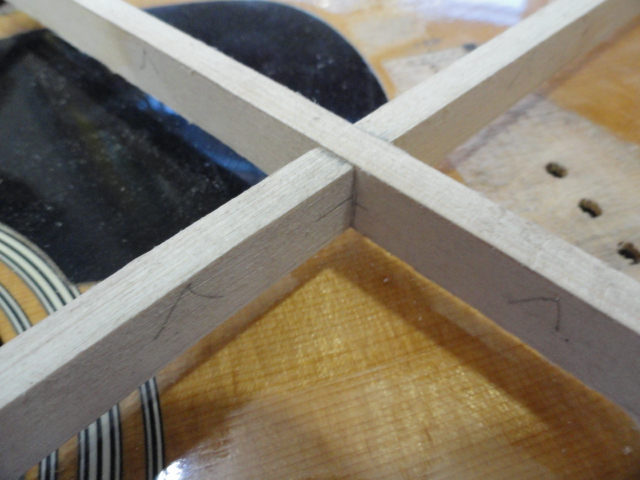
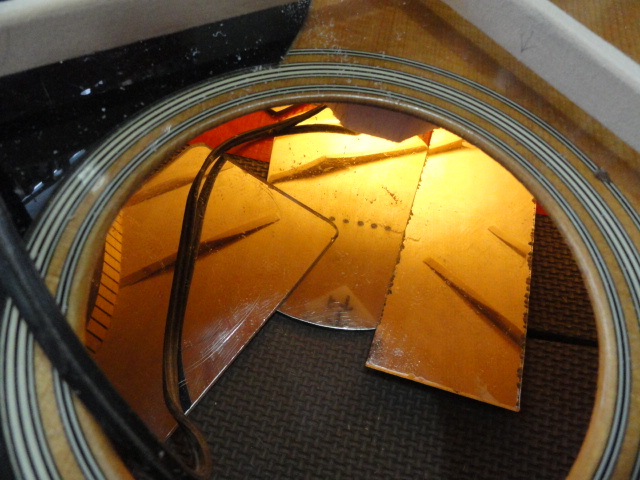
Here are the x braces and bridge plate in their original configuration.
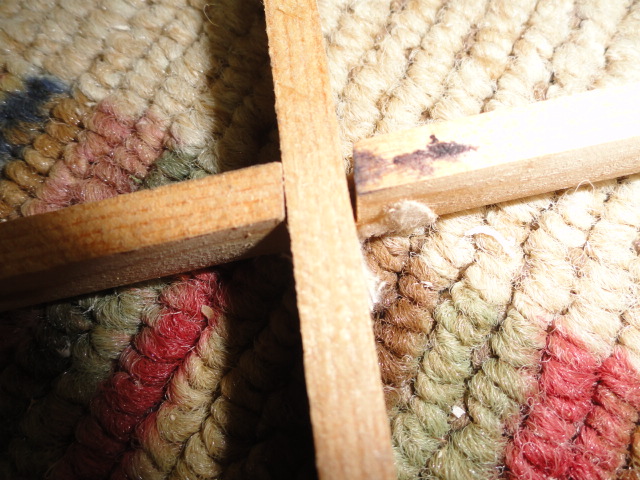
Can you see what is wrong with this picture? The slot originally cut in these braces was too wide. You could almost fit a dime in the gap between them. This was not apparent with that cloth covering the joint. It was hard for me to believe that a manufacturer like C.F.Martin would turn out something this sloppy. As previously stated, a D-28 or a D-18 has 5/16 wide braces. This is a 1/4 inch brace. It appears that they cut a slot for a D-28 in these braces. This would SERIOUSLY weaken this joint. After thinking about this for a while, I questioned whether this might have been a guitar that was made during some of Martin’s labor troubles. I knew that they had a strike several years ago, but I don’t know if it was during the time this was built or not. Anybody can make a mistake but this mistake was a big one.

Another shot of this ill fitting joint.
This picture shows how much this brace was distorted. I now can understand why this top was sunken around the bridge.
Another shot of these x braces.
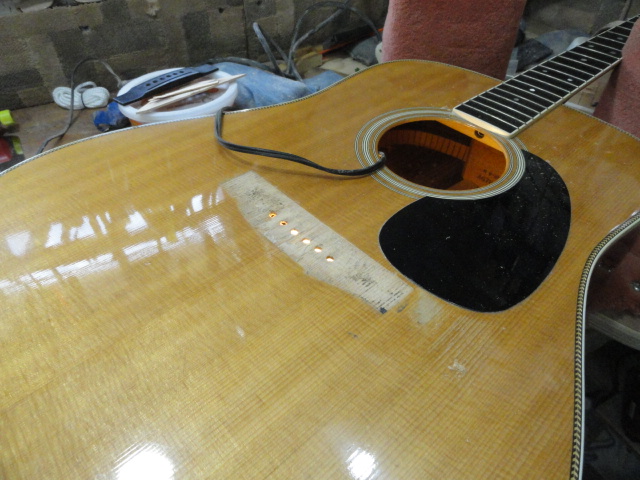
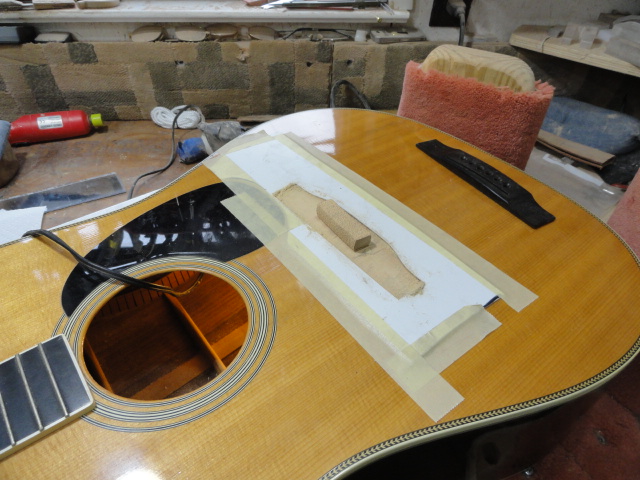
I fabricated a cleat from some spruce and glued it under the top in the area of these cracks.
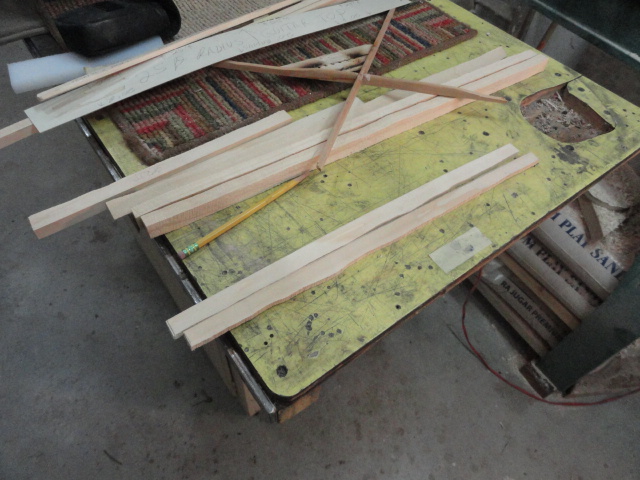
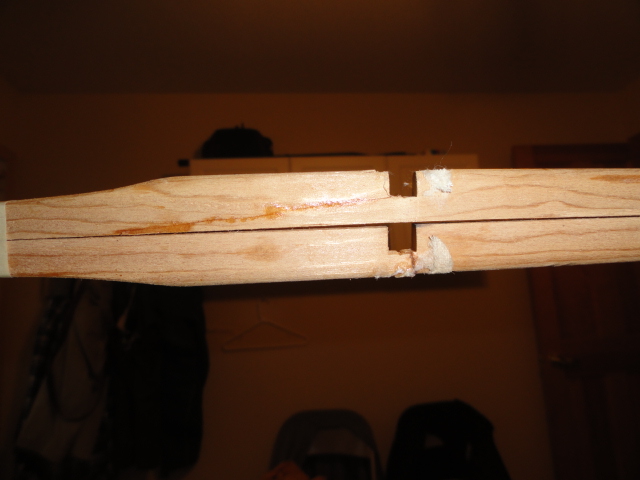
I had some red spruce which was split and not sawn out. I made 2 x braces from this wood.
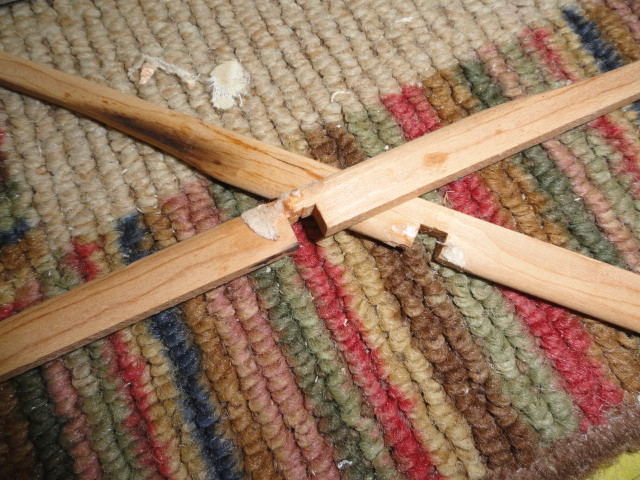
Here is my joint. I didn’t cover it with a piece of cloth.
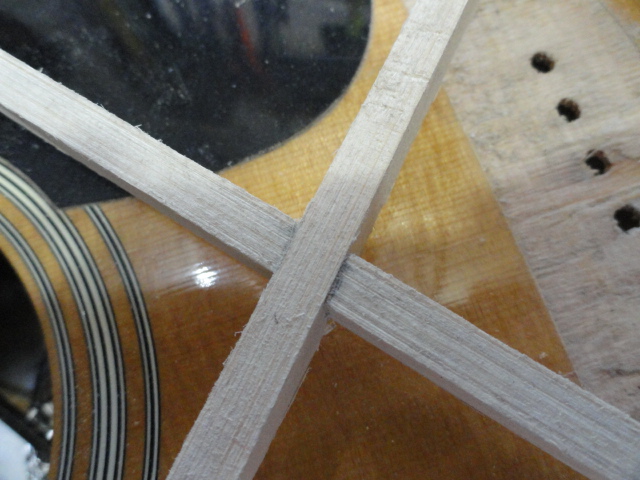
No space here. I have never believed that a piece of cloth was necessary in this joint. The tricky part of this procedure is getting the getting the x braces glued together inside the body and glued to the top since you can’t get them in there through this hole any other way. It is a challenge to get these braces in there, glued together, and glued to the top before the glue sets up. I use Titebond or Elmers Carpenters Glue. I know hide glue is really good but there is no way to use it in this repair.
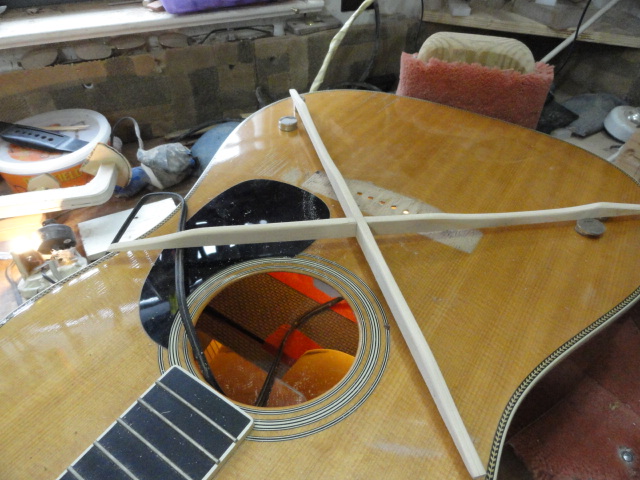
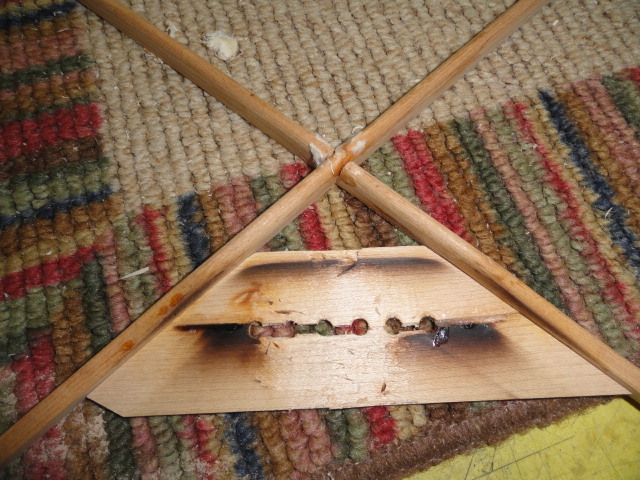
Here are the braces dry fitted and shaped. There is a limit to the length braces can be and still go through this sound hole. It is necessary to shorten these braces by about 1/4 inch on each end to get them through this hole. In the past, I have enlarged the sound hole to get the braces in without shortening the. The original braces were tucked underneath the linings and these braces are too short for that. Being tucked under the linings didn’t help this guitar so I’m not depending on that to hold them in place. I use these rare earth magnets to mark where the braces need to be positioned while I’m gluing them. There is no time to play around once you start gluing these braces together and installing them.
Here is a shot of the underside of the top with the bridge plate and old x braces removed.
Can you see the difference these new braces made? This is what a Martin top should look like. Convex not concave.
Here is another shot of this top after the new x braces were installed.
I made a new bridge plate from some hard maple .100 inch thick. This acrylic caul helps in the reshaping process.
Here is another shot of the new bridge plate being attached.
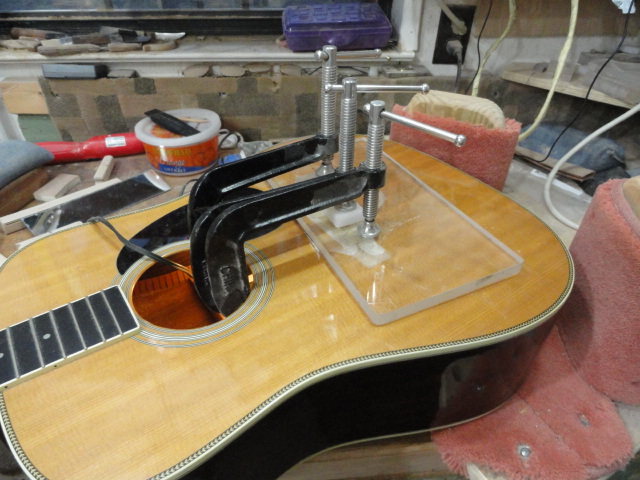
Now its time for reattaching a new bridge. I designed this little plastic piece a few years ago after a bridge slipped out of place while I was glueing it. You simply put your new bridge on top of this thin plastic piece and cut around it. You can use masking tape to position the bridge and it won’t move while you are gluing it. After it is clamped, you can remove the plastic and clean off the glue with a wet rag.
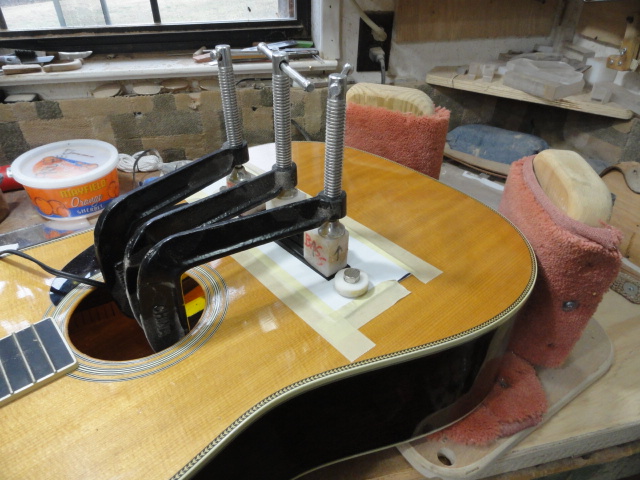
Here is the bridge being clamped. My little wooden caul in underneath the top. It is held in place by two rare earth magnet until the bridge is clamped.
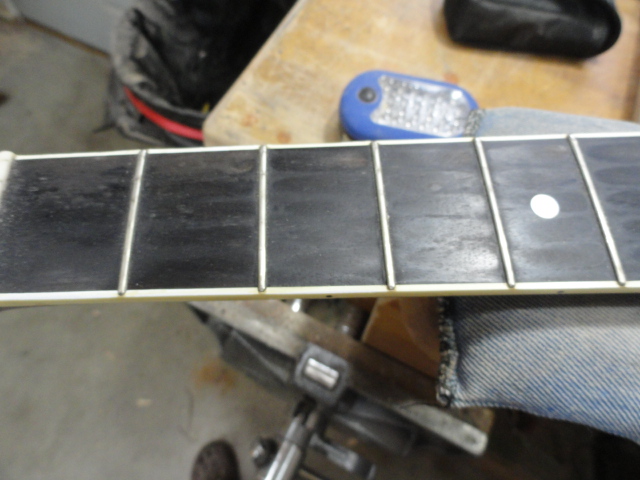
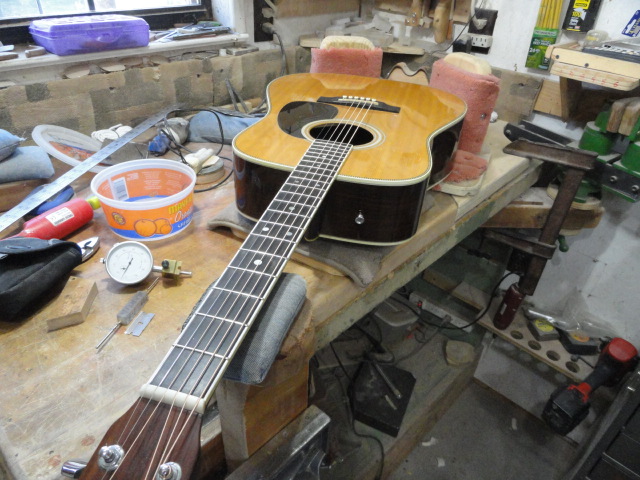
The first 6 frets were badly worn. I removed them and installed some new ones. I leveled. crowned, and polished them. I also polished and trued the frets on the entire fingerboard.
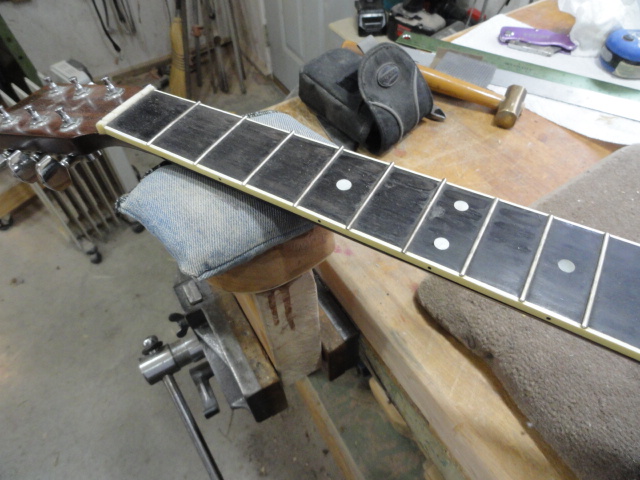
The neck after fret job.
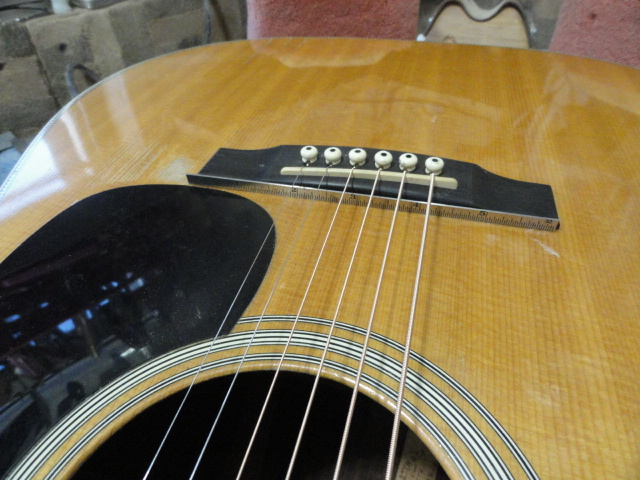
Contour of top at bridge.
I’m pleased with the way this looks now.
Not much difference here.
There is a major difference here.
Here is the completed repair. We didn’t need the Bridge Doctor. I bought one and still have it in my shop. I’m sure it will come in handy on some guitar some day. It has been about 6 years since Dewey picked this guitar up. I haven’t heard from him. No news is good news. I hope it gives him a lifetime of service.
![]()
Very interesting post
The wrong braces junction slots shows that the devil is in the details
I think i will need to replace X braces on a Gibson héritage 68
I fear the sound might become dull due to new braces
Hésitation
The top braces are a BIG factor in the tone and volume produced by an acoustic guitar. Good luck with your project. Ronnie
Yes, I am planning to replace X braces.
But I will de-top the guitar for that, as I can’t imagine an easy job with the top on.
Best,
Laurent