1942 Martin D-18

Here is the patient. A 1942 Martin D-18. These war guitars did not have a steel t bar in the neck because of the steel shortage. They used a piece of ebony instead. I think that enhanced the sound a little on these guitars. This guitar belongs to Jim Thompson of Clinton, TN. I met Jim several years ago at a bluegrass festival. It was at Nine Mile, Tennessee. I don’t know what impressed him enough about my abilities to trust me with working on this old guitar, but he asked me to take it to my shop and see what I could do with it. The bridge appeared to be rolled forward on it and I told him that I’d check it out and tell him what it would cost and what I intended to do to it.
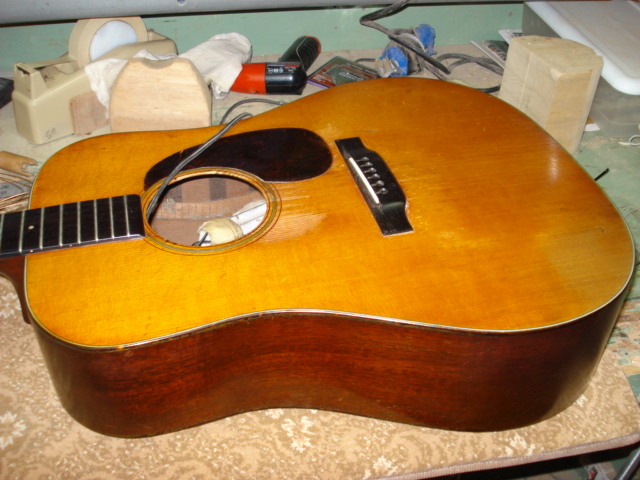
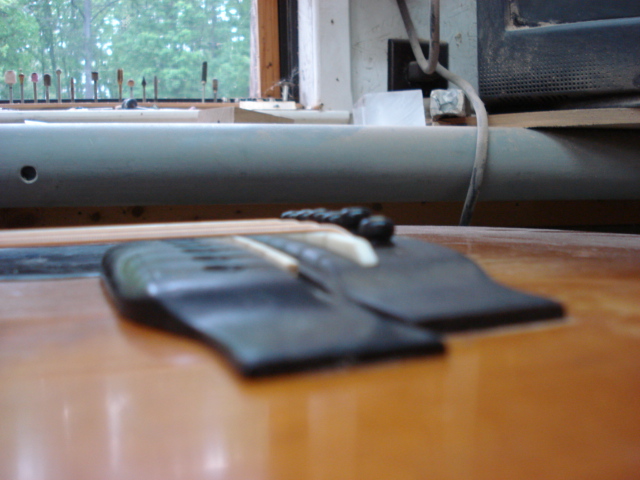
So here it lays on my bench in my shop. I loosened the strings and put my little inspection light and mirror inside.
It was hard to believe what I saw. Jim bought this guitar at a pawn shop several years before. I think he let someone work on it previously and I don’t know who it was. The bridge plate had been replaced with a curly maple one. Did I say replaced?
Maybe I should have said they attempted to replace it. This bridge plate was glued in one area and about half of it was unattached because it wasn’t positioned right. The corner of it was hanging over a brace. It was hard to believe someone had treated this guitar in such a manner. These pre-war Martins are worth a lot of money these days. I called Jim and told him what I’d found. He told me to fix it as if it were mine. So I proceeded to do just that. It is nice to have a customer who has confidence in your abilities.
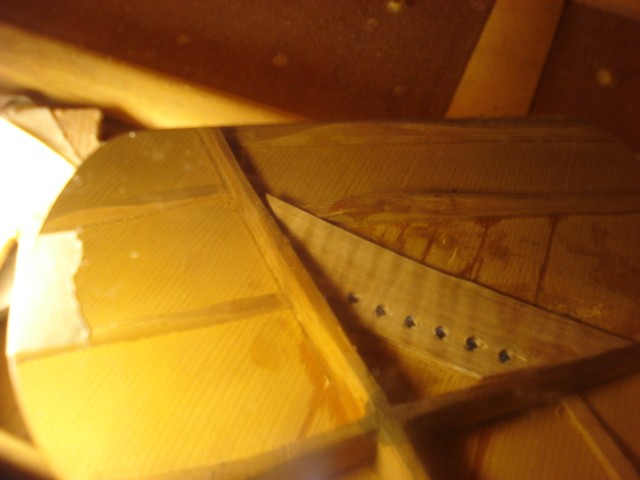
I heated the bridge and removed it. It wasn’t hard to get off because it wasn’t attached very well. When I got it off I realized why. Some previous repairman had torn a big section of the spruce top off while removing the bridge. This picture shows the missing wood and you can see the bridge plate underneath. Believe me, I didn’t tear this out. The missing piece of spruce wasn’t on that bridge.
Then I heated and removed the bridge plate.
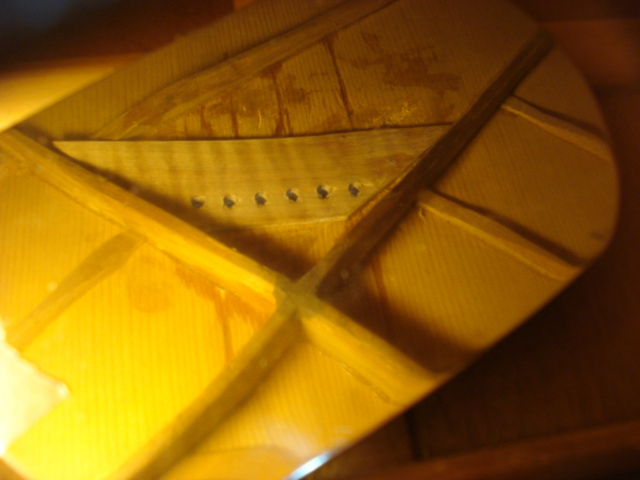
This picture shows how badly the top was distorted. Years of pressure and inexperienced repairmen had taken a toll on this top.
Now I was faced with the decision of how to best repair this without taking away from the sound and value of the guitar. I fabricated a new bridge plate.
I made it slightly oversized because I knew this guitar needed all the help it could get in this area.
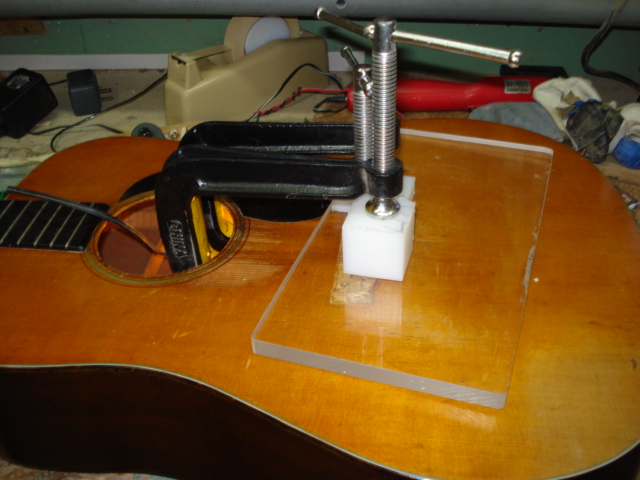
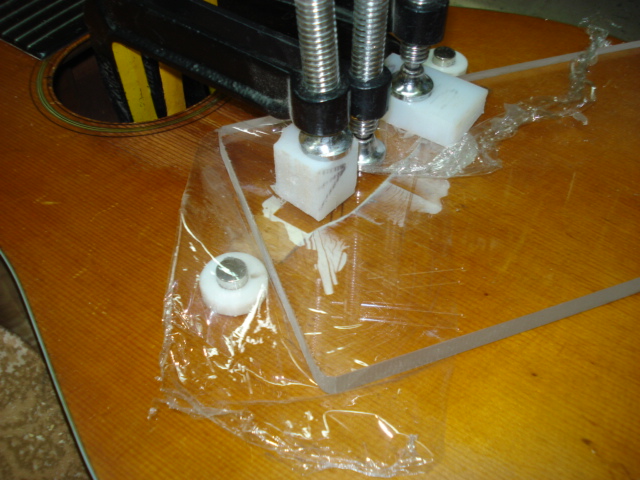
I glued the new bridge plate into the top being careful not to repeat the previous repairman’s mistake. The acrylic piece in the picture is to coax the top back into shape. (a little trick I picked up from Frank Ford)
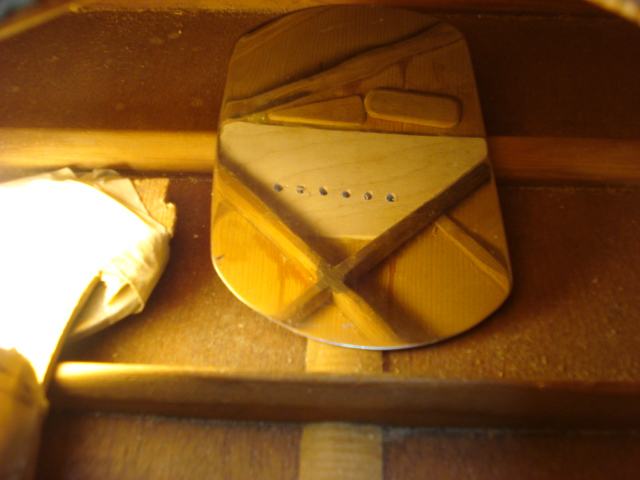
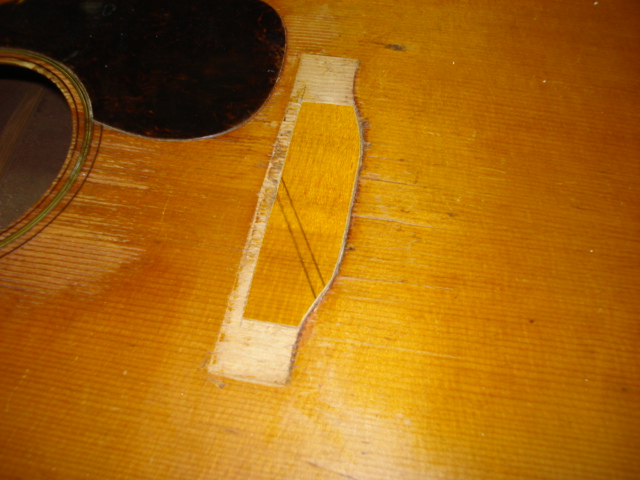
Here is a shot of the new bridge plate. Note the 2 spruce reinforcements I’ve added behind the bridge plate where the top was cracked.
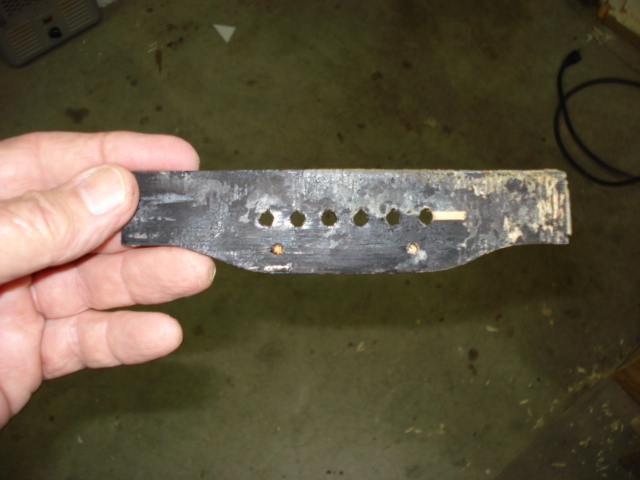
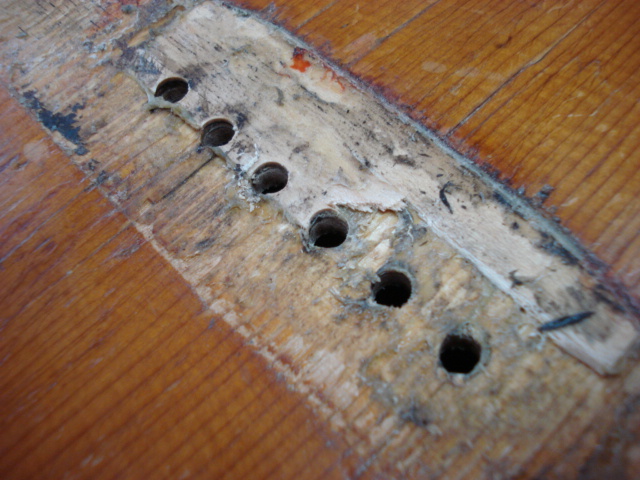
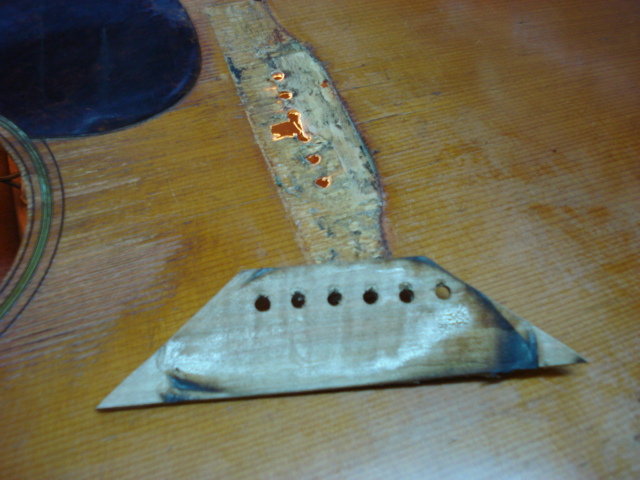
In case you didn’t believe me about the missing wood in the top, here is a picture of the old bridge. Someone had apparently put some extra holes and possible some small screws in it at some point in it’s past.
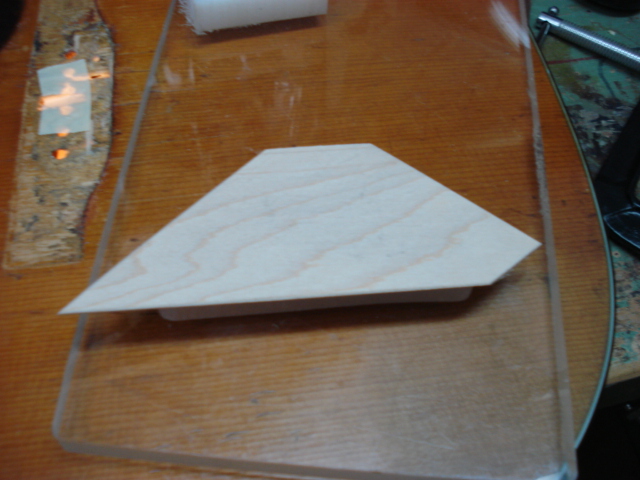
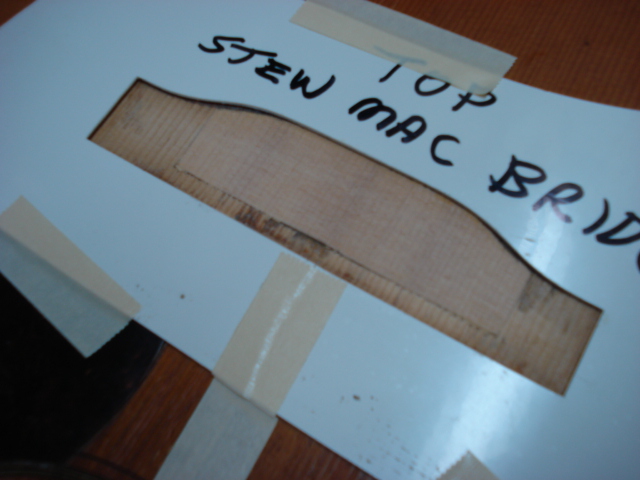
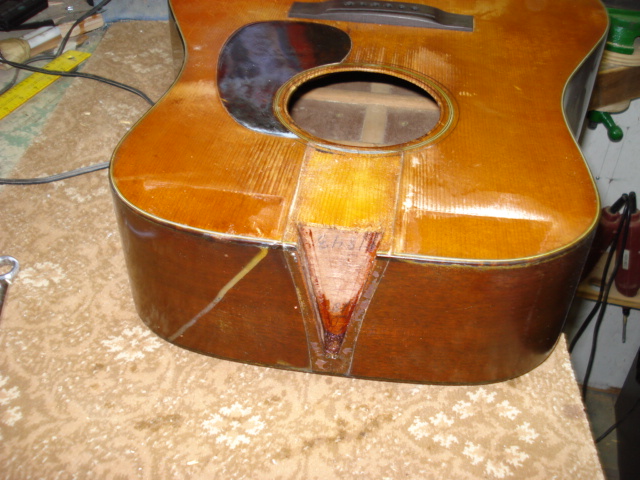
Since the area of the top was so badly deteriorated, I felt putting a spruce patch in this area would be the best solution. I had an old Martin top and I cut a patch from it to go in the void.
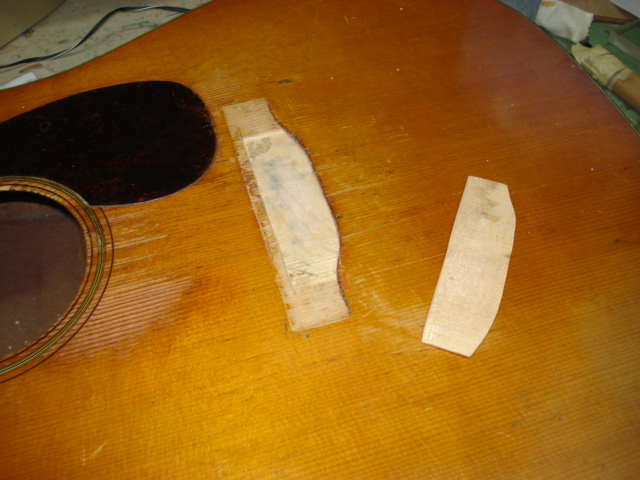
I kept it as small as I felt would be possible. I routed out the old spruce in the area where the patch was to go.
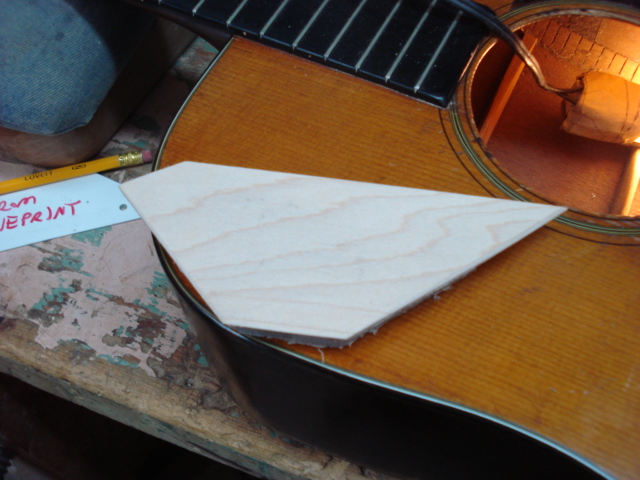
Here is my little patch.
Glueing the patch in place.
The new bridge plate and the patch helped bring the top back to an acceptable shape.
A whole lot better.
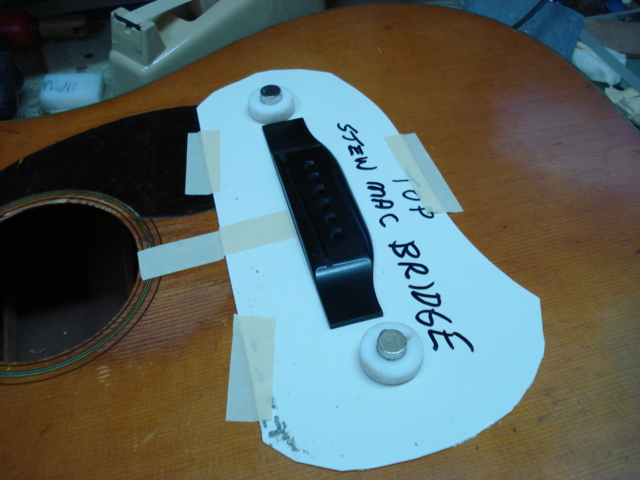
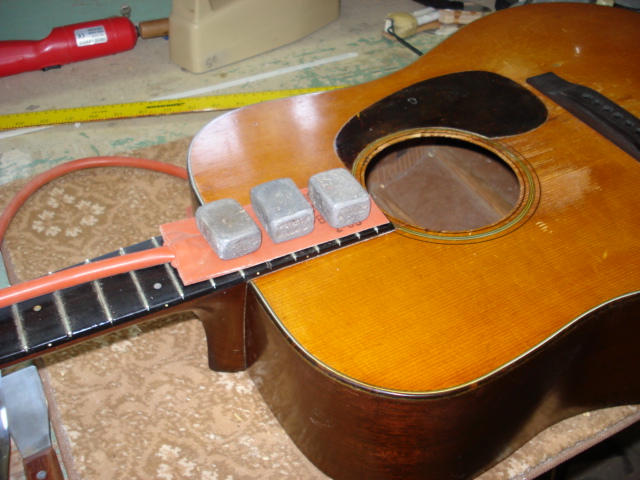
After some cleaning and shaping of this patch, I taped my little plastic bridge alignment tool to the top. I cut a new piece of this thin plastic for each bridge I replace. I holds the bridge in position while it is clamped and glued. I designed this after a bridge slipped out of position while I was clamping it years ago.
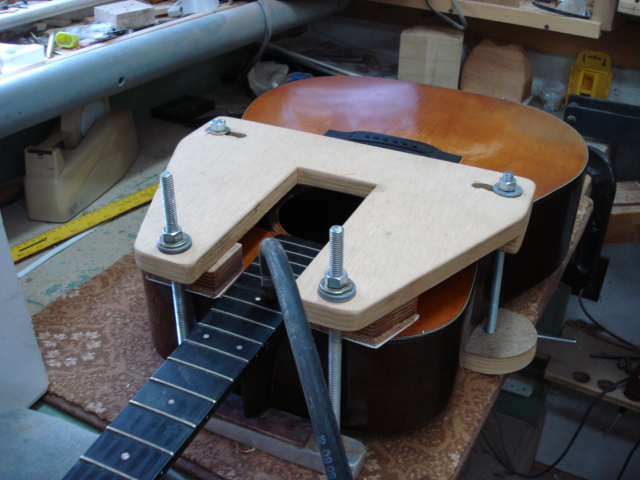
The magnets on both sides hold my caul that goes underneath the pot that goes over the x braces and bridge area.
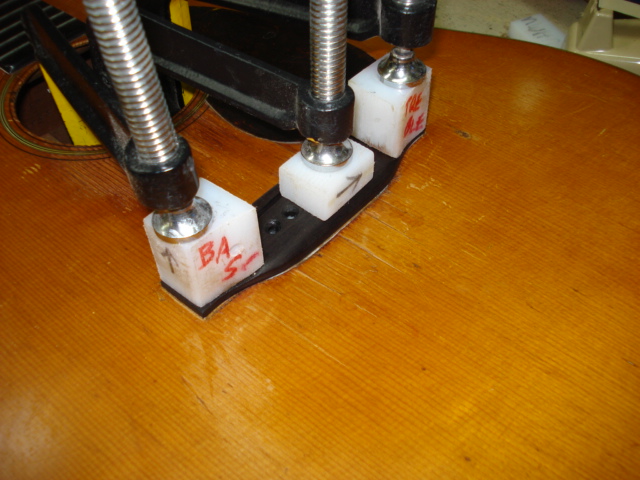
The bridge after clamping and glueing. The plastic piece can be removed after the clamps are tight. Then the glue can be cleaned off the top. My caul is in place underneath the top.
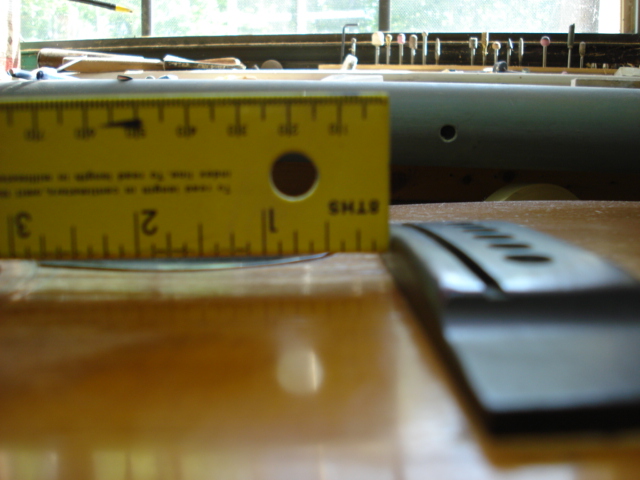
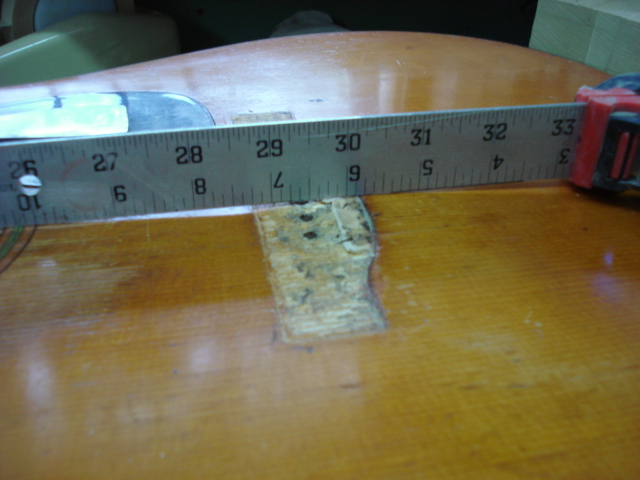
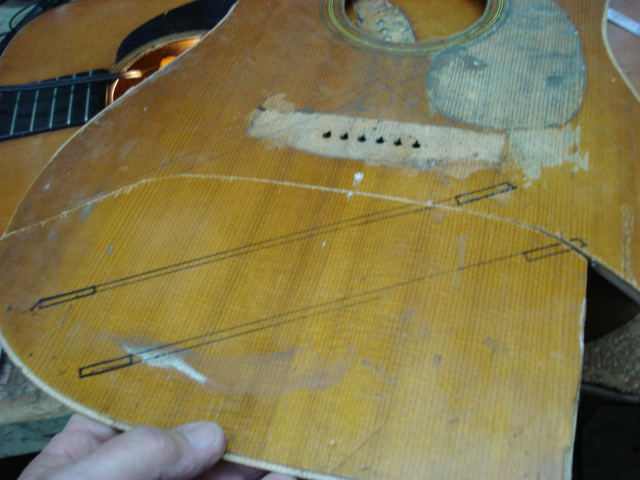
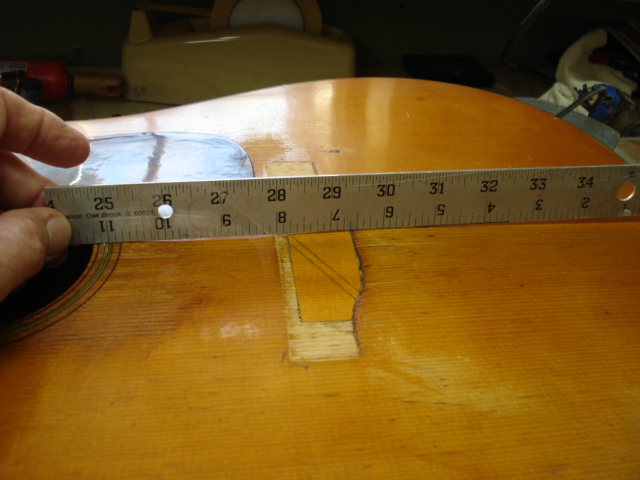
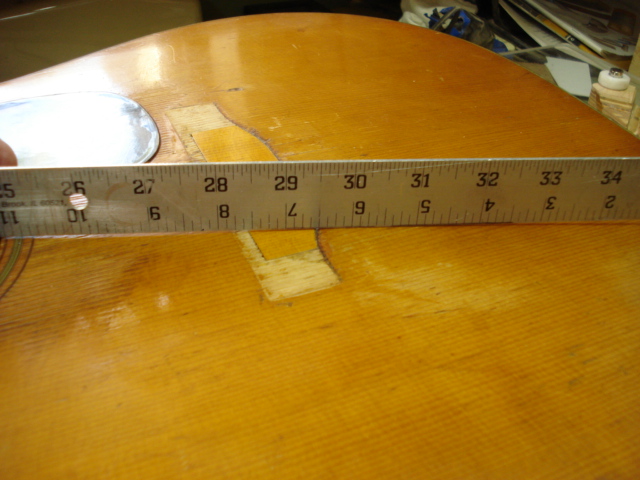
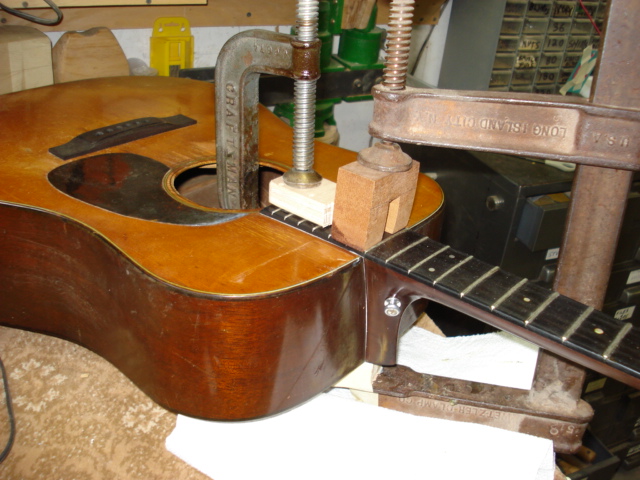
Now that we have the bridge and top problem under control, we can address the neck set. A proper neck set should allow this straight edge to pass on top of the frets, down the neck, across the body and pass on top of the bridge. You can see how much this is off.
Here is the silicon heater I purchased from LMI. It is designed for heating the end of a fingerboard. I heated the fingerboard and carefully worked thin putty knives in to loosen this area from the top.
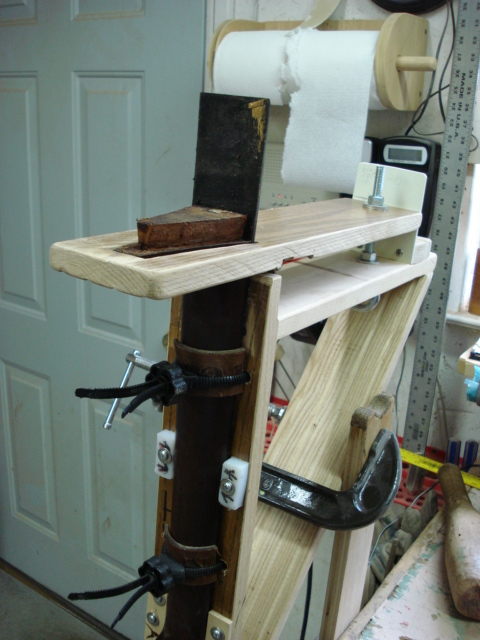
Here is my home-made jig for removing a neck. The hose goes to a steam generator. I use a little cappuccino machine that my daughter gave me for this. A football needle goes into a small hole drilled in the 15th fret slot to inject the steam. A little wiggling and tightening of the nuts on the jig along with the steam usually convinces the dovetail joint to let go.
The neck is removed.
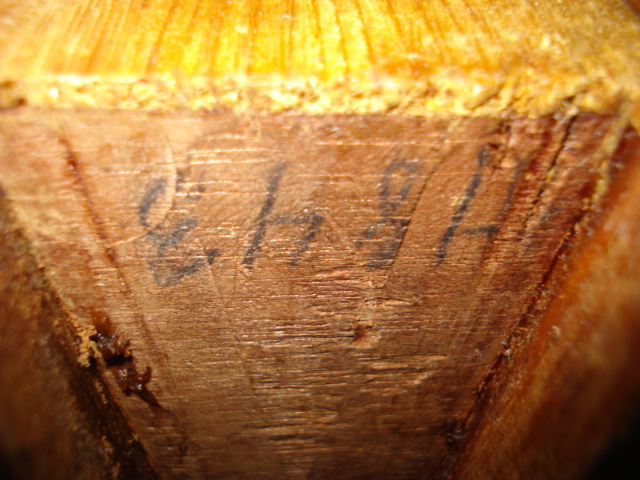
Martin usually writes the last 4 of the serial number on the body and the neck.
The neck after removal.
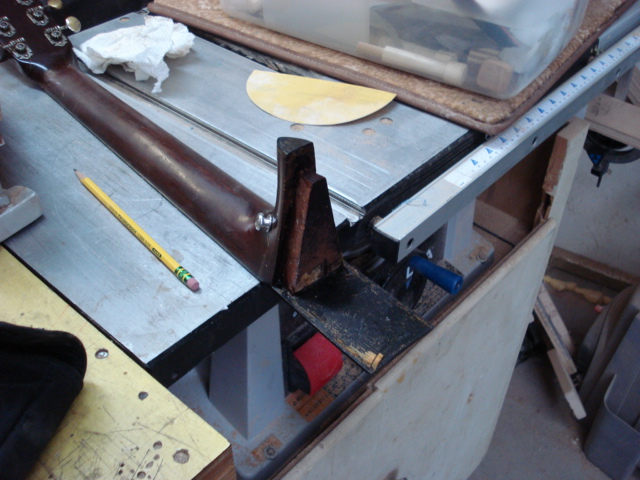
Here is my home-made jig for cutting the neck angle. I learned how to undercut the neck part and make it easier to get the angle right from Frank Ford’s website. If you are interested in luthiery, this site is a must. (www.frets.com)
After much trial and error the angle is correct and the neck is glued back.

We replaced some frets and made a new bone nut and saddle.
Here is the finished product. This is one of the best sounding guitars that I have ever played. It has been several years since I did this repair.
Here is one last picture. It shows the old bridge and the new one. People often thin the bridge on these old guitars to get a few more years of playing without a neck reset. I’d say this one went about as far as it could go. I hope it is playable for a lot more years.
![]()
Ronnie, good to see you back online and to see the old box in the OR. Its still going strong thanks to you. We are in FL for the winter and going out in the glades to pick today. See you in the spring.
Jim: I was wondering about you and Tonya. I didn’t see you this year at Nine Mile. I hope you both are doing well. We’ll look forward to seeing you both in the Spring.